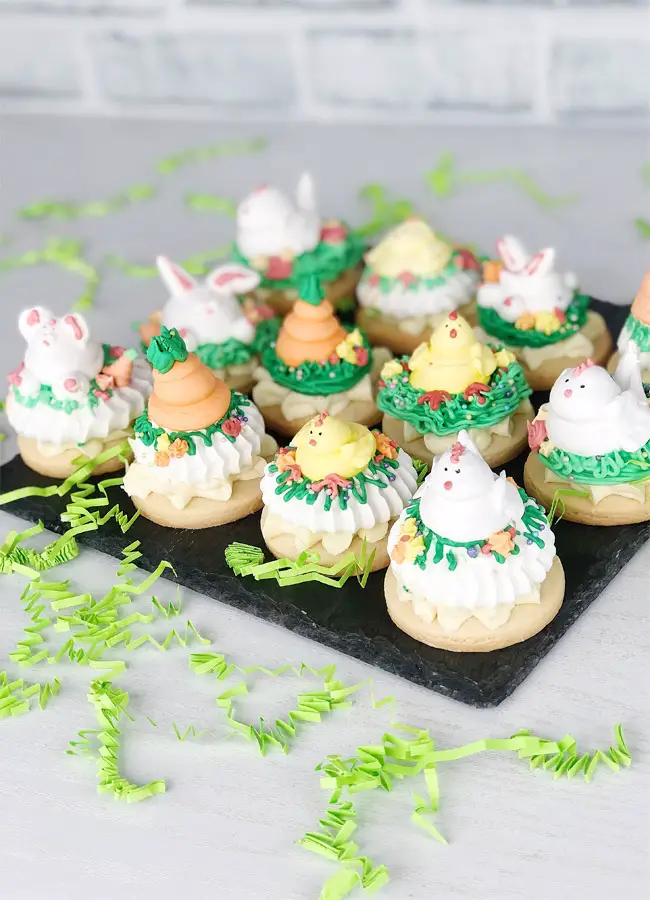
Today I want to show you a few Easter Cookie Ideas that you may like for your Eater baking recipes. They’re cute and may be used for decorating an Easter cake or cupcakes, or they can be an independent Easter dessert.
I will make meringue cookies using Swiss Meringue. In my last post I showed you how to make Swiss Meringue using a hand mixer, but I also have a post on my blog on how to make Swiss meringue using a stand mixer.
Ingredients:
One batch of Swiss Meringue
Gel food coloring
Sugar cookies
Ingredients for the frosting:
100 ml whole milk
1 egg
100g sugar
1 tsp vanilla extract
150g softened butter
Step 1
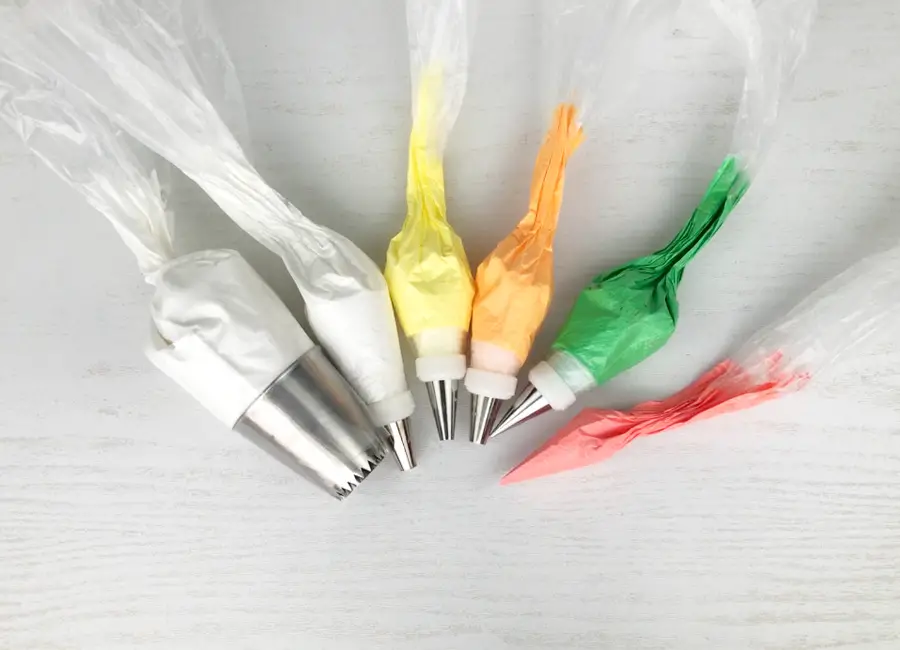
When the meringue was ready, I filled two piping bags with white meringue which was about a cup of meringue in each and the rest of it I colored into four colors. Approximately the same amount of meringue was spent on coloring green, yellow, orange and about 1 tablespoon for the red color. To color the meringue, I used gel food coloring. About piping tips that I used, I’ll tell you throughout this post.
Step 2
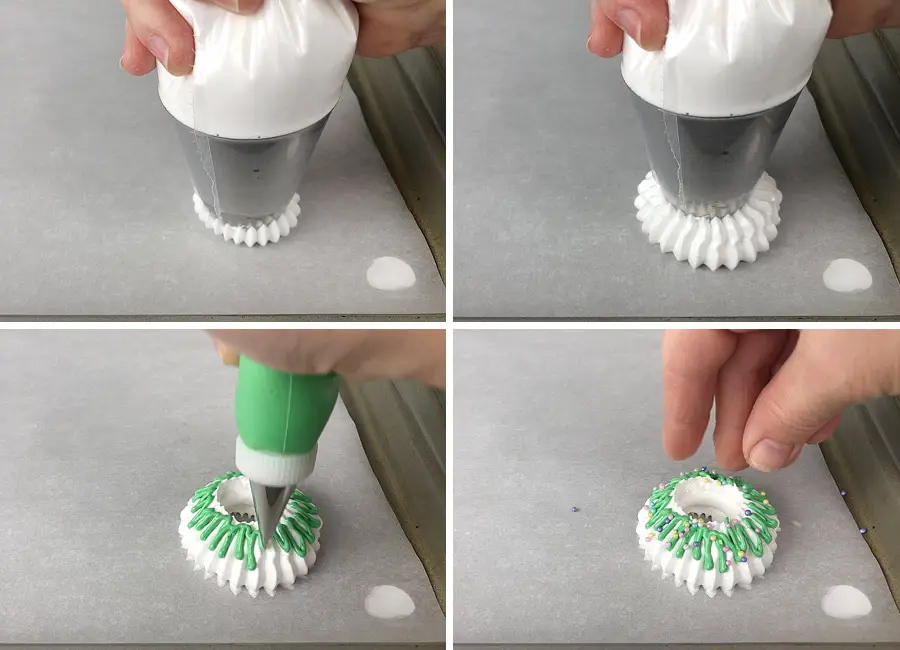
For the first design, I used a Sultan tube (Flat cone). Hold the bag about half of an inch above the parchment paper and pipe the meringue. Using plain round tip number 1, pipe some lines all around the white meringue. This is to simulate the grass on which the chicken will sit. You can also add some sprinkles to make it more festive.
Step 3
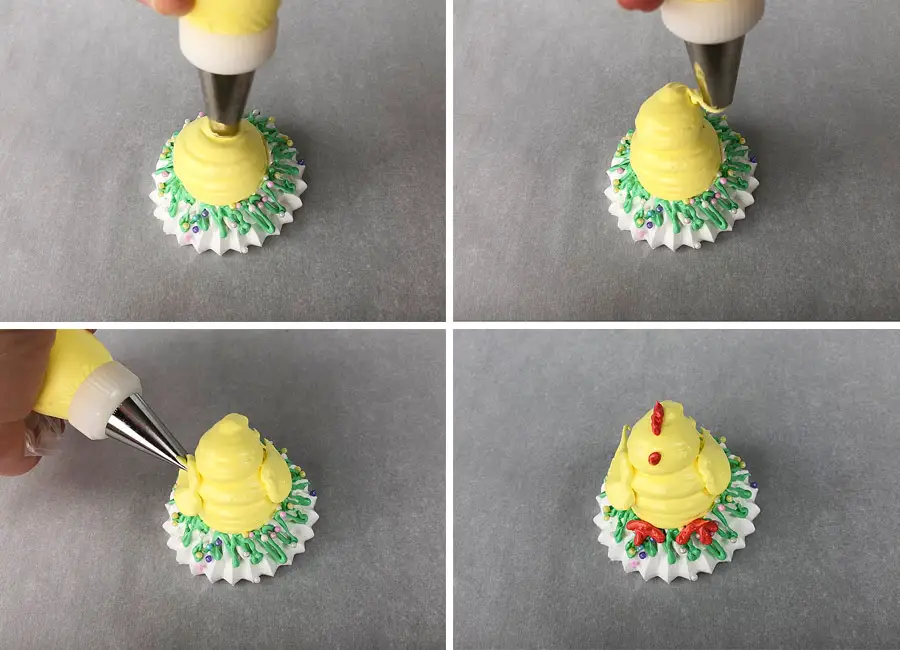
Next, using a round piping tip number 12, fill the hole in the middle of our meringue base, then keep squeezing the piping bag to form a chicken’s body. Make one more squeeze to make the chicken head. Using a piping tip number 352 or a leave tip number 112, pipe the wings. Using the red meringue, make the scallop and beak.
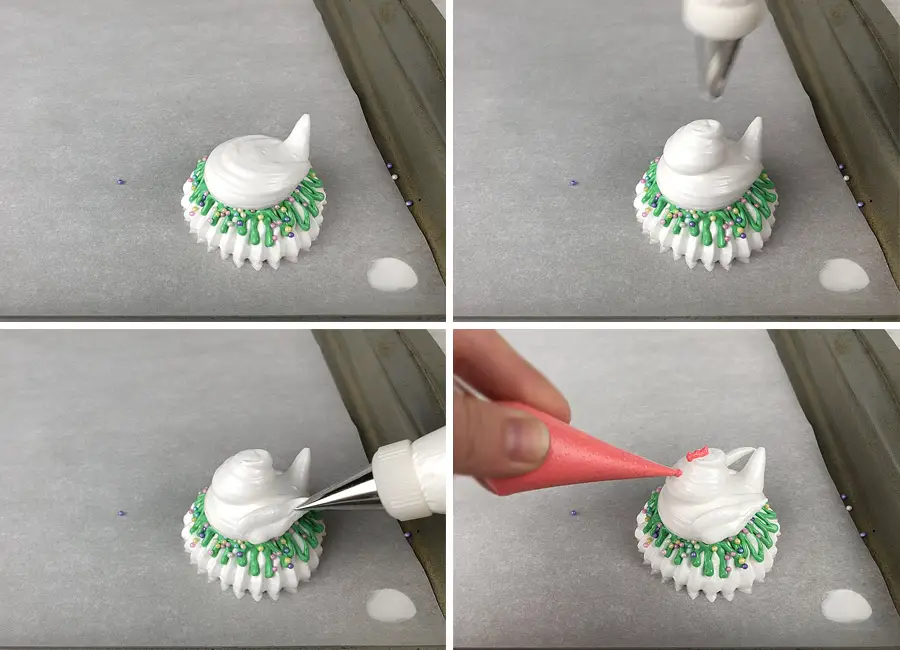
*By the way, you can pipe the whole chicken without any piping tips. All you need to do is to cut off the end of the piping bag to make about a quarter of an inch in diameter hole for the body and cut another piping bag in the shape of letter “V”.
Step 3
For the chick I made the same meringue base then using a round piping tip number 12 I piped the body and the head of the chick. Using a piping tip number 352 I piped the wings. And again, using the red meringue I made the scallop, beak and chicken paws.
Step 4
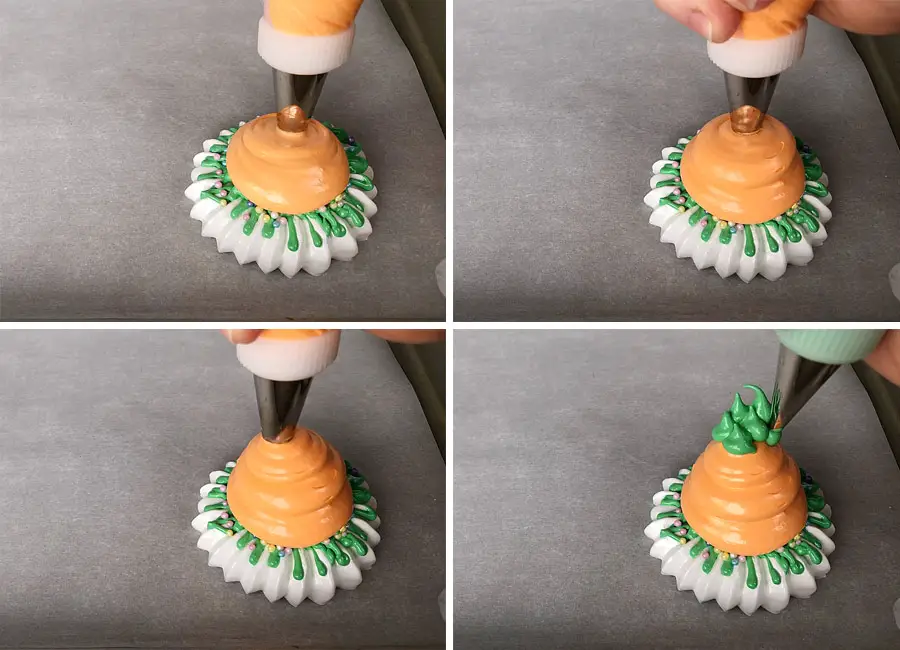
To make the carrot, using round piping tip number 12, fill the hole in the middle of our meringue base, then keep squeezing the piping bag to form the base of the carrot. Stop completely, then squeeze the second layer of the carrot smaller diameter then the first one. Stop again and pipe the third one smaller than the second one. Use a round piping tip number 5 to pipe the green part of the carrot.
Step 5
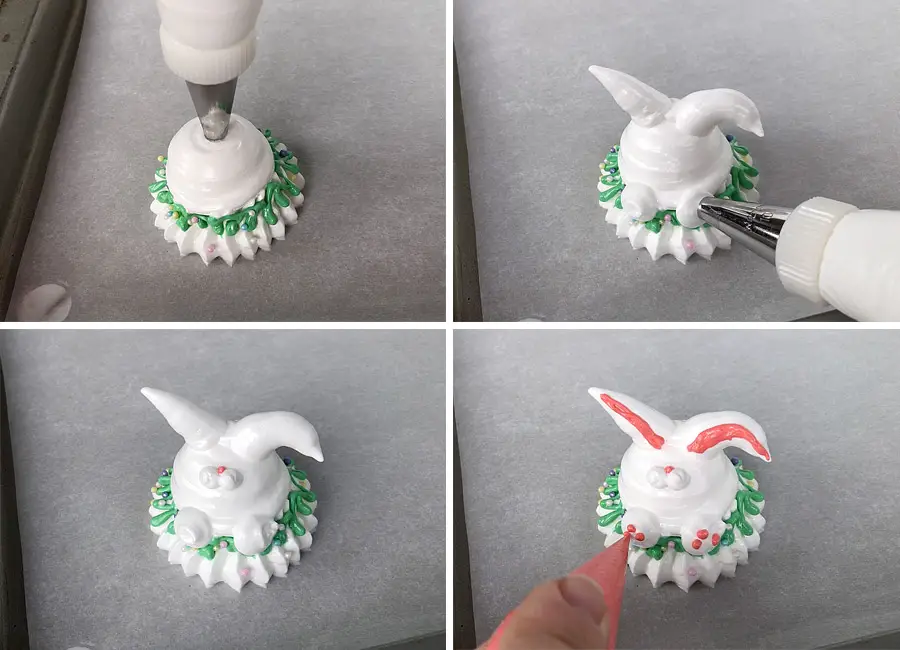
To make the bunny, using a round piping tip number 12, fill the hole in the middle of our meringue base, then keep squeezing the piping bag to form the bunny’s body. Try to squeeze the meringue in the form of a sphere. Using the same piping tip carefully squeeze the bunny’s ears, paws and tail. Using a round piping tip number 5 pipe two small dots on his face. Using the red meringue, pipe his nose and if you’d like, you can outline his ears and his paws.
Step 6
If you don’t have a Sultan piping tip, don’t worry, I’ll show you what you can do. Using a grass piping tip or a round piping tip number 1, squeeze a green wreath, which will be our meringue base for all the cookie designs. Next, using the same methods, pipe the carrot, chicken, chick and bunny. Using leftover colored meringue, I also piped some flowers around my characters.

Step 7
Next step is to dry out our cookies. Place the baking pan into a preheated to 170-180F degrease oven with convection, if possible. Depending on the size of your meringue, bake for 60 to 90 minutes, or until the outside is crisp and the inside is dry. They should feel light and hollow. When done, the meringues should easily peel off the parchment paper. Turn the oven off, crack the door open, and let the meringues cool completely in the oven. Using an edible marker or a black food coloring draw the eyes to liven up the faces.

*Baked meringue cookies may be stored in a covered container at room temperature for up to two weeks.
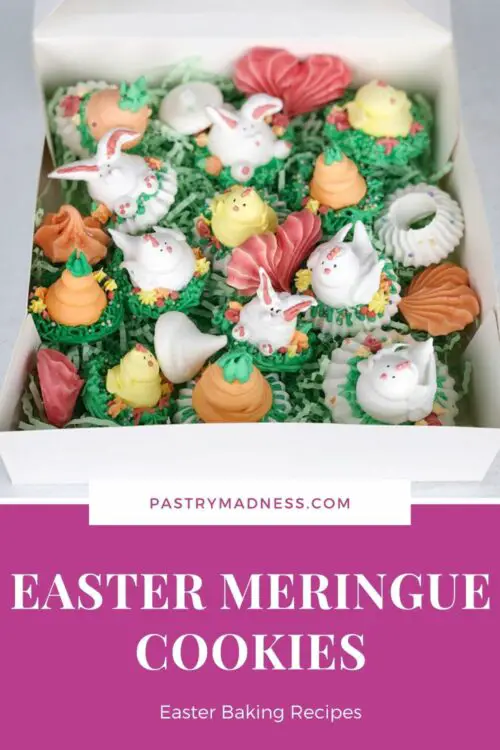
You can save them for decorating an Easter cake or cupcakes, you can place them in a cookie bakery box with a little bit of crinkled paper and give as a present,
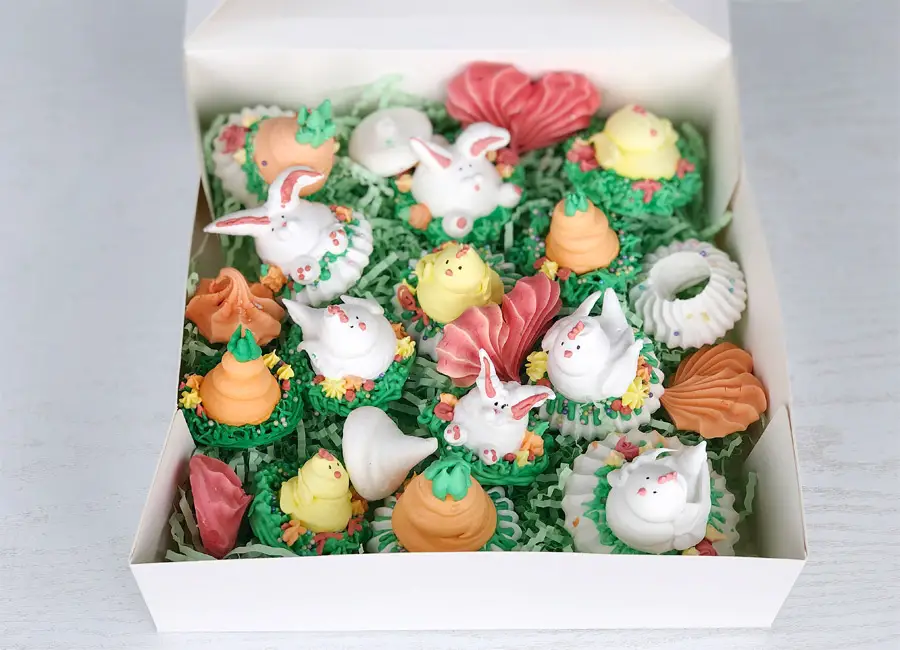
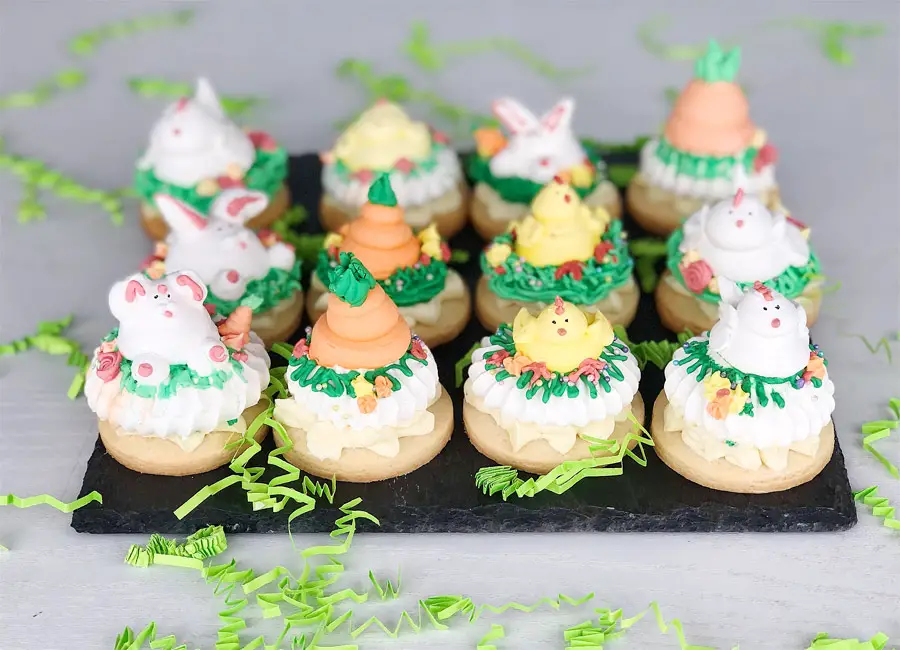
or you can make something even more impressive, like this Easter Meringue Cookie Sandwiches. In my opinion, they’re super cute and delicious.
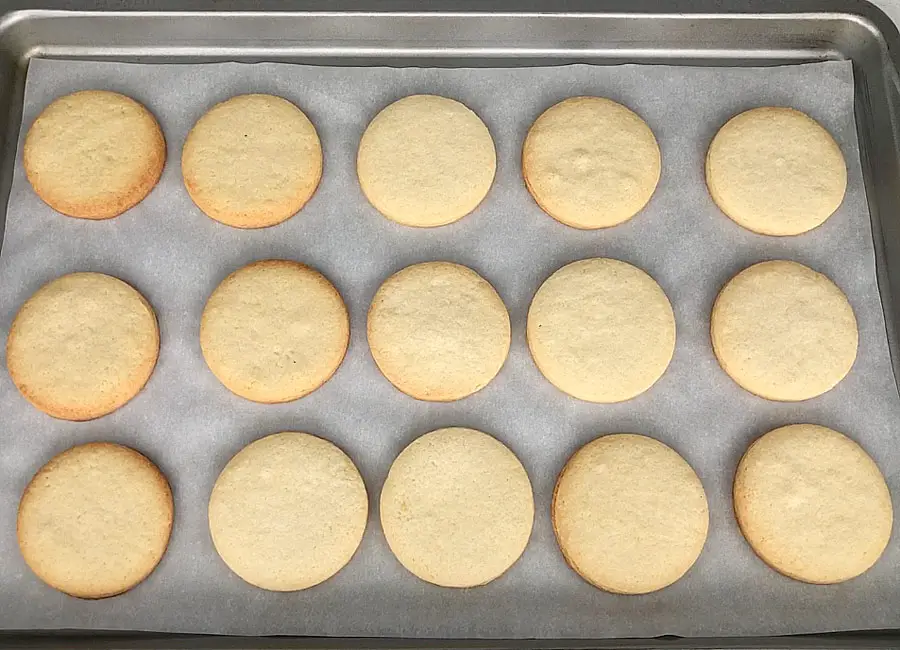
All you need to do is to make some sugar cookies or any other no spread cookies about the same diameter as the meringue cookie base and some frosting.
Step 8
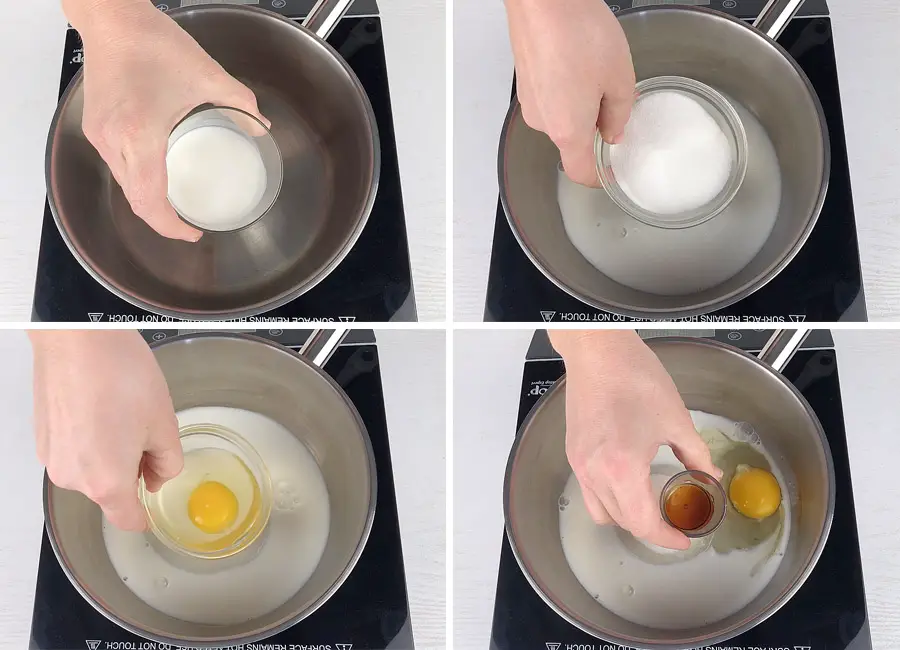
In a heavy bottom saucepan, combine the milk, sugar, egg and vanilla extract.
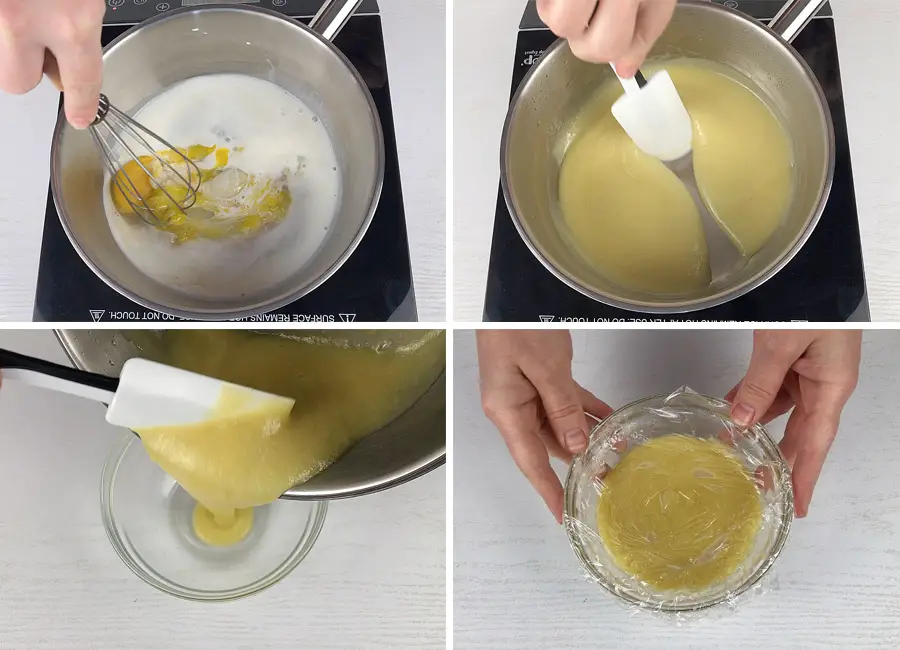
Whisk all together to combine the ingredients. Turn on the heat to medium low and constantly whisking cook the mixture until it thickens. Pour the mixture into a bowl and cover the surface with a plastic wrap making sure that the plastic wrap is touching the whole surface. Let it cool to room temperature.
Step 9
When the custard has reached room temperature, place the softened butter in a large mixing bowl and using a hand mixer beat until light and fluffy. Scrub the sides of the bowl, then adding one spoon of custard at a time, continue to beat the mixture. Our frosting is ready.

Step 10
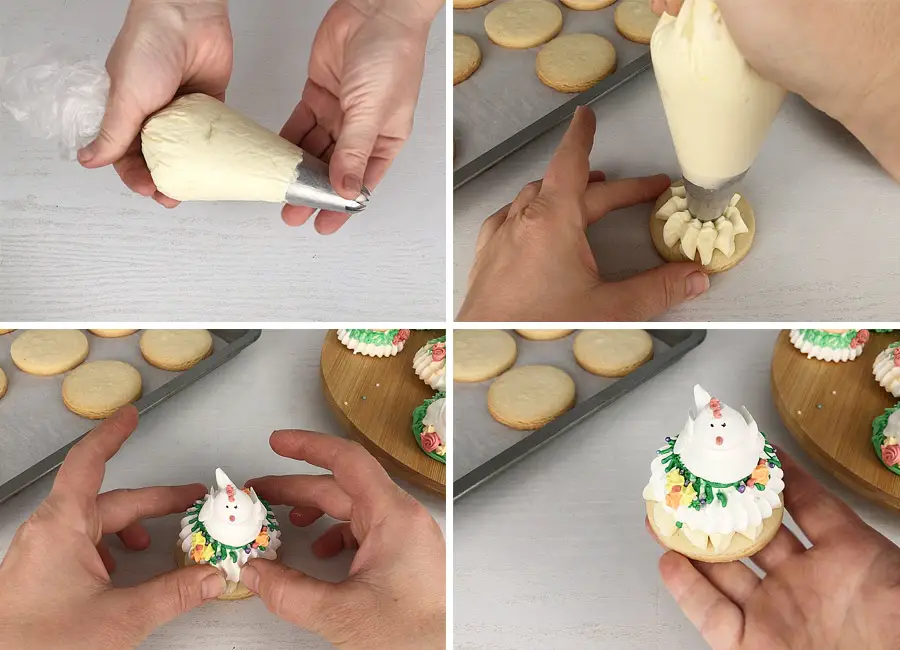
Place it in a piping bag fitted with an extra-large piping tip closed star. Take the cookie, pipe a little bit of frosting in the middle, place the meringue cookie on top and gently press it down.
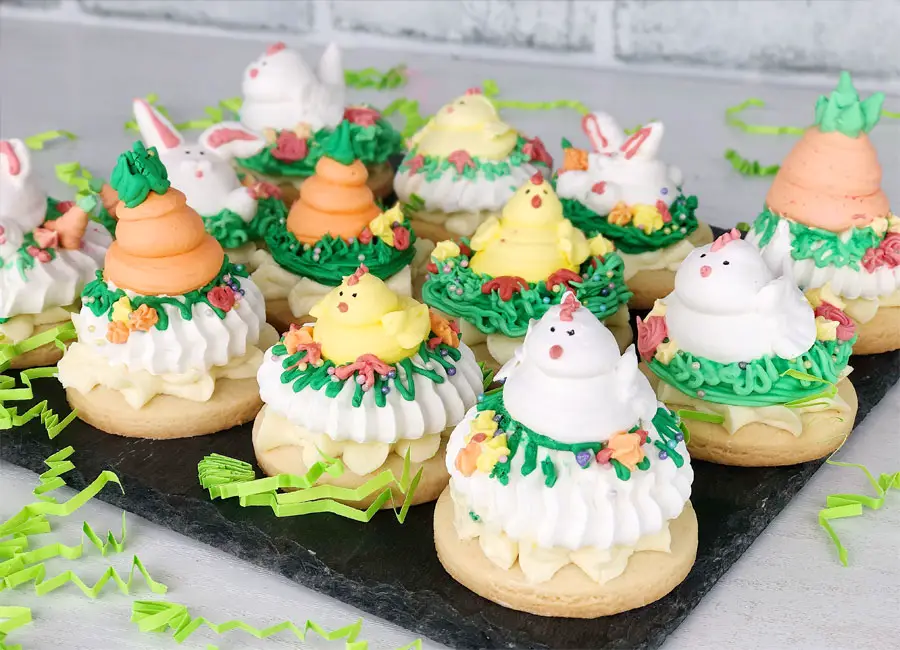
In my opinion, these cookies look gorgeous and they will make any kid happy on Easter day.
Notes:
Baked meringue cookies may be stored in a covered container at room temperature for up to two weeks.
Easter meringue cookie sandwiches may be store in a refrigerator for up to 3 days.
This post may contain affiliate sales links. Please see my Full Disclosure Policy for details.
Easter Meringue Cookies
These Easter Meringue Cookies look gorgeous and they will make any kid happy on Easter day.
- One batch of Swiss Meringue
- Gel food coloring
- Sugar Cookies
Ingredients for the frosting:
- 100 ml whole milk
- 1 egg
- 100 g sugar
- 1 tsp vanilla extract
- 150 g softened butter
-
When the meringue was ready, I filled two piping bags with white meringue which was about a cup of meringue in each and the rest of it I colored into four colors. Approximately the same amount of meringue was spent on coloring green, yellow, orange and about 1 tablespoon for the red color.
-
For the first design, I used a Sultan tube (Flat cone). Hold the bag about half of an inch above the parchment paper and pipe the meringue. Using plain round tip number 1, pipe some lines all around the white meringue. This is to simulate the grass on which the chicken will sit. You can also add some sprinkles to make it more festive.
-
Next, using a round piping tip number 12, fill the hole in the middle of our meringue base, then keep squeezing the piping bag to form a chicken’s body. Make one more squeeze to make the chicken head. Using a piping tip number 352 or a leave tip number 112, pipe the wings. Using the red meringue, make the scallop and beak.
*By the way, you can pipe the whole chicken without any piping tips. All you need to do is to cut off the end of the piping bag to make about a quarter of an inch in diameter hole for the body and cut another piping bag in the shape of letter “V”.
-
For the chick I made the same meringue base then using a round piping tip number 12 I piped the body and the head of the chick. Using a piping tip number 352 I piped the wings. And again, using the red meringue I made the scallop, beak and chicken paws.
-
To make the carrot, using round piping tip number 12, fill the hole in the middle of our meringue base, then keep squeezing the piping bag to form the base of the carrot. Stop completely, then squeeze the second layer of the carrot smaller diameter then the first one. Stop again and pipe the third one smaller than the second one. Use a round piping tip number 5 to pipe the green part of the carrot.
-
To make the bunny, using a round piping tip number 12, fill the hole in the middle of our meringue base, then keep squeezing the piping bag to form the bunny’s body. Try to squeeze the meringue in the form of a sphere. Using the same piping tip carefully squeeze the bunny’s ears, paws and tail. Using a round piping tip number 5 pipe two small dots on his face. Using the red meringue, pipe his nose and if you’d like, you can outline his ears and his paws.
-
If you don’t have a Sultan piping tip, don’t worry, I’ll show you what you can do. Using a grass piping tip or a round piping tip number 1, squeeze a green wreath, which will be our meringue base for all the cookie designs. Next, using the same methods, pipe the carrot, chicken, chick and bunny. Using leftover colored meringue, I also piped some flowers around my characters.
-
Next step is to dry out our cookies. Place the baking pan into a preheated to 170-180F degrease oven with convection, if possible. Depending on the size of your meringue, bake for 60 to 90 minutes, or until the outside is crisp and the inside is dry. They should feel light and hollow. When done, the meringues should easily peel off the parchment paper. Turn the oven off, crack the door open, and let the meringues cool completely in the oven. Using an edible marker or a black food coloring draw the eyes to liven up the faces.
-
You can save them for decorating an Easter cake or cupcakes, you can place them in a cookie bakery box with a little bit of crinkled paper and give as a present, or you can make something even more impressive, like this Easter meringue cookie sandwiches. In my opinion, they’re super cute and delicious.
All you need to do is to make some sugar cookies or any other no spread cookies about the same diameter as the meringue cookie base and some frosting.
-
In a heavy bottom saucepan, combine the milk, sugar, egg and vanilla extract. Whisk all together to combine the ingredients. Turn on the heat to medium low and constantly whisking cook the mixture until it thickens.
Pour the mixture into a bowl and cover the surface with a plastic wrap making sure that the plastic wrap is touching the whole surface. Let it cool to room temperature.
-
When the custard has reached room temperature, place the softened butter in a large mixing bowl and using a hand mixer beat until light and fluffy. Scrub the sides of the bowl, then adding one spoon of custard at a time, continue to beat the mixture. Our frosting is ready.
-
Place it in a piping bag fitted with an extra-large piping tip closed star. Take the cookie, pipe a little bit of frosting in the middle, place the meringue cookie on top and gently press it down.
Baked meringue cookies may be stored in a covered container at room temperature for up to two weeks.
Easter meringue cookie sandwiches may be store in a refrigerator for up to 3 days.




Leave a Reply