
Today I’m going to show you how to make a beautiful and delicious cake with raspberries. This cake is made of classic sponge cake, silky pastry cream, fresh raspberries and sweet raspberry jelly. This delicate and good-looking cake will be a perfect summer treat!
Ingredients for the cake:
2 eggs
70g sugar
50g flour
20g cornstarch
1/8 tsp salt
1 tsp lemon zest
Ingredients for the syrup:
150 ml water
30g sugar
1 ½ tbsp lemon juice
Ingredients for the filling:
300 ml milk
1 egg
90g sugar
20g cornstarch
8g gelatin + 40 ml cold milk
1 tsp vanilla extract
150 ml cold heavy whipping cream
Raspberries
Ingredients for the jelly:
400 ml hot water
85g raspberry jelly powder
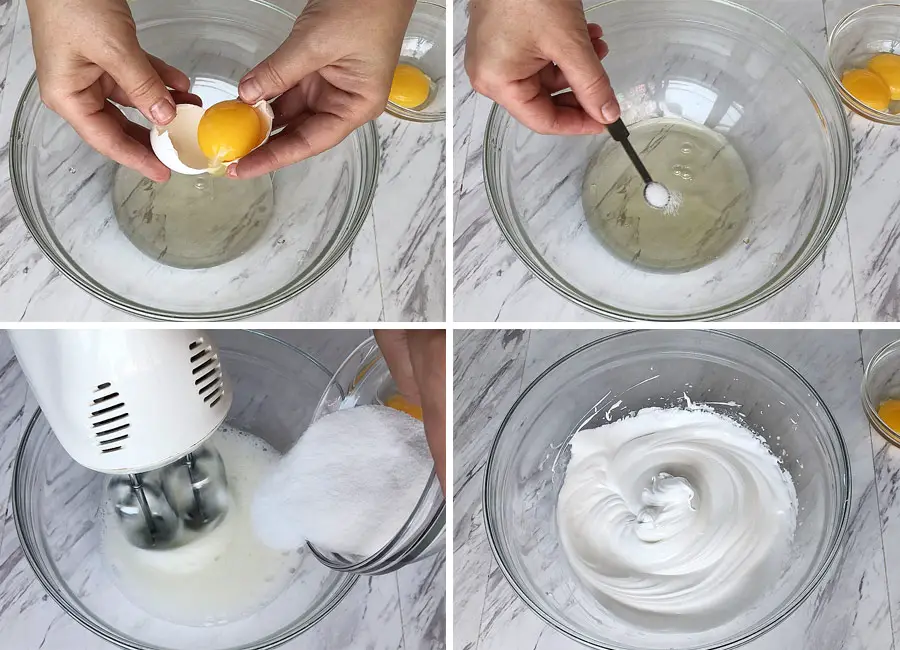
Step 1
Let’s start by separating the eggs into egg whites and egg yolks. Do it very carefully, so not a drop of yolk gets into the egg whites. Also, make sure that the mixing bowl and the whisk attachment are very clean and there’s no residual oil or fat left behind to disturb or deflate the egg whites.
Add a pinch of salt to the egg whites and start whipping the egg whites on low speed until foamy, then increase the speed to medium and gradually add the sugar. Whisk the egg whites until stiff peaks form. If you turn the bowl, the whites will remain in place.
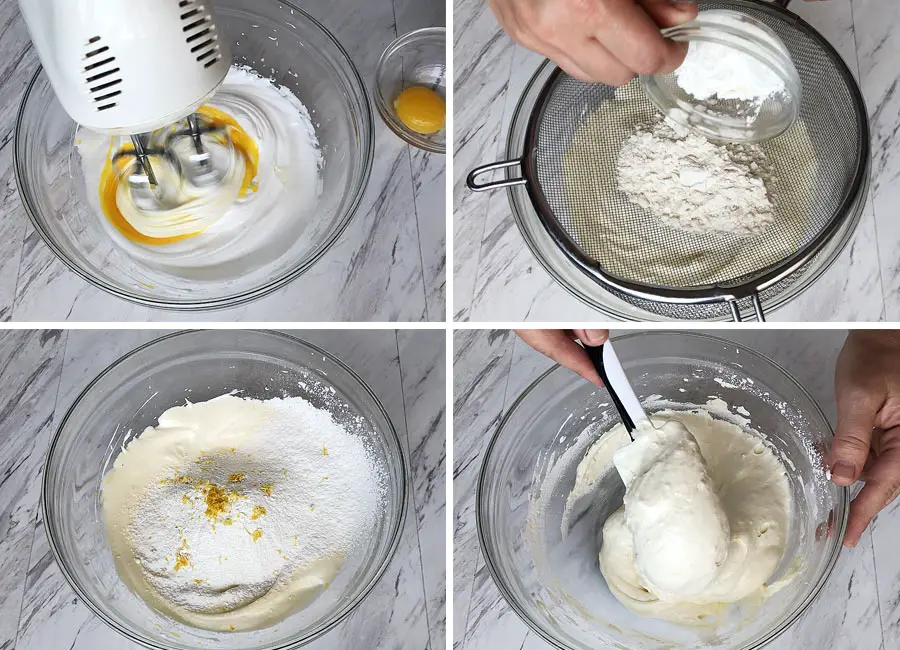
Step 2
Next, add the egg yolks one at a time and whisk until combined. Sift in the flour and cornstarch, add the lemon zest and mix the batter with a spatula very carefully, until all the dry ingredients incorporated well.
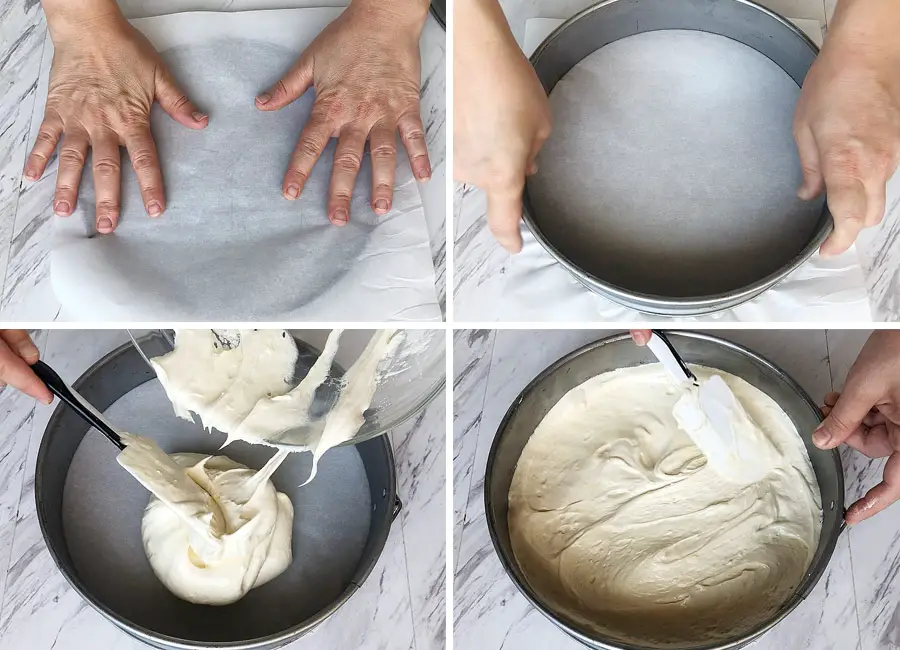
Step 3
To bake the cake, I covered the bottom of 9-inch springform with parchment paper. Transfer the cake batter to the baking pan and spread evenly with a spatula. Bake at 340 F degrees for 25 minutes.
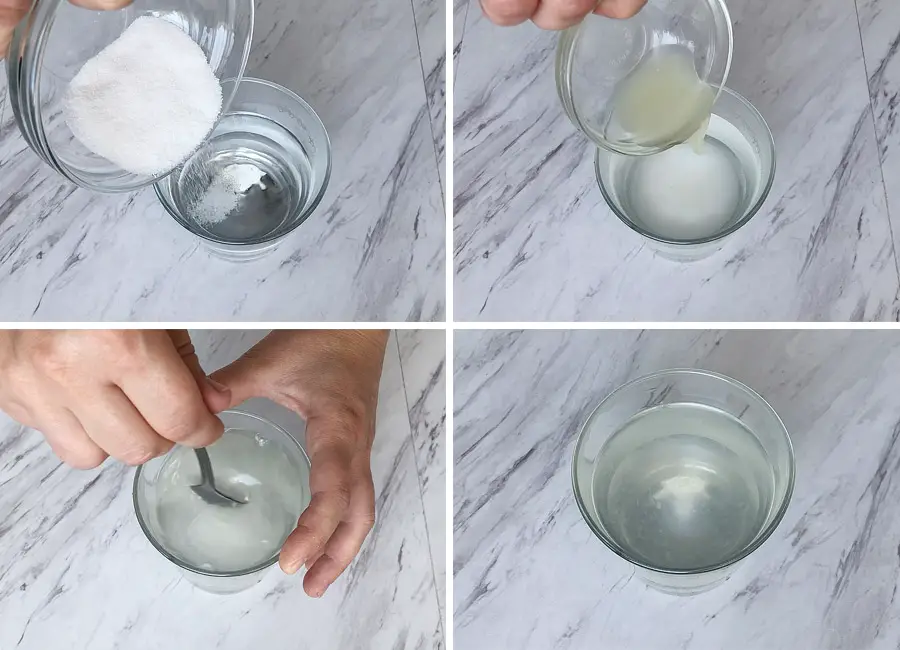
Step 4
While the cake is in the oven let’s make the syrup to soak the cake. Add the sugar and lemon juice to the hot water, mix and let it cool completely.
Step 5
Check the readiness of the cake with a skewer or a toothpick. Let the cake cool in the baking pan for about 5 minute or so, then with a sharp knife slice between the cake and the baking pan. Take the ring part off, invert the cake and carefully take off the parchment paper from the bottom.
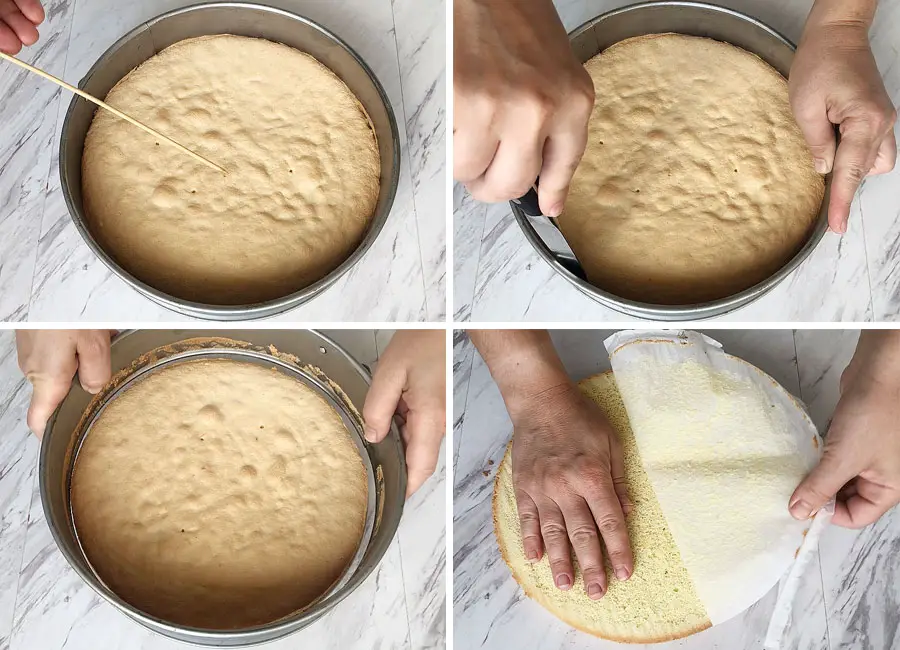
Step 6
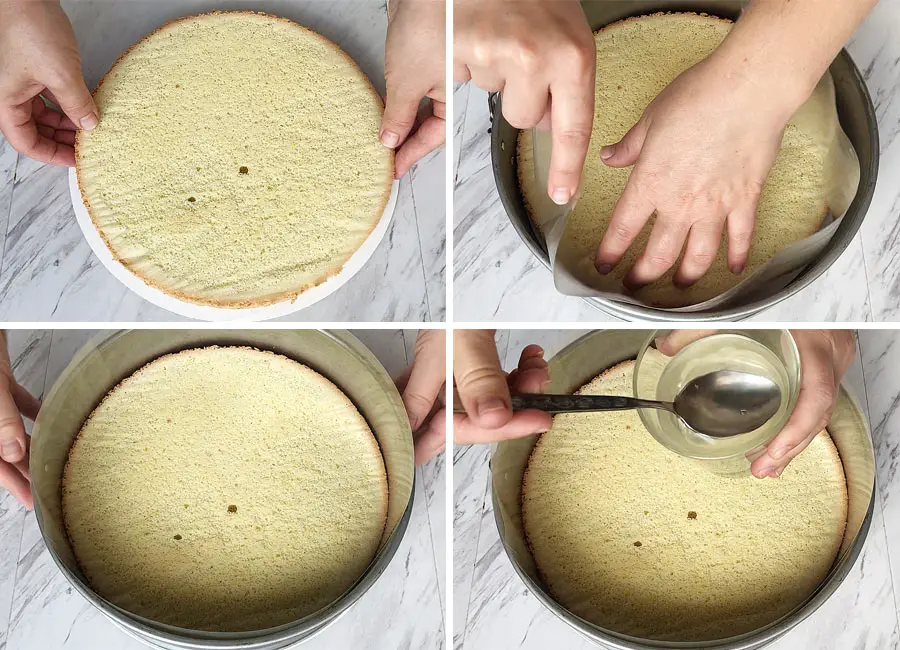
Place the cake onto a cake board or a flat serving dish. Put the ring part of the springform on top of the cake and placed the acetate film inside the ring. Close the form, so the cake fits tightly inside. Soak the sponge cake with the chilled syrup and set aside.
Step 7
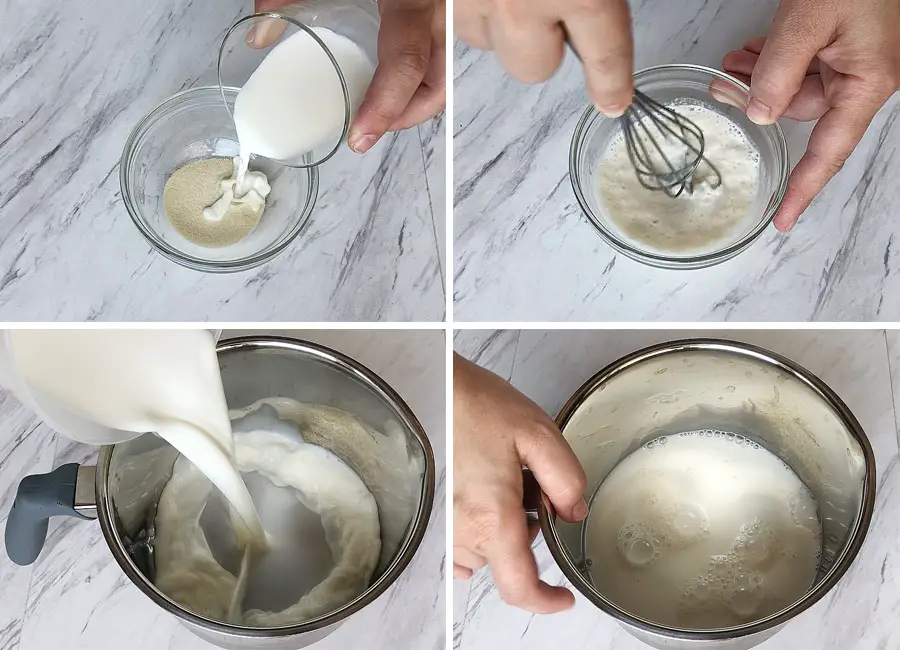
Add the cold milk to the gelatin and mix very well. Set aside for about 15 minutes. Poor the milk into a medium size saucepan and heat it by bringing it to a boil over medium heat.
Step 8
In a bowl, whisk the egg, sugar and vanilla extract. Add the cornstarch and whisk until no lumps remain.
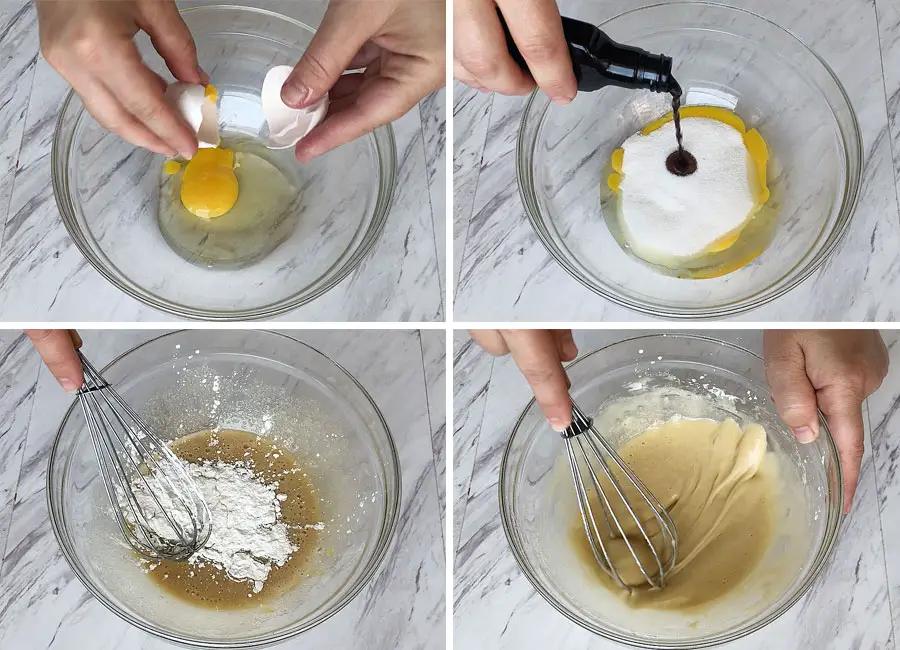
Slowly pour the hot milk in a thin stream, into the egg mix, while whisking constantly to temper the egg mix. Then, pour the egg mixture back into the saucepan. Cook over medium-high heat, whisking constantly, until thickened and slowly boiling.

Step 9
Remove the saucepan from the heat and add the gelatin. Mix well until the gelatin has completely dissolved. Pour the custard into a bowl and immediately cover the surface with a plastic wrap, making sure the plastic wrap is touching the whole surface. This is to prevent the custard from forming a skin on top. Let it cool to room temperature.

Step 10
When the custard has cooled down, whip the heavy cream until stiff peaks form. Add the whipped cream to the custard in two batches mixing everything well. The filling should turn out very smooth and silky.
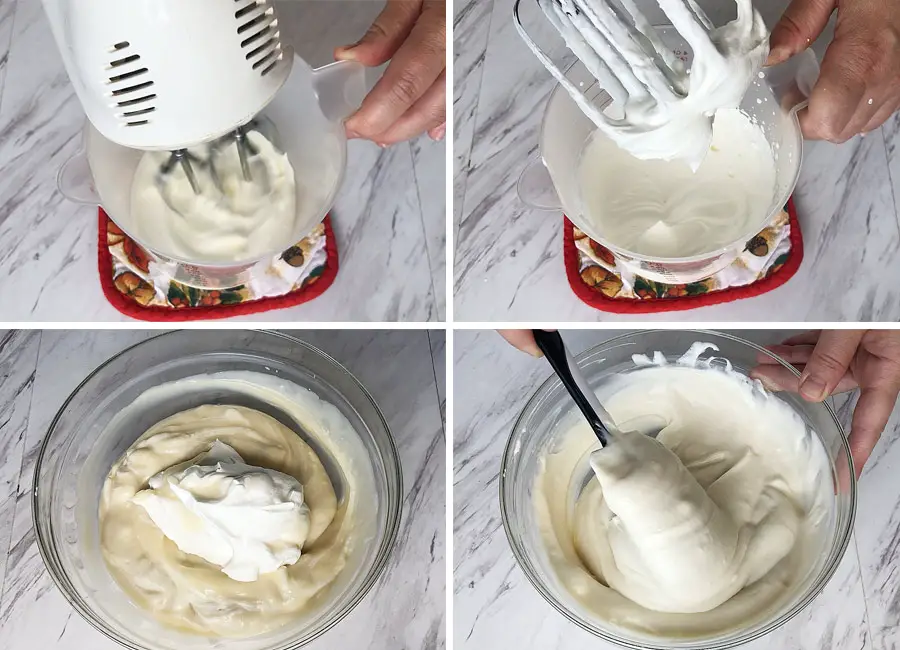
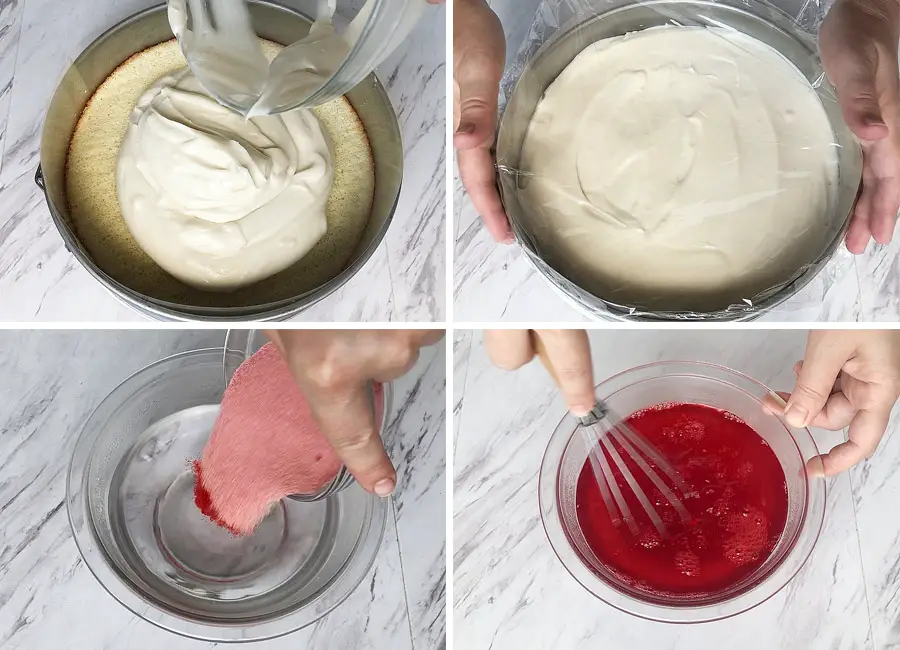
Step 11
Pour the filling onto the sponge cake and smooth it with a spatula or a spoon. Cover with a plastic wrap and refrigerate for 30 minutes.
Add the raspberry powder to the hot water, mix very well and let it cool to room temperature. Then refrigerate until the jelly starts to thicken.
Step 12
I already washed and dried my raspberries and now it’s time to cover the cake with them. Cover the cake with a plastic wrap and refrigerate until the jelly thickens enough to pour over.

Step 13
The last thing we need to do is pour the jelly over the raspberries, cover the cake with a plastic wrap and refrigerate for a few hours until the jelly holds its shape.
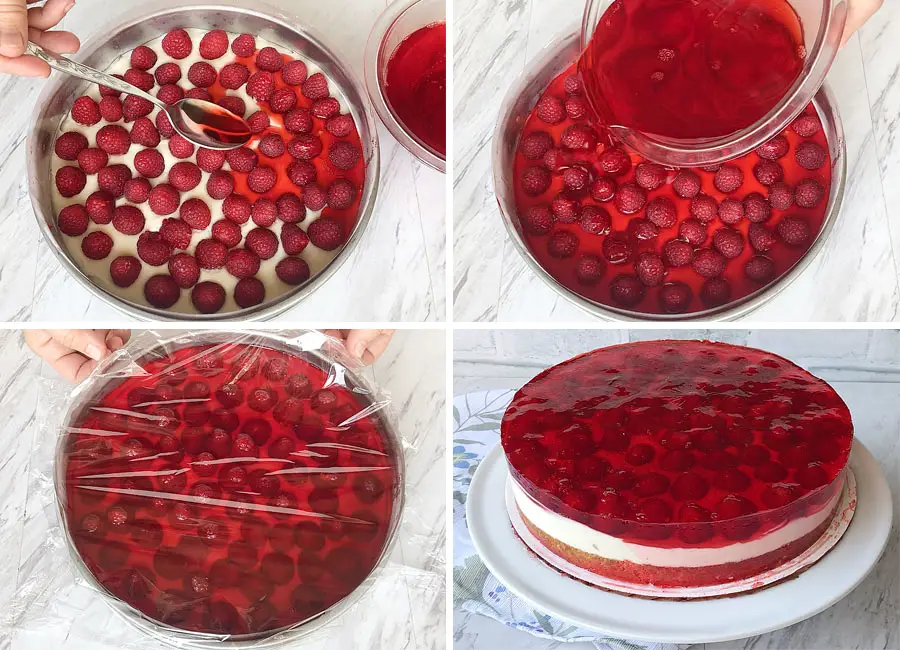
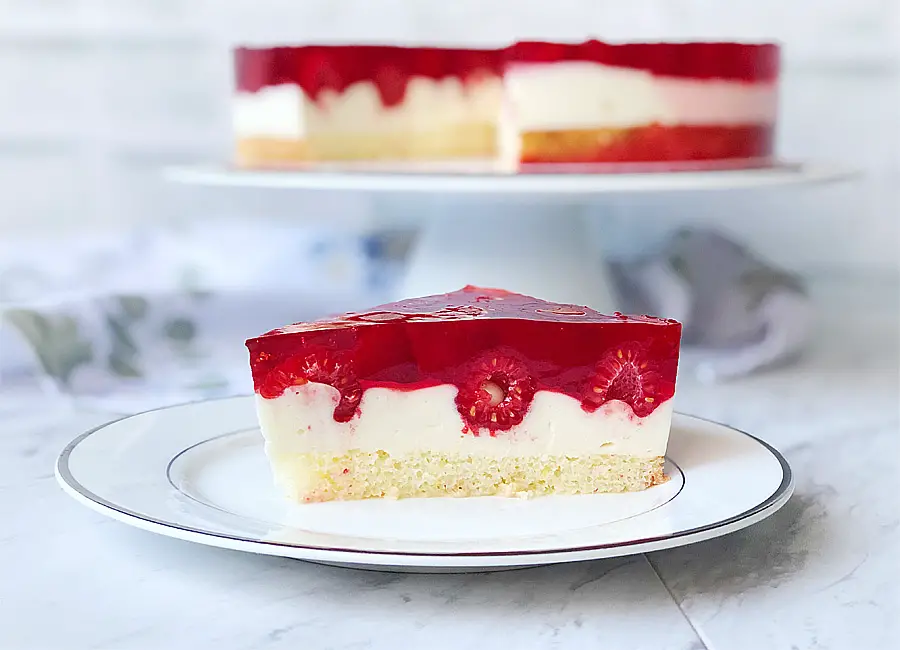
Look at this incredibly beautiful raspberry cake. Thin layers of sponge cake, delicate custard and raspberry jelly. I really hope that you enjoy this cake as much as my family.
Notes:
For this cake you can use different types of berries or fruits and every time it will be a completely new kind of cake.
It’s better to put a board or a serving plate under the cake before you start assembling it. That way the cake will not be damaged when repeatedly moved to the refrigerator.
If my post was useful to you, please let me know in the comment section below.
Summer Cake with Raspberries
Ingredients
Method
- Let’s start by separating the eggs into egg whites and egg yolks. Do it very carefully, so not a drop of yolk gets into the egg whites. Also, make sure that the mixing bowl and the whisk attachment are very clean and there's no residual oil or fat left behind to disturb or deflate the egg whites.Add a pinch of salt to the egg whites and start whipping the egg whites on low speed until foamy, then increase the speed to medium and gradually add the sugar. Whisk the egg whites until stiff peaks form. If you turn the bowl, the whites will remain in place.
- Next, add the egg yolks one at a time and whisk until combined. Sift in the flour and cornstarch, add the lemon zest and mix the batter with a spatula very carefully, until all the dry ingredients incorporated well.
- To bake the cake, I covered the bottom of 9-inch springform with parchment paper.Transfer the cake batter to the baking pan and spread evenly with a spatula. Bake at 340 F degrees for 25 minutes.
- While the cake is in the oven let’s make the syrup to soak the cake. Add the sugar and lemon juice to the water, mix and let it cool completely.
- Check the readiness of the cake with a skewer or a toothpick. Let the cake cool in the baking pan for about 5 minute or so, then with a sharp knife slice between the cake and the baking pan. Take the ring part off, invert the cake and carefully take off the parchment paper from the bottom.
- Place the cake onto a cake board or a flat serving dish. Put the ring part of the springform on top of the cake and placed the acetate film inside the ring. Close the form, so the cake fits tightly inside. Soak the sponge cake with the chilled syrup and set aside.
- Add the cold milk to the gelatin and mix very well. Set aside for about 15 minutes. Poor the milk into a medium size saucepan and heat it by bringing it to a boil over medium heat.
- In a bowl, whisk the egg, sugar and vanilla extract. Add the cornstarch and whisk until no lumps remain.Slowly pour the hot milk in a thin stream, into the egg mix, while whisking constantly to temper the egg mix. Then, pour the egg mixture back into the saucepan. Cook over medium-high heat, whisking constantly, until thickened and slowly boiling.
- Remove the saucepan from the heat and add the gelatin. Mix well until the gelatin has completely dissolved. Pour the custard into a bowl and immediately cover the surface with a plastic wrap, making sure the plastic wrap is touching the whole surface. This is to prevent the custard from forming a skin on top. Let it cool to room temperature.
- When the custard has cooled down, whip the heavy cream until stiff peaks form. Add the whipped cream to the custard in two batches mixing everything well. The filling should turn out very smooth and silky.
- Pour the filling onto the sponge cake and smooth it with a spatula or a spoon. Cover with a plastic wrap and refrigerate for 30 minutes.Add the raspberry powder to the hot water, mix very well and let it cool to room temperature. Then refrigerate until the jelly starts to thicken.
- I already washed and dried my raspberries and now it’s time to cover the cake with them. Cover the cake with a plastic wrap and refrigerate until the jelly thickens enough to pour over.
- The last thing we need to do is pour the jelly over the raspberries, cover the cake with a plastic wrap and refrigerate for a few hours until the jelly holds its shape.
Notes
You may also like

Sour Cream Raspberry Pie
Non-Traditional Lemon Bars

Honey Sponge Cake
Leave a Reply