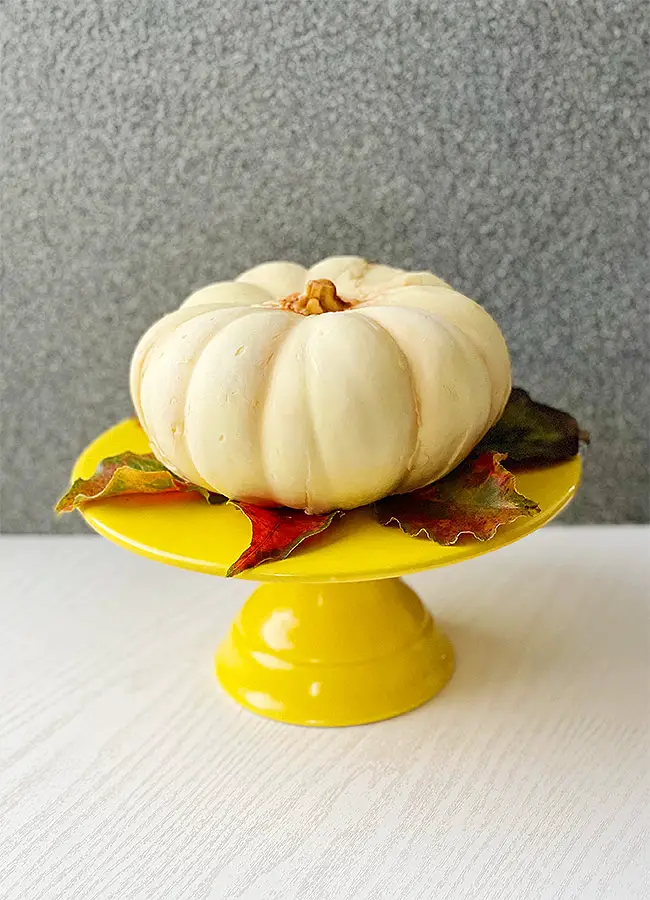
Today I’m going to show you how to make a Pumpkin Shaped Cake without fondant or buttercream. I saw the idea on Instagram and decided to replicate the cake. This is my first 3D cake and I thought it would be fun to share my experience with you.
Ingredients for the gelatin mold:
240g gelatin powder
760 ml vegetable glycerin
1040 ml cold water
Ingredients for the chocolate shell:
200g white chocolate chips
100g chopped white chocolate chips
Ingredients for the cake:
Pumpkin Sponge Cake (or any other cake of your choice)
Ingredients for the mousse filling:
135g white chocolate
80ml hot milk
25 g softened butter
250 ml cold heavy cream
6g gelatin powder
30 ml cold water
Step 1
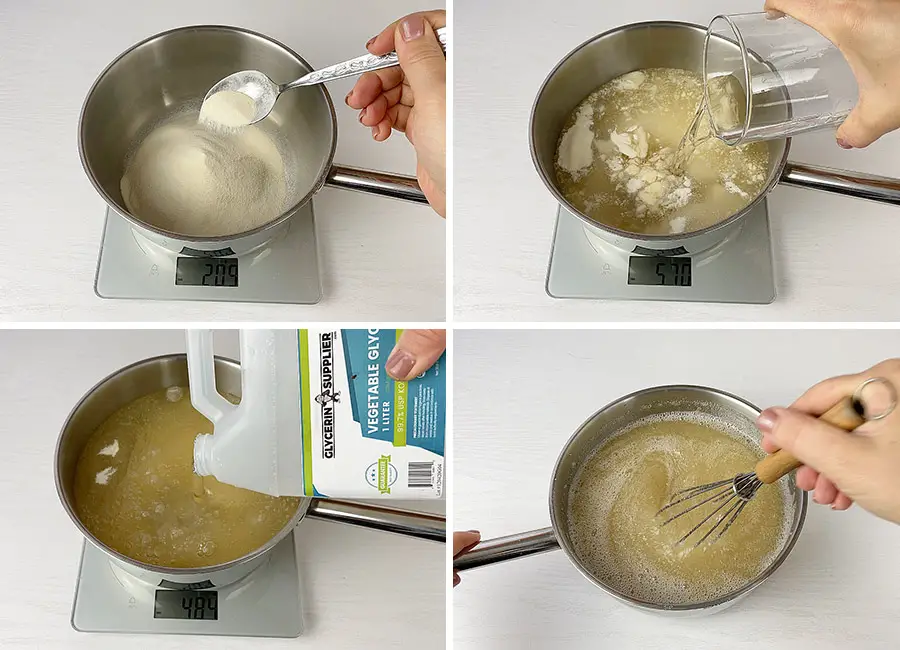
In a heavy bottom saucepan combine the powdered gelatin, cold water and glycerine. Mix the mixture very well, until all gelatin lumps have dissolved and set it aside for 20 minutes.
Step 2
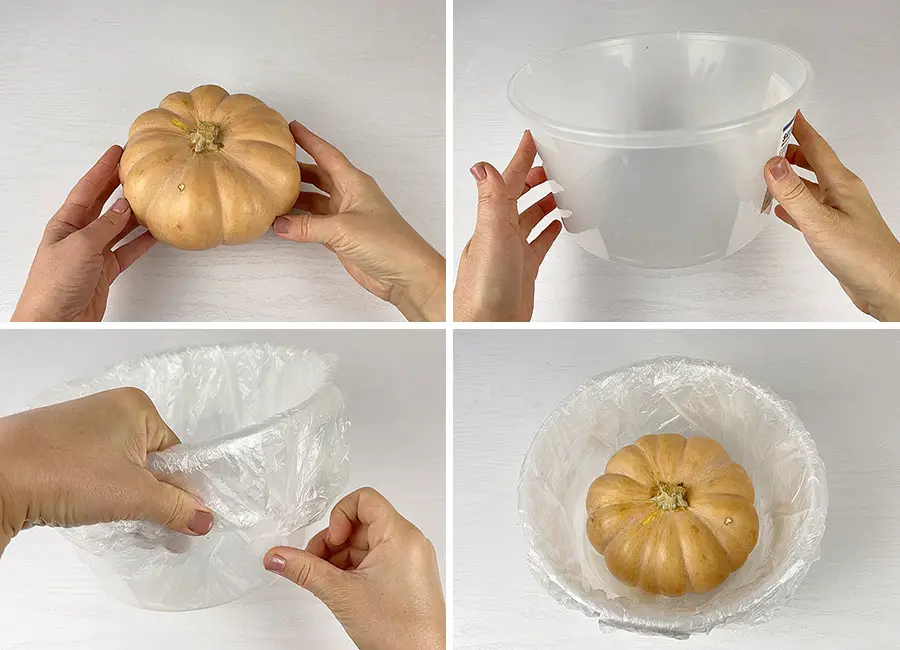
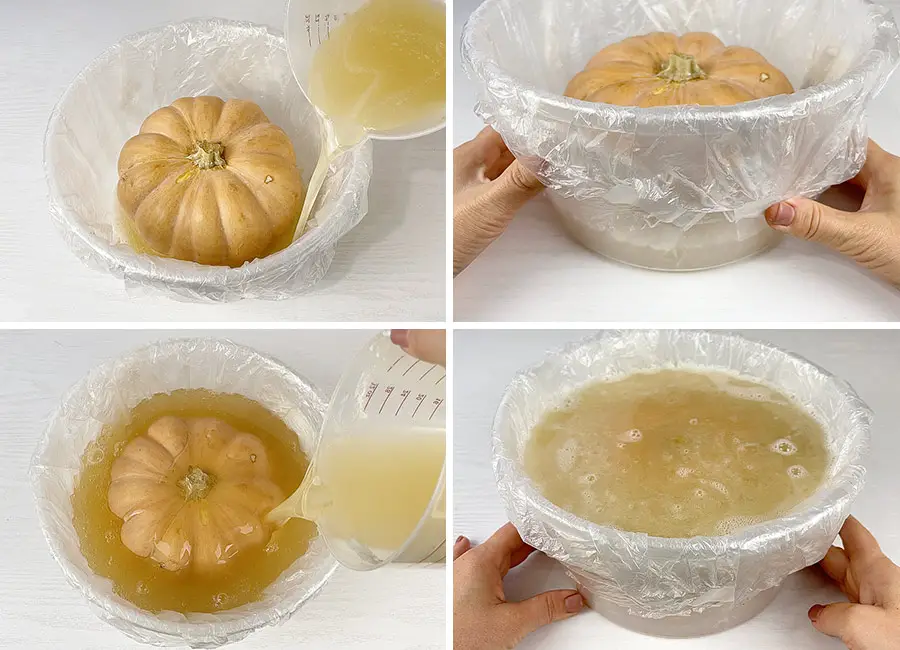
Next, we’ll need to prepare the pumpkin. I already washed and dried my pumpkin and it’s about 6-inches wide and three and three quarter inches tall. We’ll also need a container. It has to be big enough to pour the gelatin mixture about 1-inch around the pumpkin. Take a big plastic bag and cover the entire inside of the container. Tape the bag on the outside so it doesn’t move. It will help to take the ready mold out of the container. Place the pumpkin inside the container and make sure it has the same amount of space all around the pumpkin.
Step 3
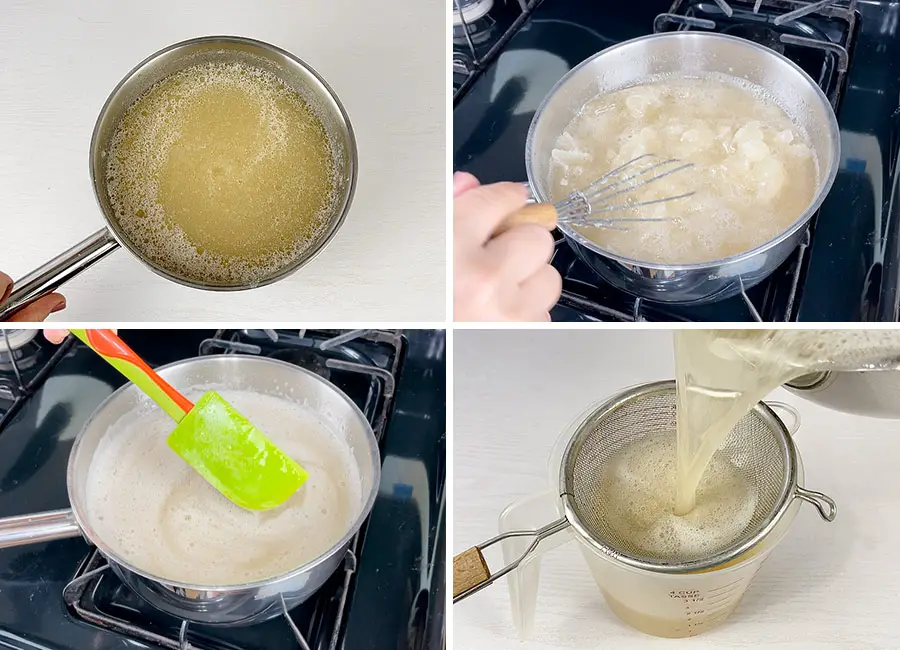
After 20 minutes our gelatin has bloomed and now we need to dissolve it over medium high heat. You want to stir it from time to time to help it melt evenly. When all the gelatin has melted, strain the mixture through a sieve.
Step 4
Pour the gelatin mixture around the pumpkin so it covers about an inch of the pumpkin. Then let it sit in the refrigerator for about 10 minutes. The gelatin will harden and it will fix the pumpkin to the bottom of the container. After that pour the rest of the gelatin mixture. It has to cover the whole pumpkin about an inch above the pumpkin. If you don’t have enough gelatin mixture, just make ⅛ of the recipe and pour on top. Place the container in the refrigerator for a minimum of 4 hour or overnight.
Step 5
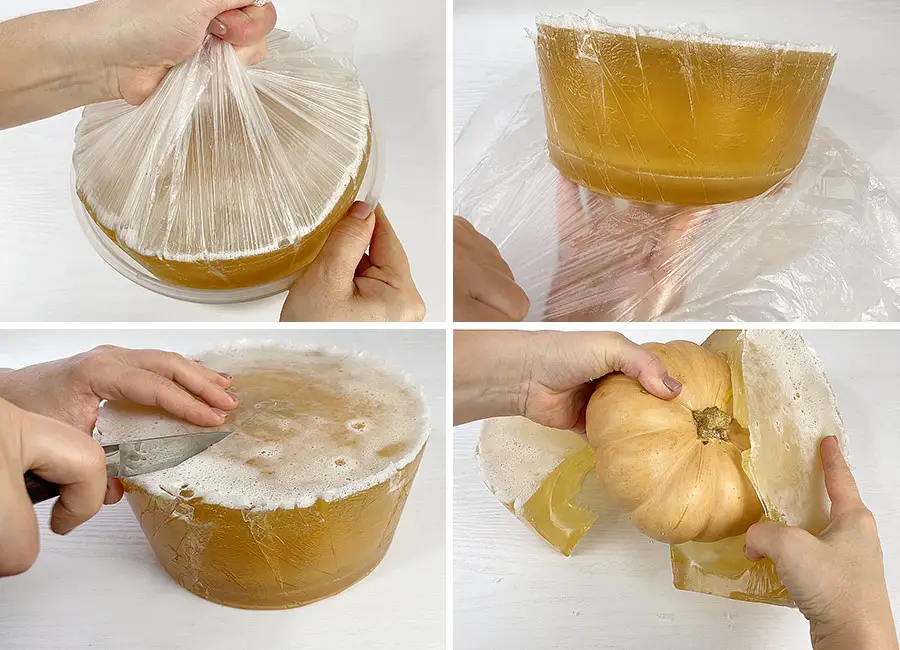
When the gelatin has hardened pull out the plastic and take the mold out of the container. Next, carefully take off the plastic bag. Then make two cuts on both sides of the mold. When it’s done, carefully separate the mold from the pumpkin.
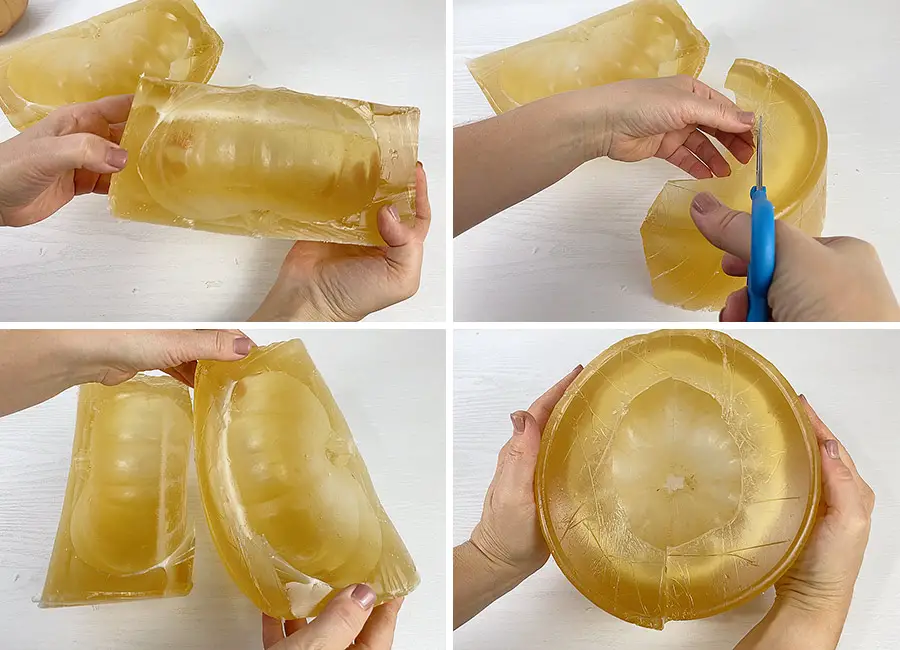
Now we have a perfectly shaped pumpkin mold. Using scissors, trim the edges of the mold to make a small hole. It will be the bottom of our future cake.
Step 6
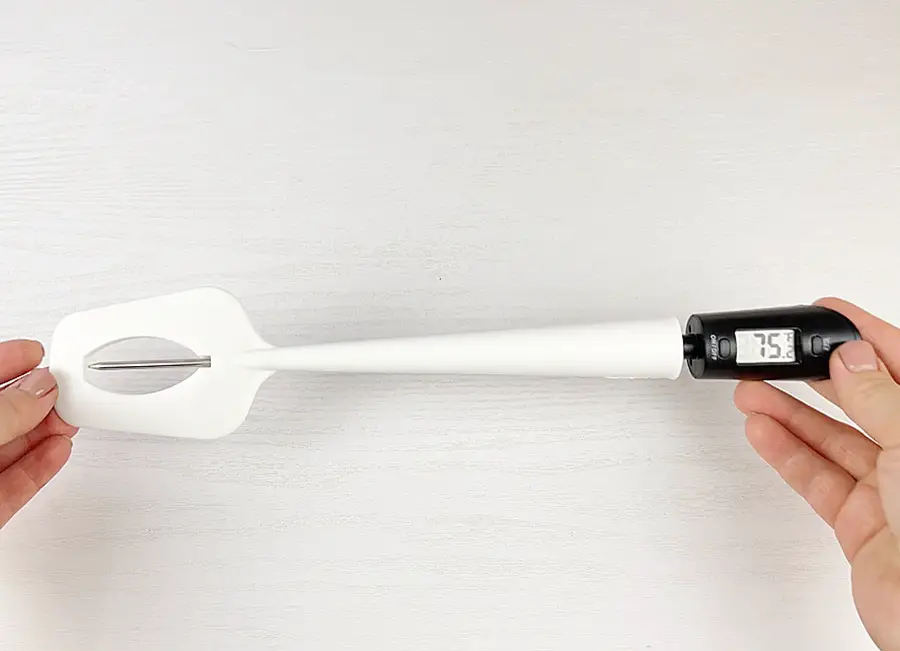
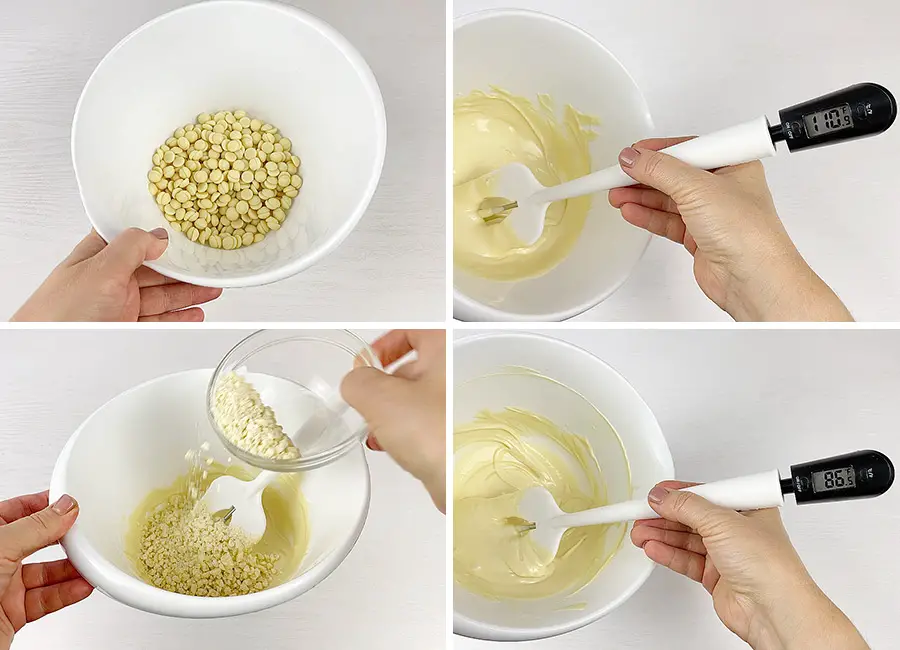
Next, we need to temper white chocolate and today I’m going to use my new thermo spatula. Of course you can use a regular spatula and a food thermometer.
Start by microwaving the chocolate for 20 seconds then take the bowl out and give it a stir. Place the bowl back in the microwave and repeat the process of cooking for another 20 seconds, stopping, stirring and returning it to the microwave until the chocolate has melted and reached around 110°F degrees (43°C). If the chocolat already melted but the temperature is not right, keep microwaving for an additional 5 seconds each time stirring well and checking the temperature. When the chocolate is at around 110°F degrees, add half of the chopped chocolate and start stirring it until all the pieces have melted and the chocolate has reached around 87°F degrees (30°C).
Step 7
Now you need to work fast. Pour the chocolate inside the first half mold and spread it quickly. My mistake was not letting the mold reach room temperature. The mold was cold and the chocolate had hardened in seconds, which made it very hard to spread evenly. So, don’t make my mistake and let the gelatin mold get to room temperature before tempering the chocolate. Also, the chocolate layer has to be thick enough to make a strong chocolate shell for the future cake.

Step 8
By the time I finished with my first half mold, the chocolate’s temperature dropped to 80°F degrees, so I wormed it up again to around 110°F degrees (43°C), added second half of my chopped chocolate and mixed until the chocolate has reached around 87°F degrees (30°C).
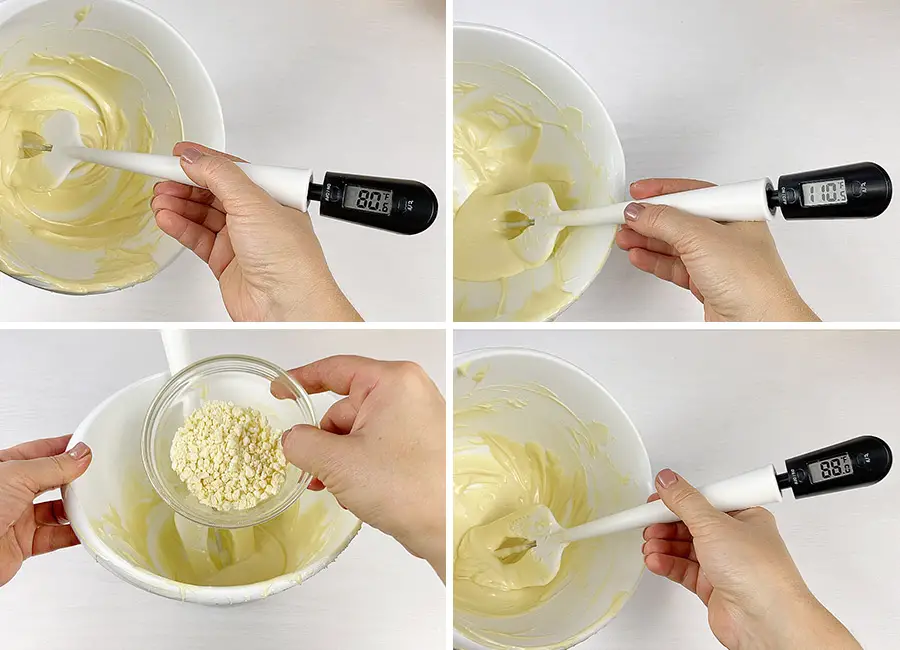
I poured it in the second half mold and spread it evenly.
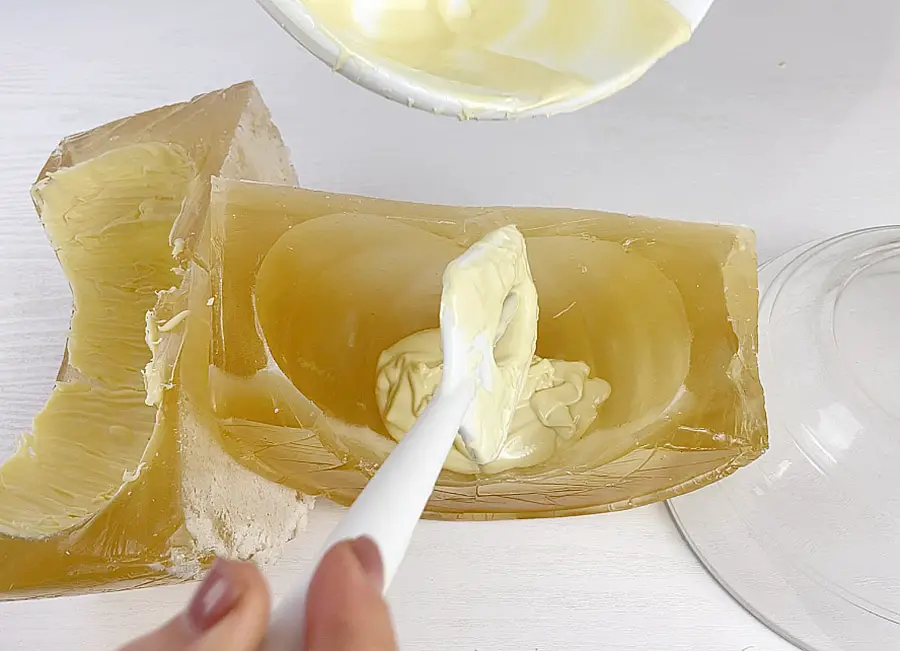
Step 9
Next, I placed both mold halves on a baking pan and connected them as close as I could. Using the leftover chocolate, I covered all the joints and any other open spots. That’s how it looked when I was done.
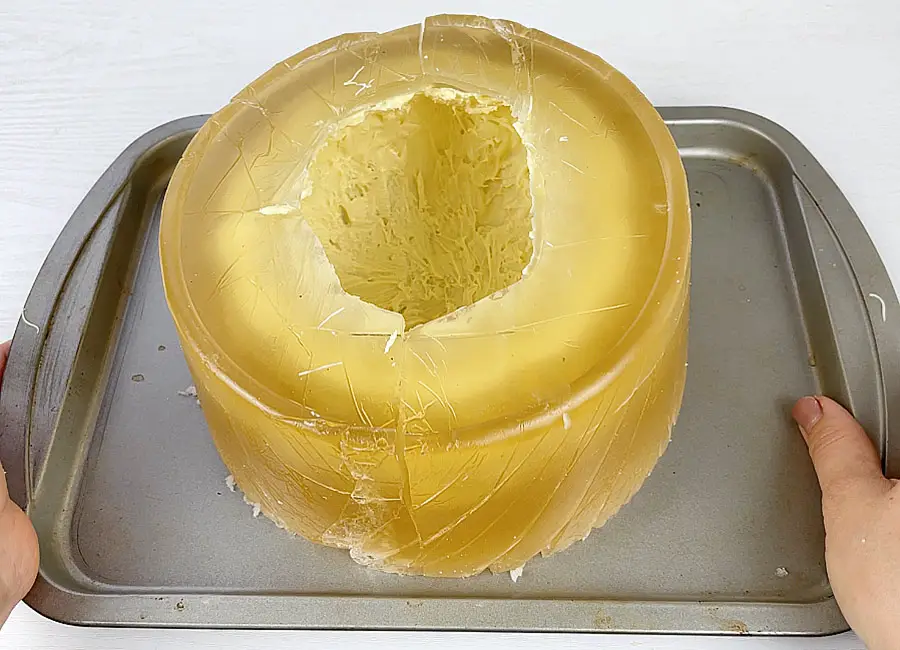
Step 10
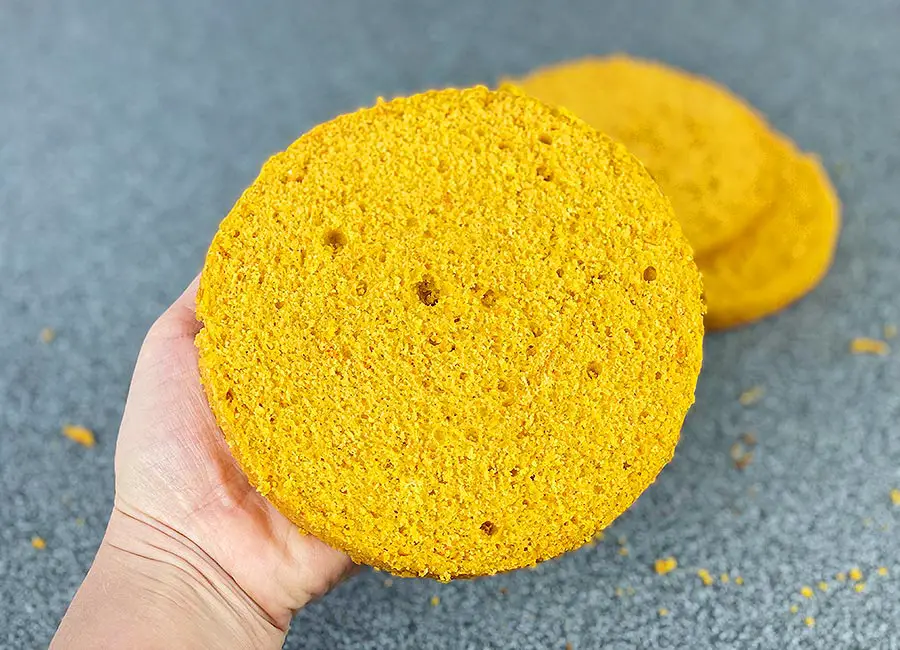
For the cake you can use my Pumpkin Sponge Cake or any other cake you like.
Step 11
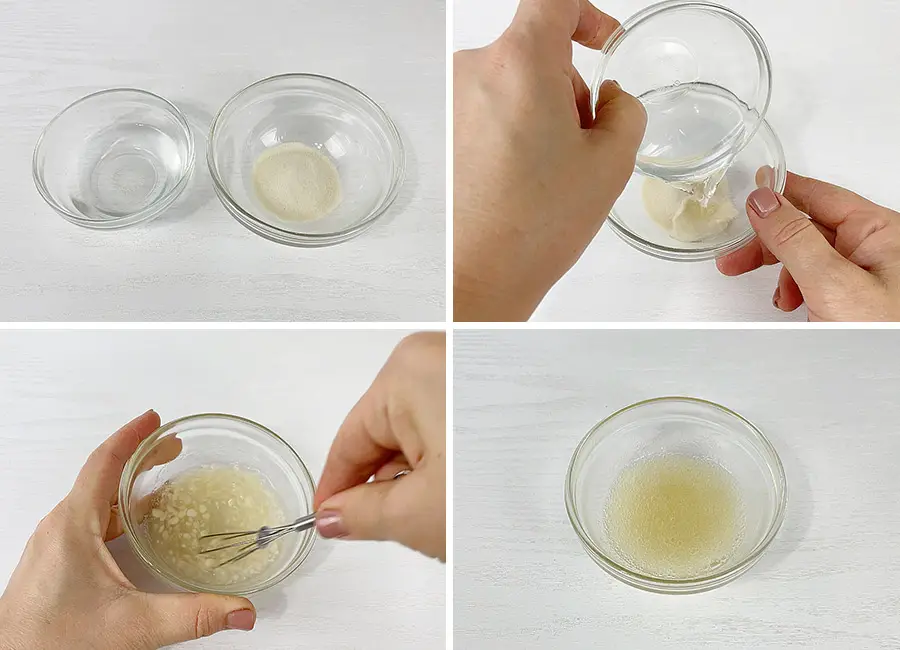
To make the mousse filling combine the gelatin powder with water and mix well. Let it sit for about 15 minutes.
Step 12
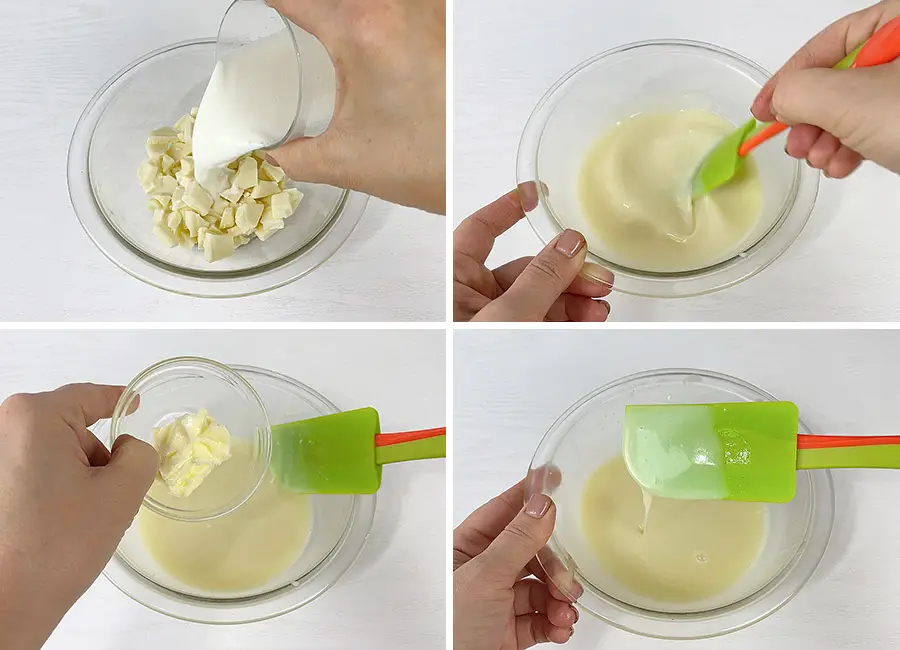
Using a microwave, heat the milk. Cover the chocolate with hot milk, let it sit for two minutes and mix, until the chocolate has melted. If you can still see little pieces of chocolate, warm the mixture up in the microwave for 5-10 seconds and stir again. Add the softened butter and mix again until the butter has melted.
Step 13
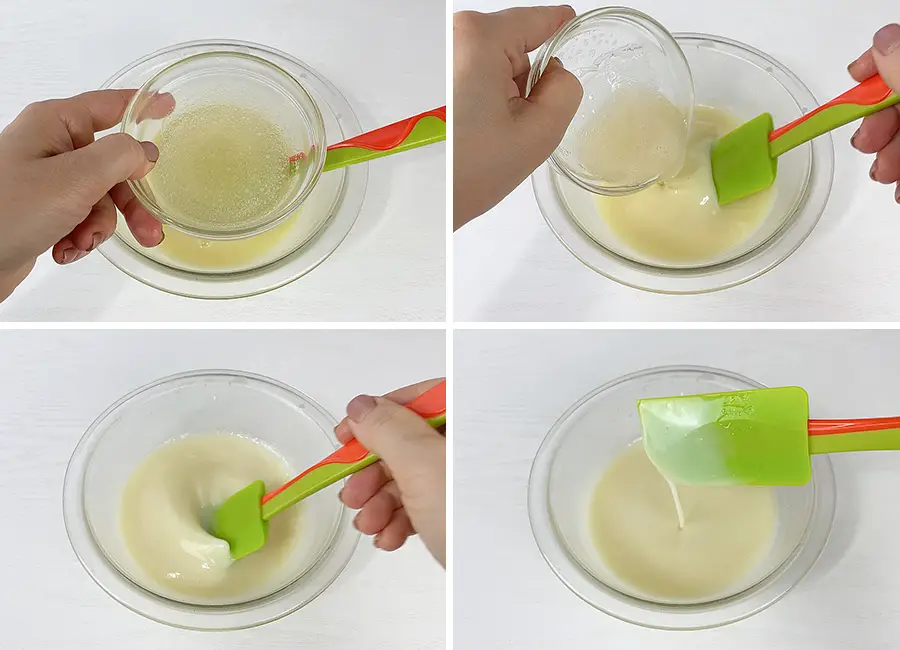
Next, we need to dissolve the gelatin by microwaving it for 10 seconds. Add the liquid gelatin to the chocolate mixture and whisk one more time.
Step 14
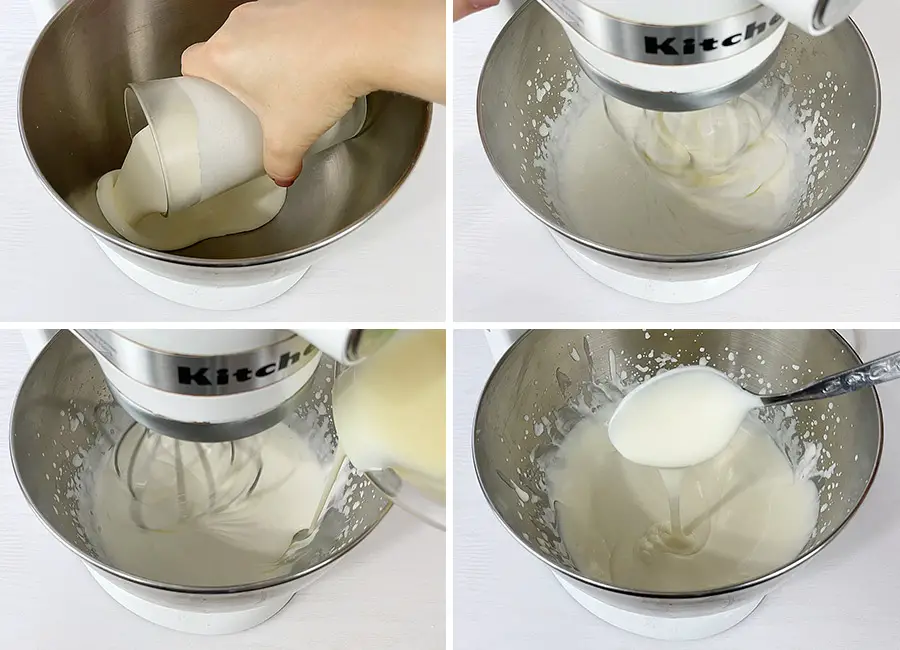
Place the cold heavy cream in a stand mixing bowl and whisk until soft peaks are formed. It should have a consistency of melted ice cream. Then, reduce the speed to low, slowly add the chocolate mixture to the whipped cream and whisk for another minute or two.
Step 15
To assemble the pumpkin cake, pour a little bit of mousse filling on the bottom of the chocolate mold, then place the first cake layer, cover it with more filling and continue to alternate the cake layers and the filling.
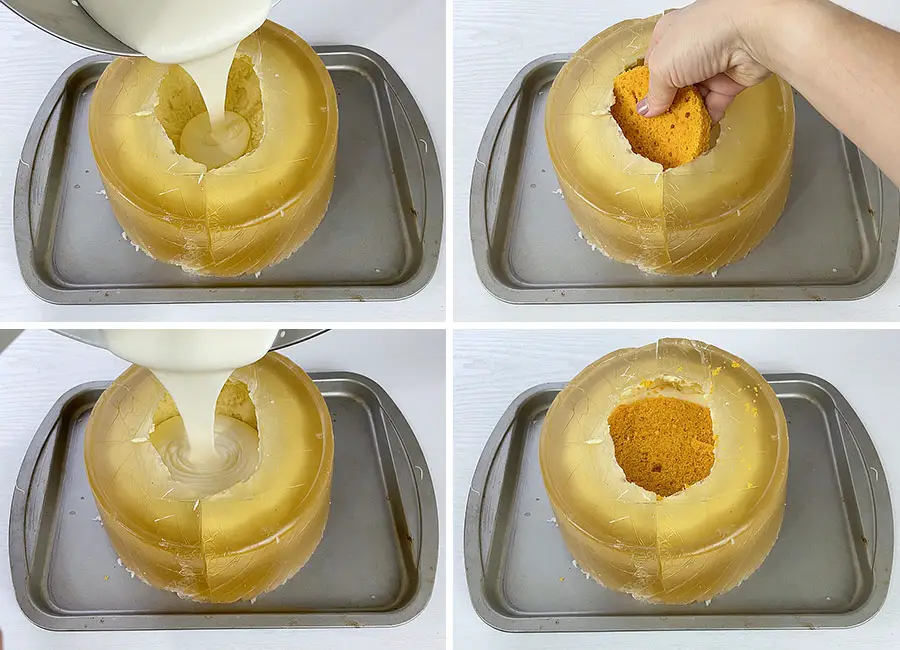
I cut each cake layer to the size of the pumpkin mold. Also, make sure to evenly spread the mousse filling, so that there are no empty spaces when cutting the cake.
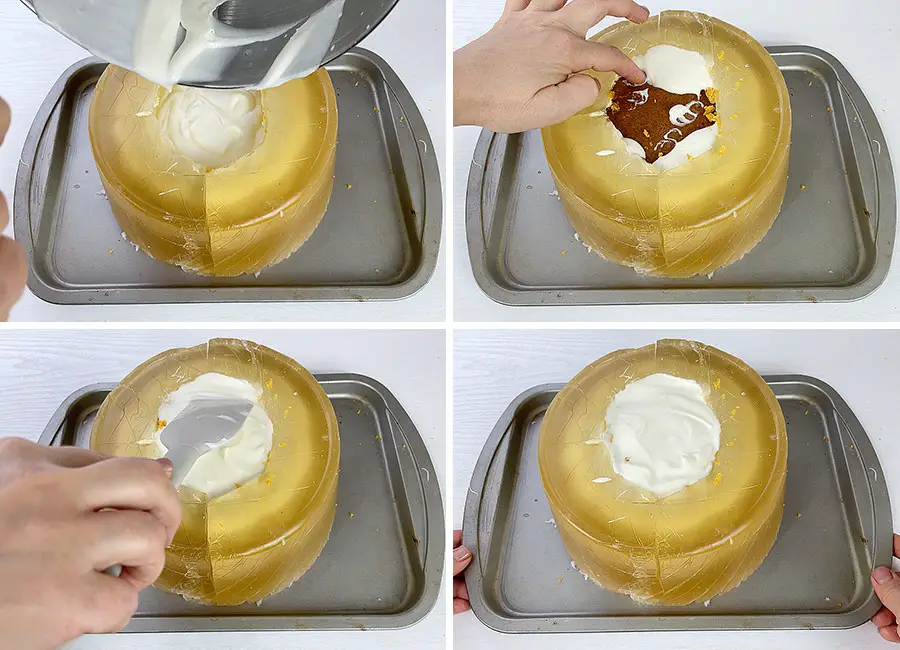
Place the assembled cake in the refrigerator for 6-8 hours or overnight.
Step 16
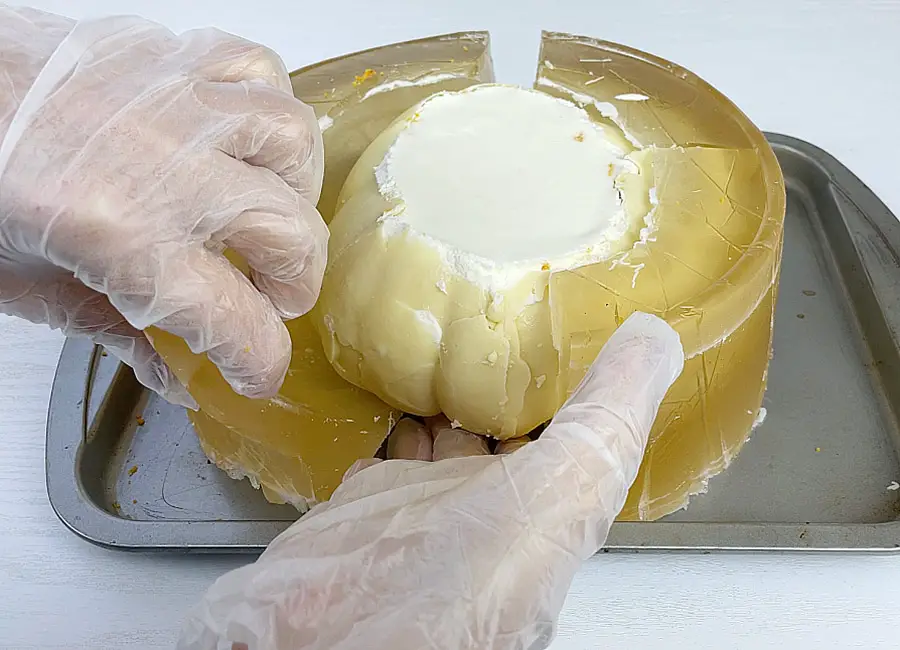
When the cake has been chilled, very carefully remove the gelatin mold. I also recommend using gloves to not leave fingerprints on the chocolate.
Step 17
Now we need to smooth out all the bumps and joints on the surface. To do that, dip the knife in hot water, wipe it with a piece of paper towel, press the hot knife to the chocolate and hold it for a few seconds. Then with your finger smooth out the chocolate.
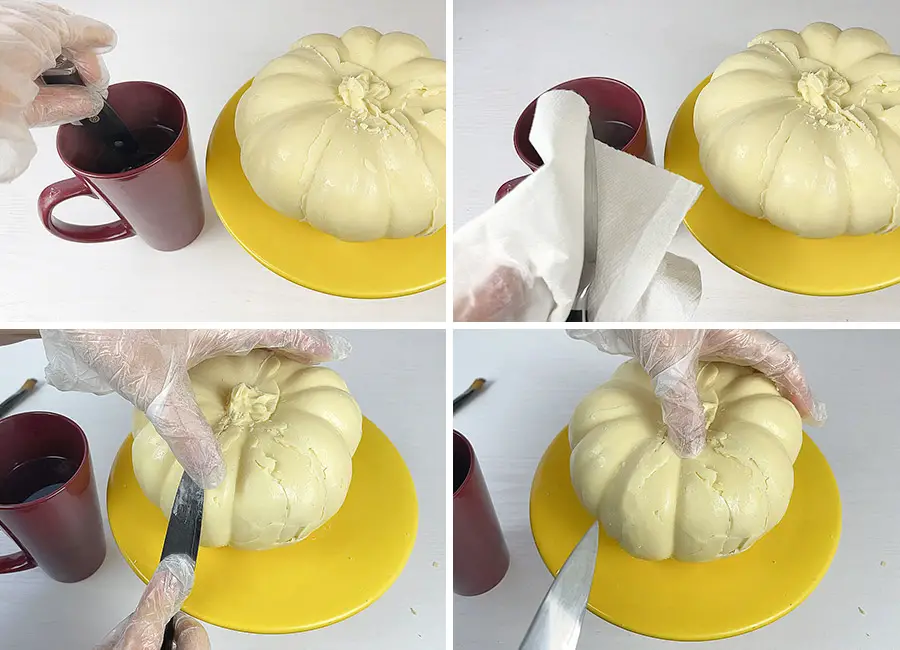
I personally don’t think that the pumpkin should be completely smooth and perfect and I’m pretty happy with what I’ve got.
Step 18
The last thing I did was use gel food colors diluted in vodka. I added some color on the stalk of the pumpkin and in between each segment of the pumpkin.
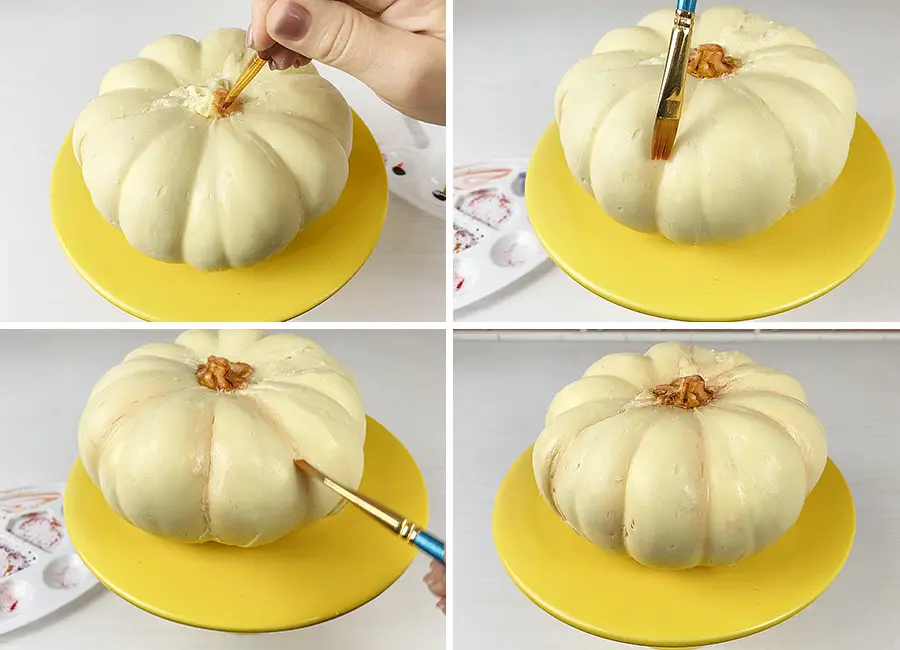
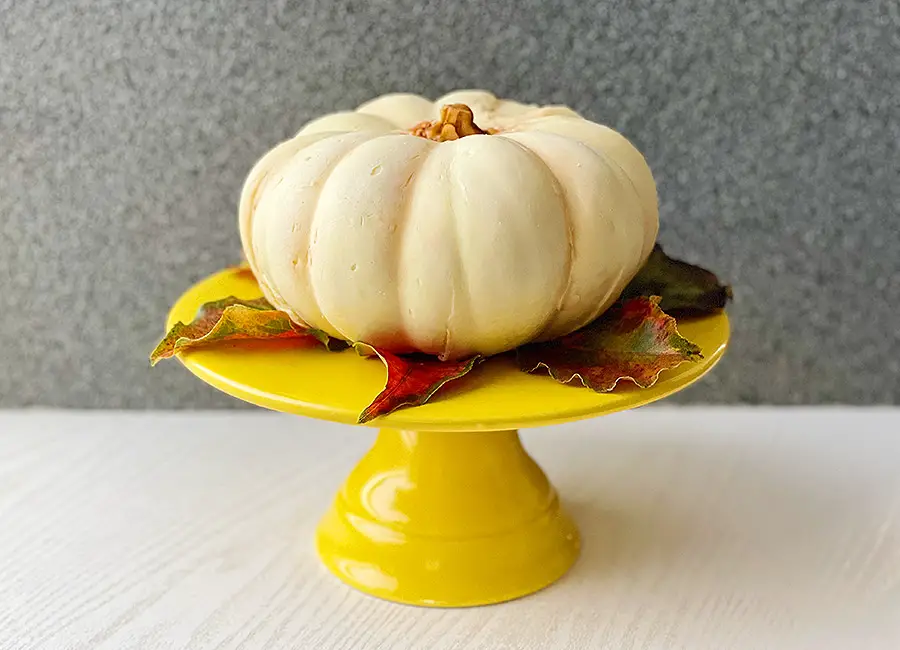
I think the cake turned out very realistic and cute.
Step 19
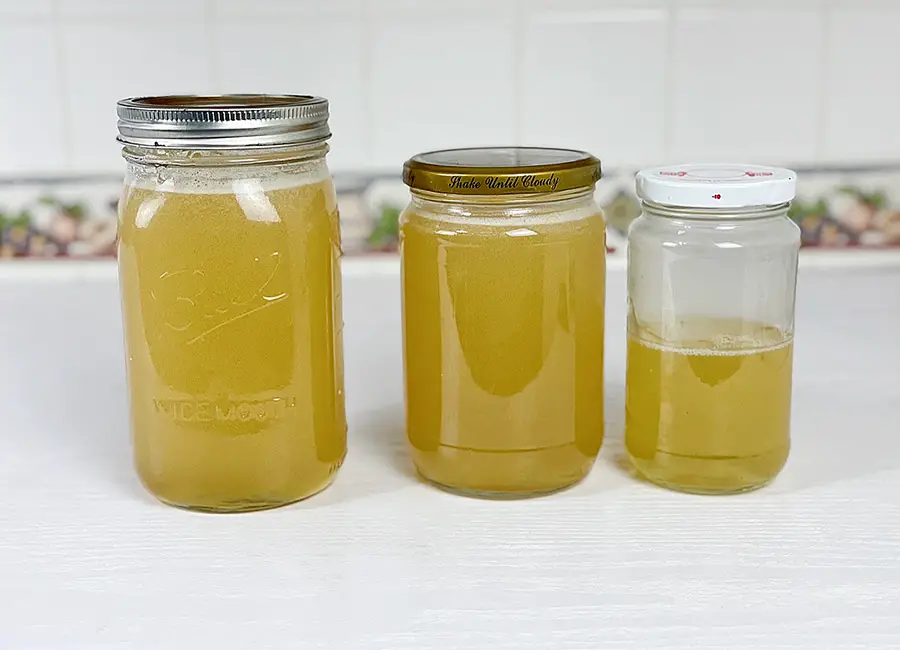
Now let’s go back to our gelatin mold. If the mold looks good and doesn’t have any cracks, you can reuse it again for up to 5 times. Otherwise, clean it up from any small chocolate pieces. Then cut it into small pieces and place in a heavy bottom saucepan. Cook it over medium heat, stirring occasionally, until all the gelatin has melted. Then, strain the mixture through a sieve into a glass jar.
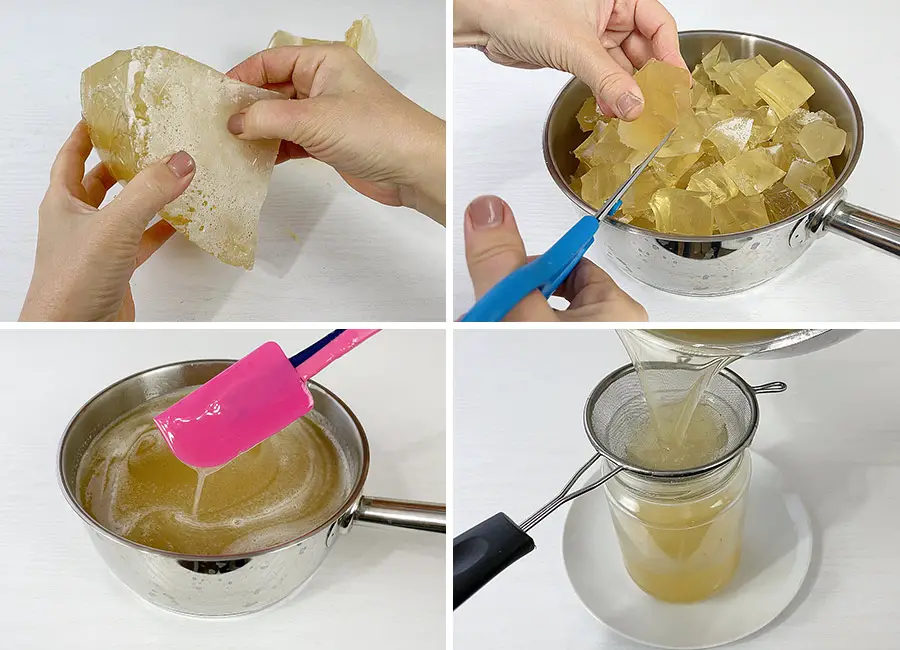
Cover with a lid and keep it in the refrigerator for up to 6 months. You can use it for any other fun project.
Before cutting the cake let it get to room temperature. Also, it recommended using a hot knife to cut through the chocolate layer to avoid too many cracks.
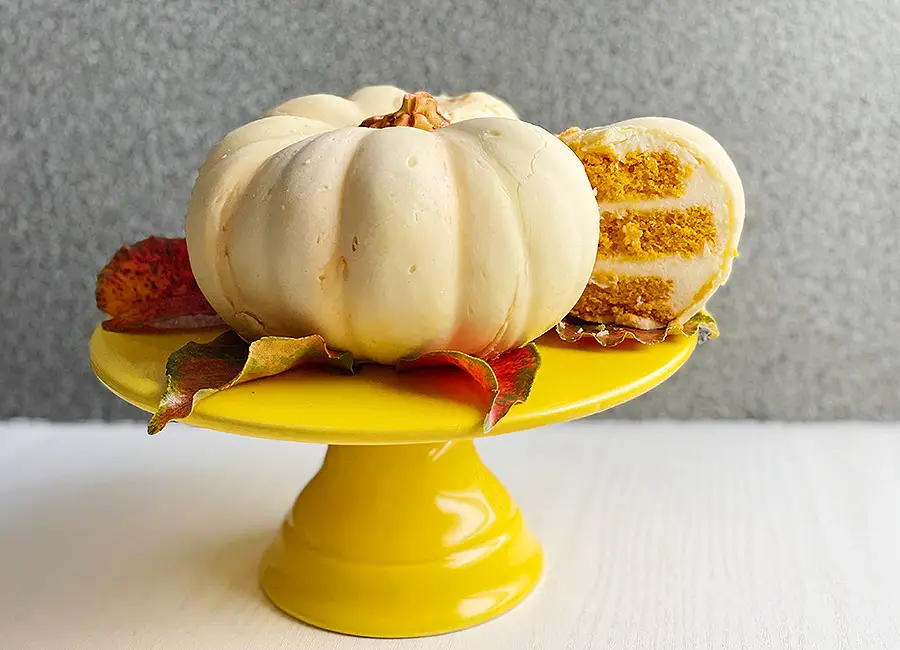
I think that for my first 3D cake project I did a very good job. Let me know in the comment area if you agree with me.
THIS POST CONTAINS AFFILIATE LINKS, WHICH MEANS I MAKE A SMALL COMMISSION AT NO EXTRA COST TO YOU. PLEASE SEE MY FULL DISCLOSURE POLICY FOR DETAILS.
Make sure to watch my YouTube video recipe for step-by-step instructions and see how I make this beautiful Pumpkin Shaped Cake! Want new recipe updates? Make sure to subscribe to my YouTube Channel!
Tips for Making Gelatin Mold:
- Use a kitchen scale to make the gelatin mixture.
- Depending on the size of your pumpkin you may need a little bit more or less of gelatin mixture. If the amount of the gelatin mixture is not enough for your pumpkin, just make an additional ⅛ of the recipe until it’s enough to cover the whole pumpkin about an inch above the pumpkin.
- Let the gelatin mold get to room temperature before tempering the chocolate.
- If the mold looks good and doesn’t have any cracks, you can reuse it again for up to 5 times.
How to Store The Gelatin Mixture:
- Store it in a glass jar refrigerated for up to 6 months.
Tips for Making the Pumpkin Shaped Cake:
- Use a high-quality white chocolate that contains a higher percentage of cocoa butter.
- The chocolate layer has to be thick enough to make a strong chocolate shell for the future cake.
- It recommended using gloves to not leave fingerprints on the chocolate.
- Before cutting the cake let it get to room temperature. Also, it recommended using a hot knife to cut through the chocolate layer to avoid too many cracks.
Pin For Later:
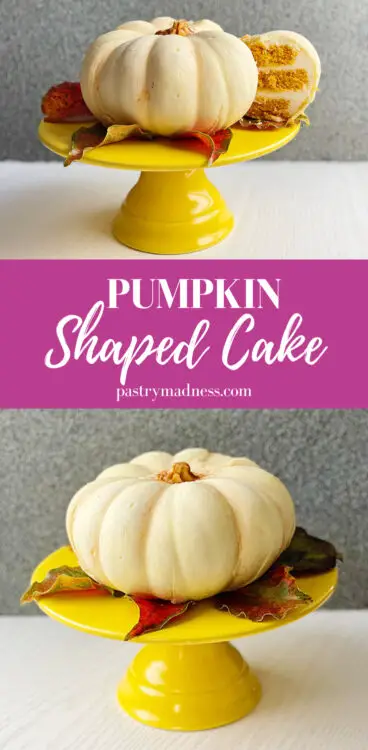

Pumpkin Shaped Cake
Ingredients
Method
- In a heavy bottom saucepan combine the powdered gelatin, cold water and glycerine. Mix the mixture very well, until all gelatin lumps have dissolved and set it aside for 20 minutes.
- Next, we’ll need to prepare the pumpkin. I already washed and dried my pumpkin and it’s about 6-inches wide and three and three quarter inches tall.We’ll also need a container. It has to be big enough to pour the gelatin mixture about 1-inch around the pumpkin.Take a big plastic bag and cover the entire inside of the container. Tape the bag on the outside so it doesn't move. It will help to take the ready mold out of the container.Place the pumpkin inside the container and make sure it has the same amount of space all around the pumpkin.
- After 20 minutes our gelatin has bloomed and now we need to dissolve it over medium high heat. You want to stir it from time to time to help it melt evenly. When all the gelatin has melted, strain the mixture through a sieve.
- Pour the gelatin mixture around the pumpkin so it covers about an inch of the pumpkin. Then let it sit in the refrigerator for about 10 minutes. The gelatin will harden and it will fix the pumpkin to the bottom of the container. After that pour the rest of the gelatin mixture. It has to cover the whole pumpkin about an inch above the pumpkin.Place the container in the refrigerator for a minimum of 4 hour or overnight.
- When the gelatin has hardened pull out the plastic and take the mold out of the container. Next, carefully take off the plastic bag. Then make two cuts on both sides of the mold. When it’s done, carefully separate the mold from the pumpkin. Using scissors, trim the edges of the mold to make a small hole. It will be the bottom of our future cake.
- Next, we need to temper white chocolate. Start by microwaving the chocolate for 20 seconds then take the bowl out and give it a stir. Place the bowl back in the microwave and repeat the process of cooking for another 20 seconds, stopping, stirring and returning it to the microwave until the chocolate has melted and reached around 110°F degrees (43°C). If the chocolat already melted but the temperature is not right, keep microwaving for an additional 5 seconds each time stirring well and checking the temperature. When the chocolate is at around 110°F degrees, add half of the chopped chocolate and start stirring it until all the pieces have melted and the chocolate has reached around 87°F degrees (30°C).
- Pour the chocolate inside the first half mold and spread it quickly. The chocolate layer has to be thick enough to make a strong chocolate shell for the future cake.
- Worm up the leftover chocolate to around 110°F degrees (43°C), add second half of chopped chocolate and mix until the chocolate has reached around 87°F degrees (30°C).
- Pour it in the second half mold and spread it evenly.
- Place both mold halves on a baking pan and connect them as close as you could. Using the leftover chocolate, cover all the joints and any other open spots.
- For the cake you can use my Pumpkin Sponge Cake or any other cake you like.
- To make the mousse filling combine the gelatin powder with water and mix well. Let it sit for about 15 minutes.
- Using a microwave, heat the milk. Cover the chocolate with hot milk, let it sit for two minutes and mix, until the chocolate has melted. If you can still see little pieces of chocolate, warm the mixture up in the microwave for 5-10 seconds and stir again. Add the softened butter and mix again until the butter has melted.
- Next, we need to dissolve the gelatin by microwaving it for 10 seconds. Add the liquid gelatin to the chocolate mixture and whisk one more time.
- Place the cold heavy cream in a stand mixing bowl and whisk until soft peaks are formed. It should have a consistency of melted ice cream. Then, reduce the speed to low, slowly add the chocolate mixture to the whipped cream and whisk for another minute or two.
- To assemble the pumpkin cake, pour a little bit of mousse filling on the bottom of the chocolate mold, then place the first cake layer, cover it with more filling and continue to alternate the cake layers and the filling.I cut each cake layer to the size of the pumpkin mold. Also, make sure to evenly spread the mousse filling, so that there are no empty spaces when cutting the cake. Place the assembled cake in the refrigerator for 6-8 hours or overnight.
- When the cake has been chilled, very carefully remove the gelatin mold. I also recommend using gloves to not leave fingerprints on the chocolate.
- Now we need to smooth out all the bumps and joints on the surface. To do that, dip the knife in hot water, wipe it with a piece of paper towel, press the hot knife to the chocolate and hold it for a few seconds. Then with your finger smooth out the chocolate.
- The last thing I did was use gel food colors diluted in vodka. I added some color on the stalk of the pumpkin and in between each segment of the pumpkin.
- Now let’s go back to our gelatin mold. If the mold looks good and doesn’t have any cracks, you can reuse it again for up to 5 times. Otherwise, clean it up from any small chocolate pieces. Then cut it into small pieces and place in a heavy bottom saucepan.Cook it over medium heat, stirring occasionally, until all the gelatin has melted. Then, strain the mixture through a sieve into a glass jar. Cover with a lid and keep it in the refrigerator for up to 6 months.
- Before cutting the cake let it get to room temperature. Also, it recommended using a hot knife to cut through the chocolate layer to avoid too many cracks.
Notes
- Use a kitchen scale to make the gelatin mixture.
- Depending on the size of your pumpkin you may need a little bit more or less of gelatin mixture. If the amount of the gelatin mixture is not enough for your pumpkin, just make an additional ⅛ of the recipe until it's enough to cover the whole pumpkin about an inch above the pumpkin.
- let the gelatin mold get to room temperature before tempering the chocolate.
- If the mold looks good and doesn’t have any cracks, you can reuse it again for up to 5 times.
- Store it in a glass jar refrigerated for up to 6 months.
- Use a high-quality white chocolate that contains a higher percentage of cocoa butter.
- The chocolate layer has to be thick enough to make a strong chocolate shell for the future cake.
- It recommended using gloves to not leave fingerprints on the chocolate.
- Before cutting the cake let it get to room temperature. Also, it recommended using a hot knife to cut through the chocolate layer to avoid too many cracks.


Leave a Reply