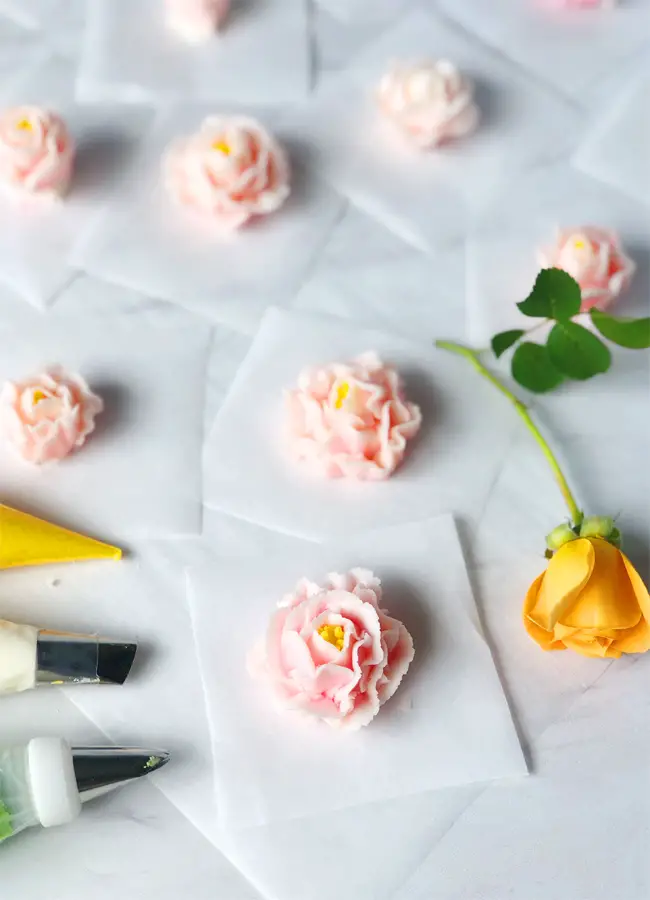
Today I want to show you how to make beautiful buttercream roses using only one petal piping tip number 104. I’ll share my secrets for making the flowers more realistic and elegant.
Piping roses is much easier than you think and all you need is a few piping tools, buttercream with the right consistency and a little bit of practice. I’ll show how you can make some of the piping tips yourself and how to make American buttercream, which is certainly the easiest buttercream to work with for beginners.
Ingredients:
225g salted butter at room temperature
460g sifted powdered sugar
1 teaspoon of any flavoring (I use an orange flavor)
Step 1
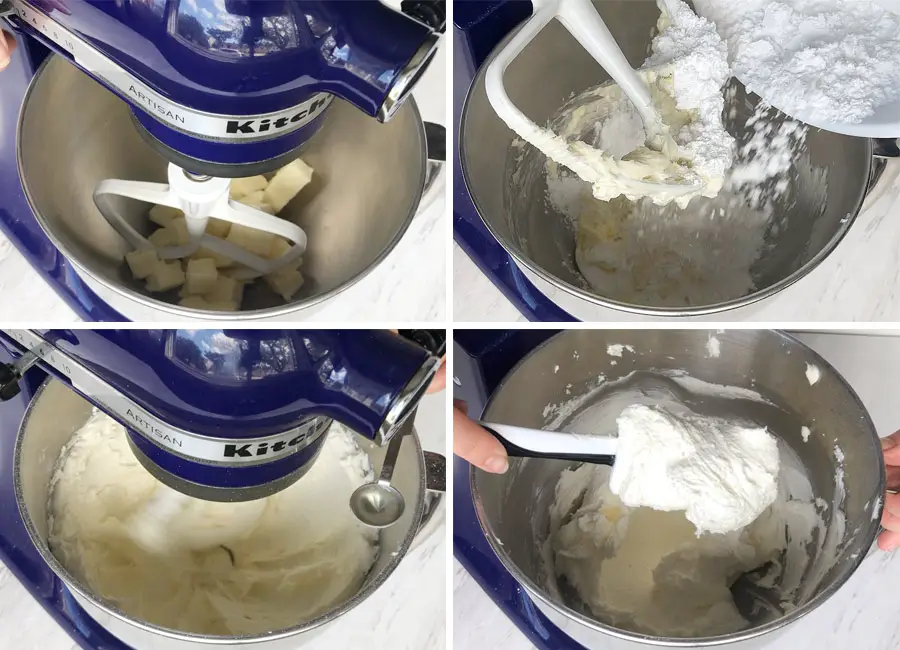
First, we need to cream the butter. Add the butter to the stand mixer bowl, fitted with a paddle attachment and mix until smooth. I want to remind you that the butter needs to be at room temperature, so get it out of the fridge in advance and let it warm up.
Add the sifted powdered sugar in two batches. Be sure to sift your powdered sugar well to avoid clogged piping tips. Beat the mixture until you get a thick consistency and add a few drops of flavoring extract. Increase the speed to medium-high and mix until smooth. Our buttercream is ready! Cover the bowl with plastic wrap and set aside.
Step 2
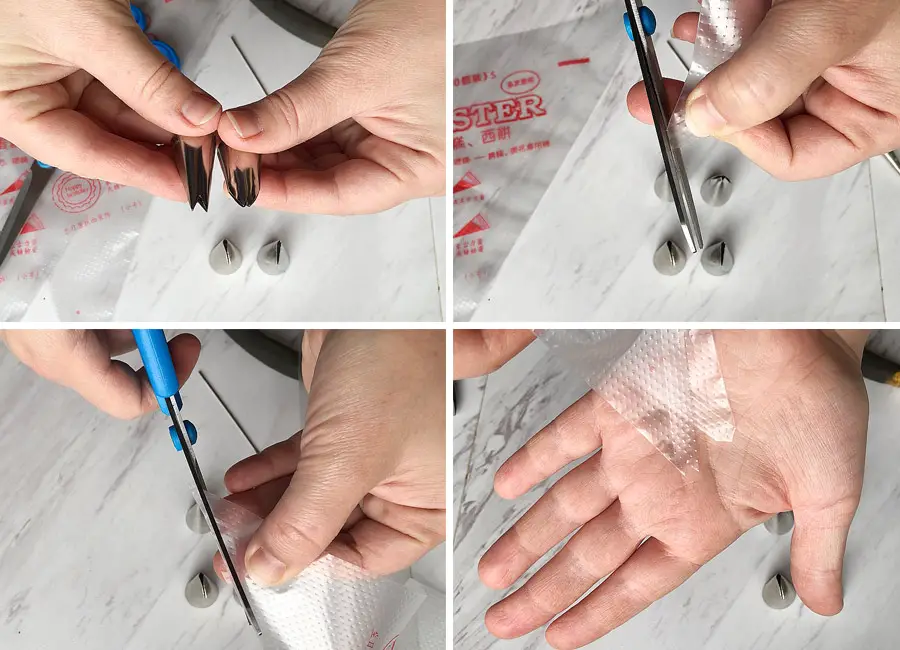
Now let’s talk about the tools that we will need. As I already said, we will only need one petal piping tip number 104. And one of my secrets for making realistic and elegant roses is to squeeze the narrow part of the petal tip just a little bit using pliers. It will help to make a flower petal thinner on top which gives a more realistic look. If you squeeze the petal tip too much, just take a sewing needle and reopen it again.

For piping some leaves, you may need a piping tips number 352 and number 70. If you don’t have leaf tips, don’t worry. Take a piping bag and cut the end in the shape of letter “V” or inverted letter “V” like you can see on the picture.
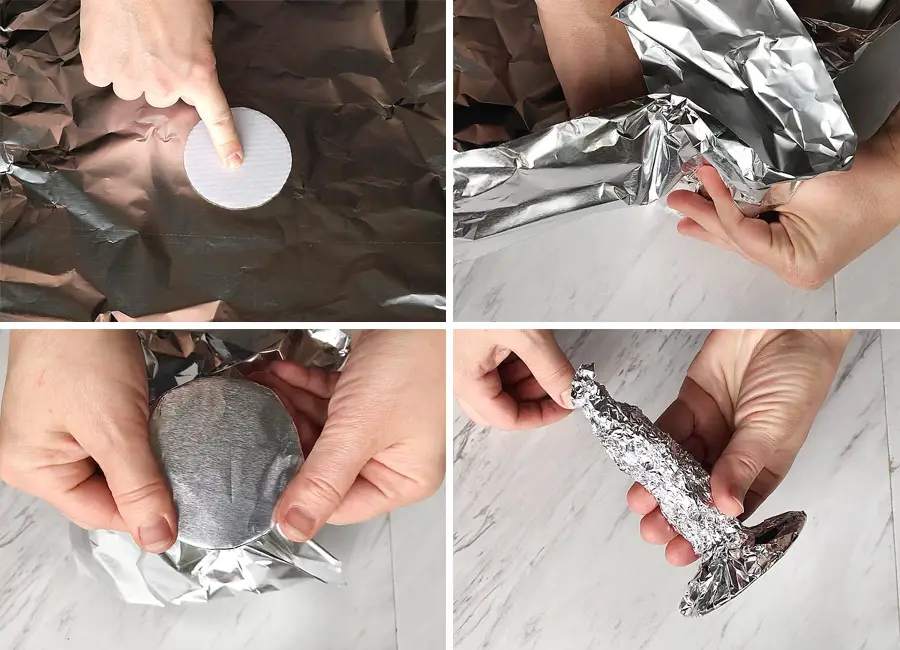
We’ll also need a flower nail. Don’t worry if you don’t have one it’s very easy to make. You will need a cardboard circle about 2-inch wide and a piece of aluminum foil. Place the cardboard in the middle of the foil and fold the foil around it, while not allowing the circle to move. We need it to be flat like a nail head. Then just crumble the rest of the foil into the sharp side of the nail. As a result, you will have a homemade flower nail.
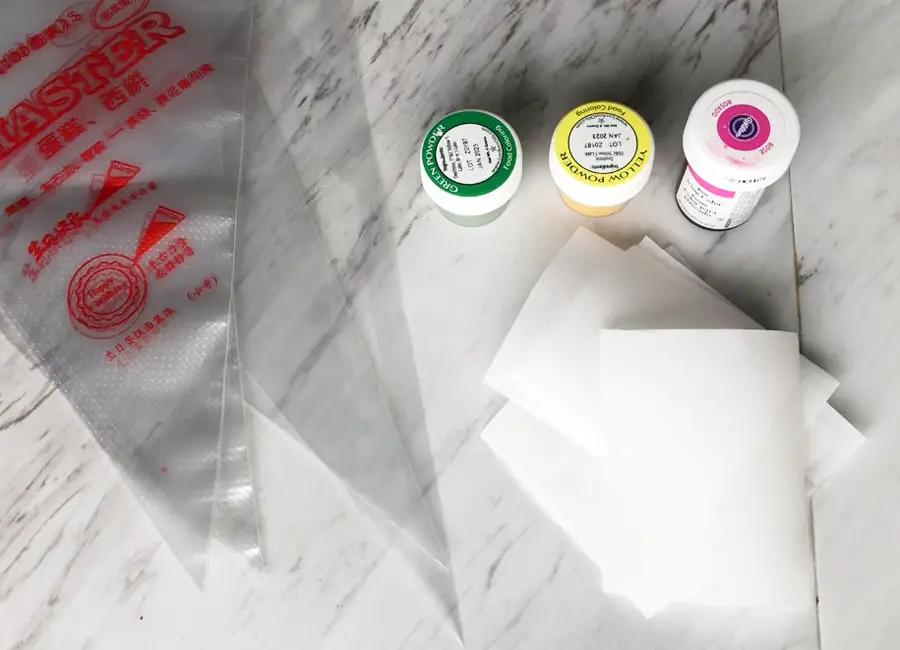
We’ll also need piping bags, parchment paper squares and food colors. You can use gel food colors or powder ones. Since the gel colors are highly concentrated, you don’t need very much of it to get the right color. I use pink gel color for the petals and two powder ones: yellow for the little stamens in the middle of the flower and green for the leaves.
Step 3
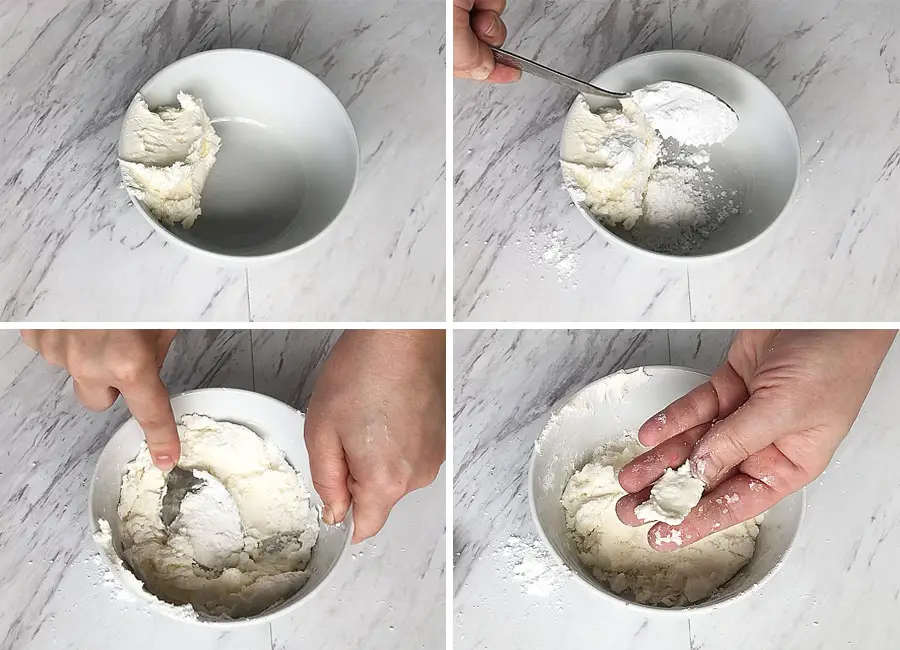
Now let’s color our buttercream, but first, save a small amount of buttercream in a bowl. Add more powdered sugar and mix by hand until you get a play dough consistency. This will be used for the base of our flowers.
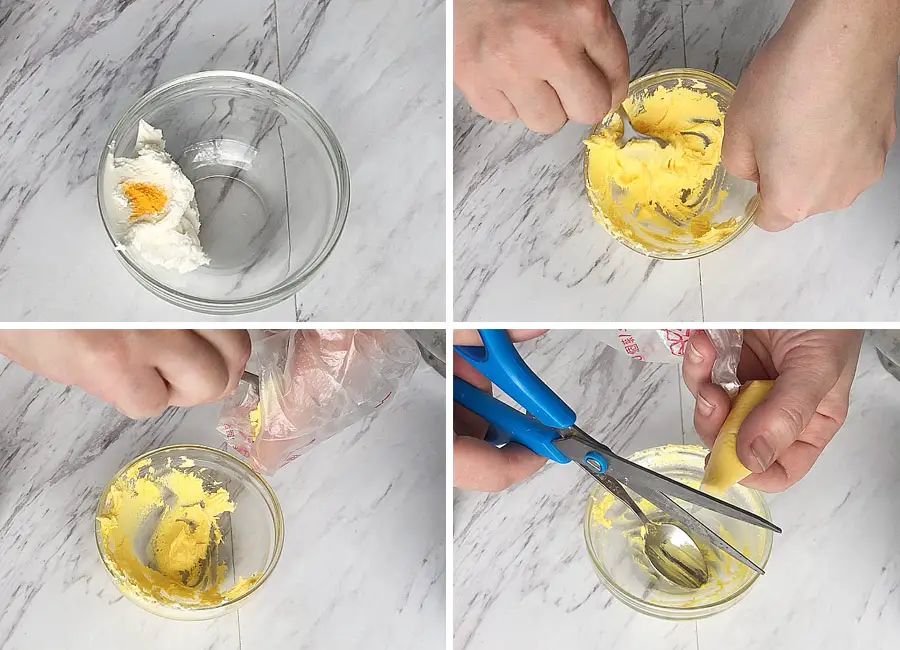
Next, take a couple tablespoons of buttercream and color it with yellow food color. Transfer to the piping bag and cut the very tip of the bag. We only need a little bit of yellow buttercream to pipe the center of the flower.
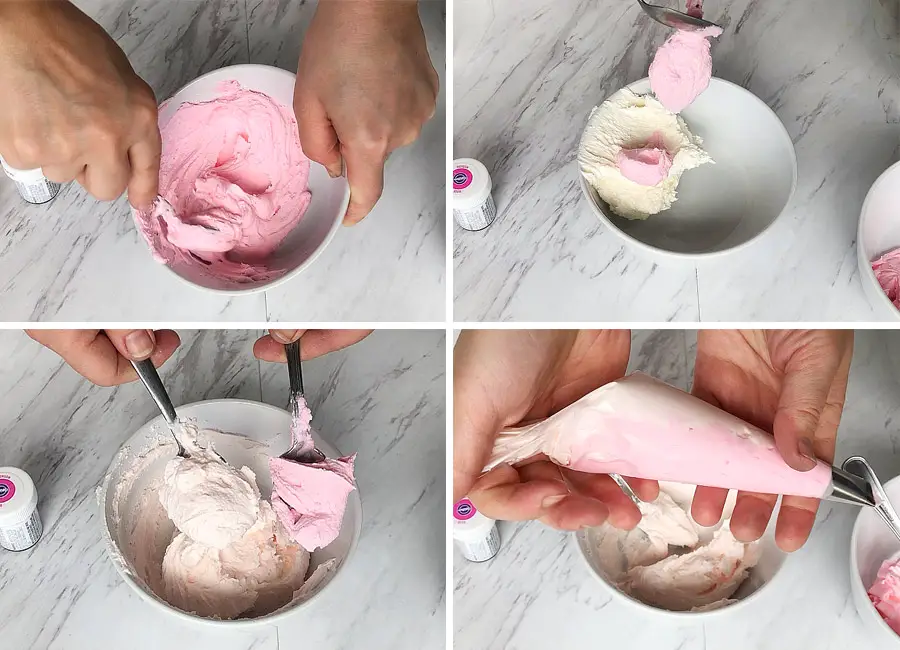
The second secret to make more realistic flowers is to use two tone petals, that’s why we need to mix up two batches of buttercream. One batch I colored in saturated pink, then I took about a teaspoon of my pink buttercream and mixed it with the second batch of the buttercream. That way I got very nice blush pink color. Fit the piping bag with the petal tip and spoon the more saturated frosting into the side with the more open end of the piping tip. Fill the rest of the piping bag with the pale frosting and it’s ready for piping.
And last, I colored some of the buttercream green for my future leaves on the cake.
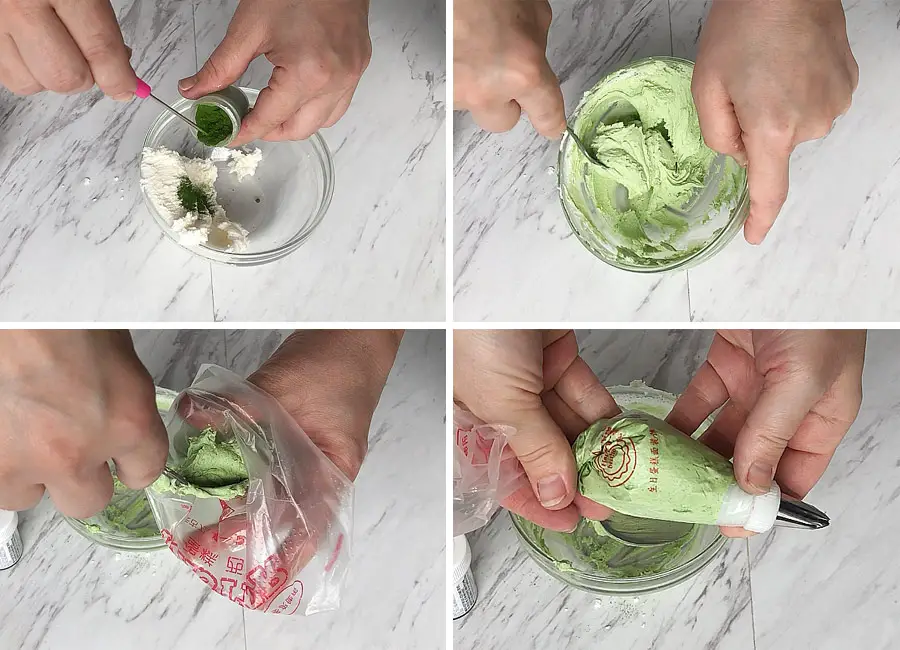
If you’re planning to pipe some white flowers, then don’t forget to save some white buttercream.
And one more thing that’s important to mention is, don’t leave the buttercream uncovered. Because of the big amount of powder sugar, the buttercream will dry out very quickly and you won’t be able to use it for smooth piping.
Step 4
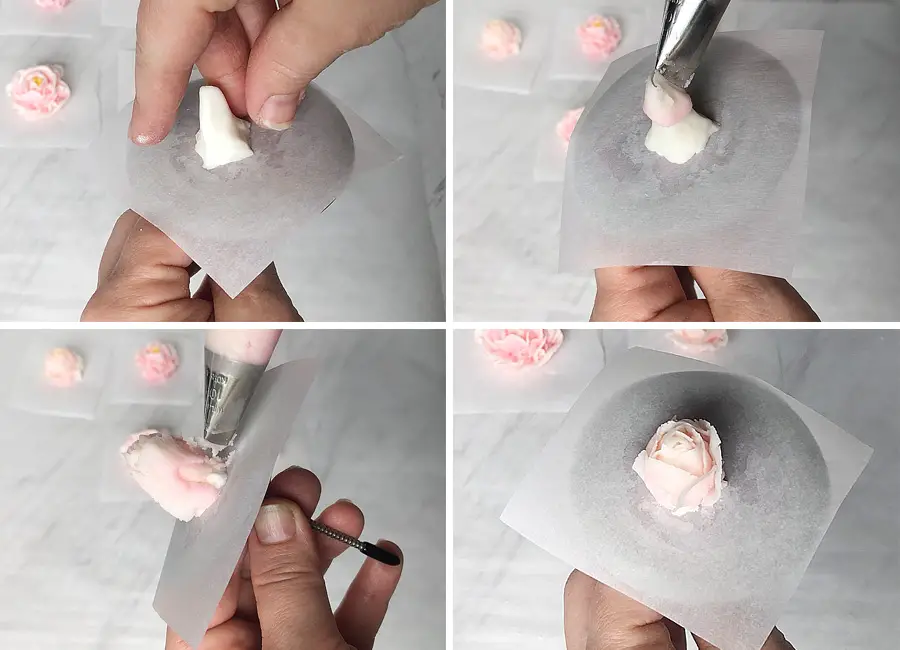
Let’s make our first rose. Squeeze a small amount of buttercream in the middle of the flower nail and place parchment paper square on top. Add a small amount of thick buttercream and form a cone to act as the base.
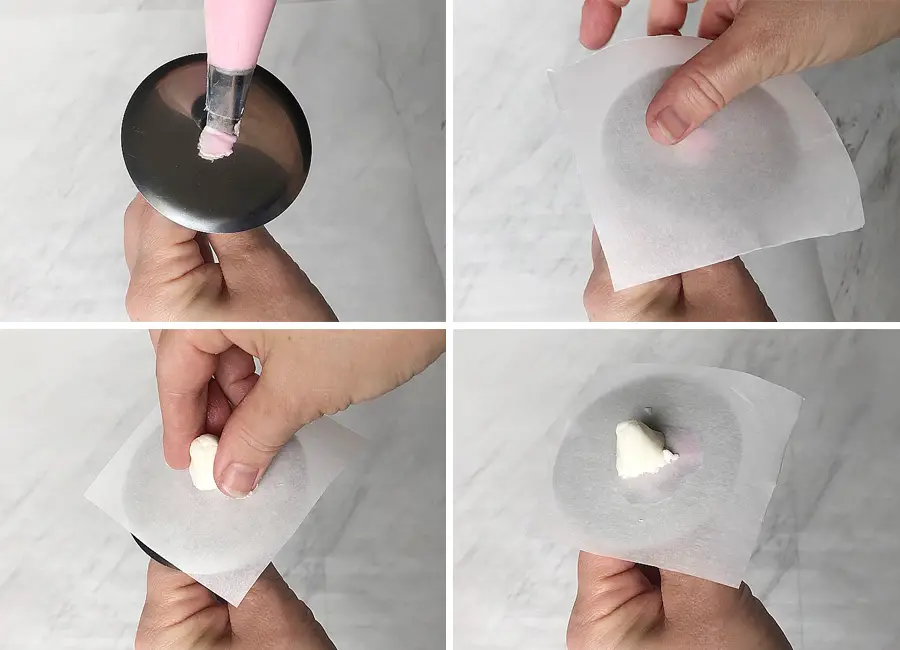
Then pipe the stamens onto the tip of the cone using the yellow buttercream. Starting with the piping bag touching the base, squeeze and lift the bag at the same time then continue lifting but stop squeezing to finish the stamen. With the long edge of the rose tip down, slowly squeeze the piping bag to form one petal, making a rounded n-like (as in the letter n) movement. There will be three petals for the first row.
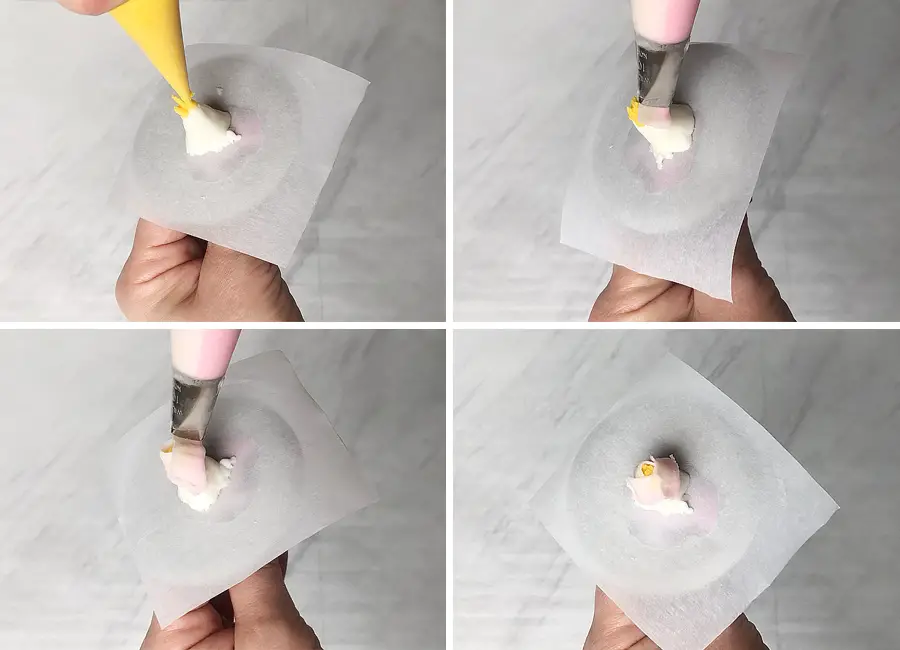
Continue piping arcs that become larger as the rose increases in size. The petals should overlap a bit and the wide end of tip always touches the rose base, so the petals will attach. Keep piping arcs to shape a rose. To make open looking roses pipe the last row of petals in a little bit of an angle. Keep practicing and you will understand how to hold the piping bag, how fast to rotate the flower nail and how to pipe different shape roses.
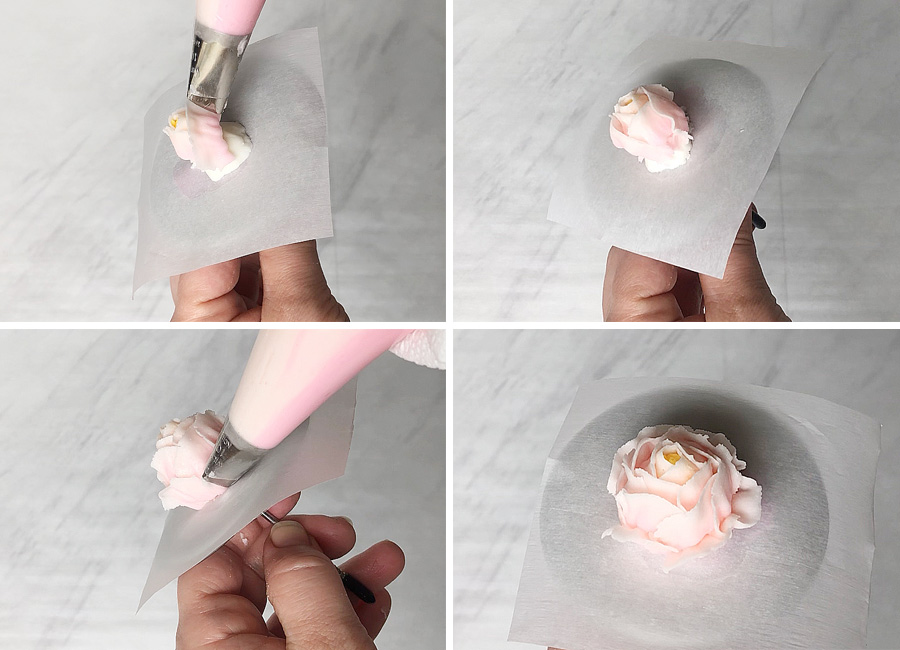
To make buttercream rose with a closed center create a cone-shaped base to work on. Then use the petal tip to pipe a spiral onto the base. After that, it’s the same process of piping the petals that overlap a bit, moving the piping bag up and down to shape the rose.
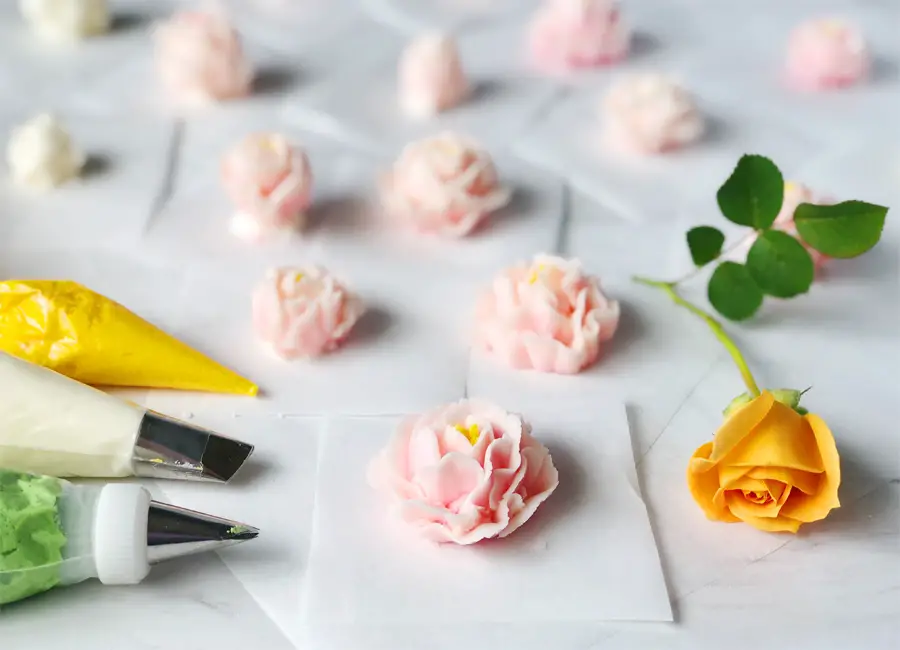
If you’re making flowers in advance, then store them in an airtight container in the refrigerator. If you’re staging the flowers and just need a place for them to hang out while you bake or build the cake, then you can pop them into the freezer or let them seat on the counter.
To transfer the roses onto your cake or cupcakes use a clean pair of scissors to cut the base off and move the flower. It’s best to apply some fresh buttercream onto the dessert to act as glue for the flower.
If my post was useful to you, please let me know in the comment section below.

Piping Buttercream Roses for Beginners
Ingredients
Method
- First,we need to cream the butter. Add the butter to the stand mixer bowl, fitted with a paddle attachment and mix until smooth. Add the sifted powdered sugar in two batches. Beat the mixture until you get a thick consistency and add a few drops of flavoring extract. Increase the speed to medium-high and mix until smooth.Cover the bowl with plastic wrap and set aside.
- We'll only need one petal piping tip number 104. And one of my secrets for making realistic and elegant roses is to squeeze the narrow part of the petal tip just a little bit using pliers. It will help to make a flower petal thinner on top which gives a more realistic look. If you squeeze the petal tip too much, just take a sewing needle and reopen it again.
- For piping some leaves, you may need a piping tips number 352 and number 70. If you don’t have leaf tips, don’t worry. Take a piping bag and cut the end in the shape of letter “V” or inverted letter “V”.
- We’ll also need a flower nail. Don’t worry if you don’t have one it’s very easy to make.You will need a cardboard circle about 2-inch wide and a piece of aluminum foil. Place the cardboard in the middle of the foil and fold the foil around it, while not allowing the circle to move. We need it to be flat like a nailhead. Then just crumble the rest of the foil into the sharp side of the nail. As a result, you will have a homemade flower nail.
- We’ll also need piping bags, parchment paper squares and food colors. You can use gel food colors or powder ones. Since the gel colors are highly concentrated, you don’t need very much of it to get the right color. I use pink gel color for the petals and two powder ones: yellow for the little stamens in the middle of the flower and green for the leaves.
- Save a small amount of buttercream in a bowl. Add more powdered sugar and mix by hand until you get a play dough consistency. This will be used for the base of our flowers.
- Take a couple tablespoons of buttercream and color it with yellow food color. Transferto the piping bag and cut the very tip of the bag. We only need a little bit of yellow buttercream to pipe the center of the flower.
- The second secret to make more realistic flowers is to use two tone petals, that’s why we need to mix up two batches of buttercream. One batch I colored in saturated pink, then I took about a teaspoon of my pink buttercream and mixed it with the second batch of the buttercream. That way I got very nice blush pink color. Fitthe piping bag with the petal tip and spoon the more saturated frosting in to the side with the more open end of the piping tip. Fill the rest of the piping bag with the pale frosting and it’s ready for piping.
- And last, I colored some of the buttercream green for my future leaves on the cake. If you’re planning to pipe some white flowers, then don’t forget to save some white buttercream.
- Let’s make our first rose. Squeeze a small amount of buttercream in the middle of the flower nail and place parchment paper square on top. Add a small amount of thick buttercream and form a cone to act as the base. Then pipethe stamens onto the tip of the cone using the yellow buttercream. Starting with the piping bag touching the base, squeeze and lift the bag at the same time then continue lifting but stop squeezing to finish the stamen.
- With the long edge of the rose tip down, slowly squeeze the piping bag to form one petal, making a rounded n-like (as in the letter n) movement. There will be three petals for the first row.
- Continue piping arcs that become larger as the rose increases in size. The petals should overlap a bit and the wide end of tip always touches the rose base, so the petals will attach. Keep piping arcs to shape a rose.
- To make open looking roses pipe the last row of petals in a little bit of an angle.Keep practicing and you will understand how to hold the piping bag, how fast to rotate the flower nail and how to pipe different shape roses.
- To make buttercream rose with a closed center create a cone-shaped base to work on. Then use the petal tip to pipe a spiral onto the base. After that, it’s the same process of piping the petals that overlap a bit, moving the piping bag up and down to shape the rose.
Notes

Leave a Reply