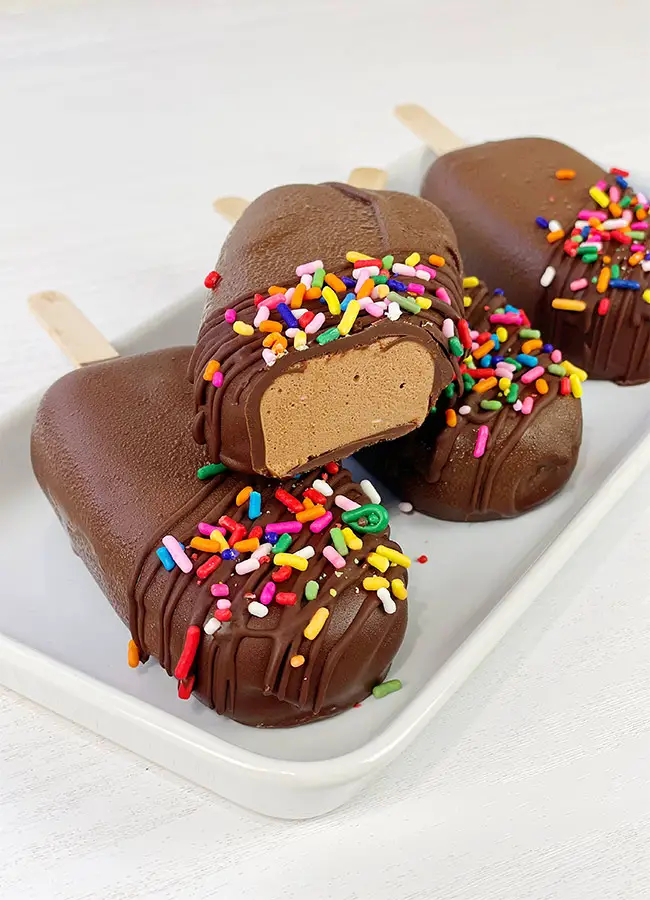
Today I’m going to show you how to make a very simple Chocolate Mousse Dessert that looks like a store bought chocolate ice cream. This no melt ice cream can be a great addition to a kid’s party sweet table, it can be used for decorating cakes or could surprise any chocolate lover with its presentation.
Ingredients for the chocolate mousse:
100g dark chocolate (I use Callebaut dark chocolate)
50 ml heavy cream (for melting the chocolate)
100g cream cheese (at room temperature)
150 ml cold heavy cream (for the whipping cream)
15g (2 tbsp) powdered sugar
1 tsp vanilla extract
7g gelatin powder
35 ml water
Ingredients for the chocolate glaze:
250g dark chocolate
40g canola oil
Step 1
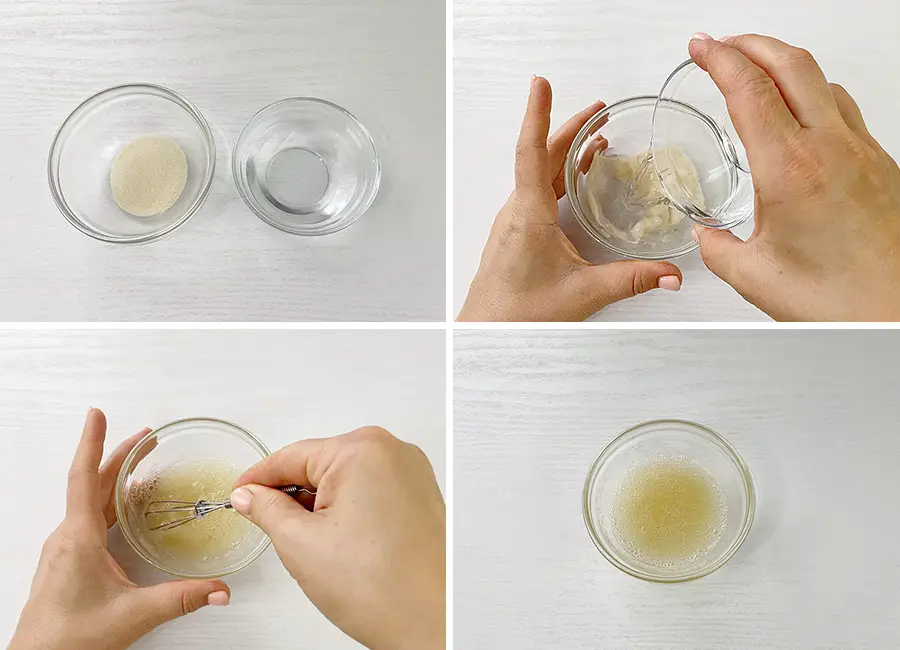
Combine the gelatin powder with water and mix well. Let it sit for about 15 minutes.
Step 2
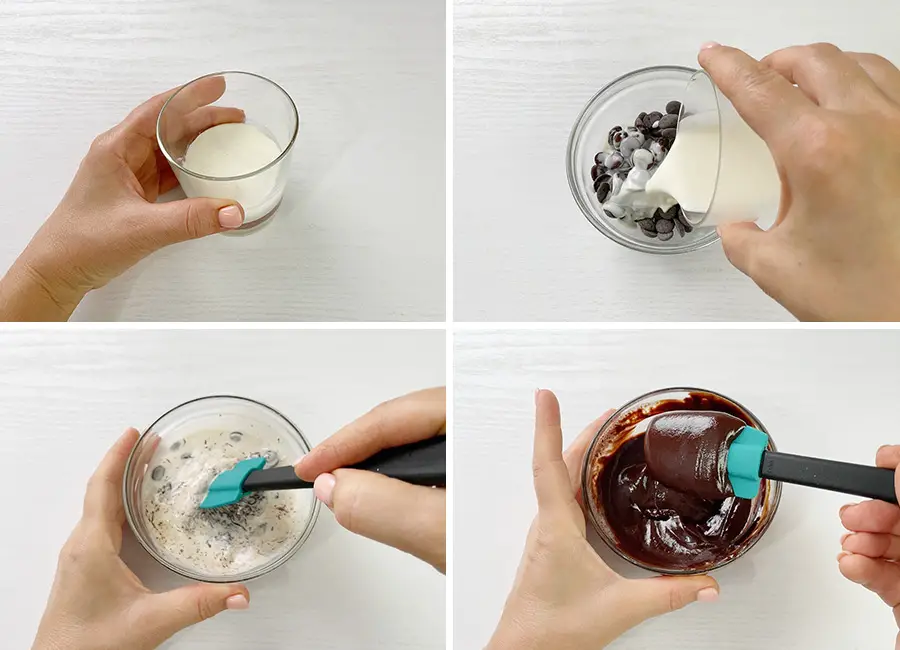
Using a microwave, heat the smaller portion of heavy cream. Cover the chocolate with hot cream, let it sit for two minutes and mix, until the chocolate has melted. If you can still see little pieces of chocolate, warm the mixture up in the microwave for 5-10 seconds and stir again.
Step 3
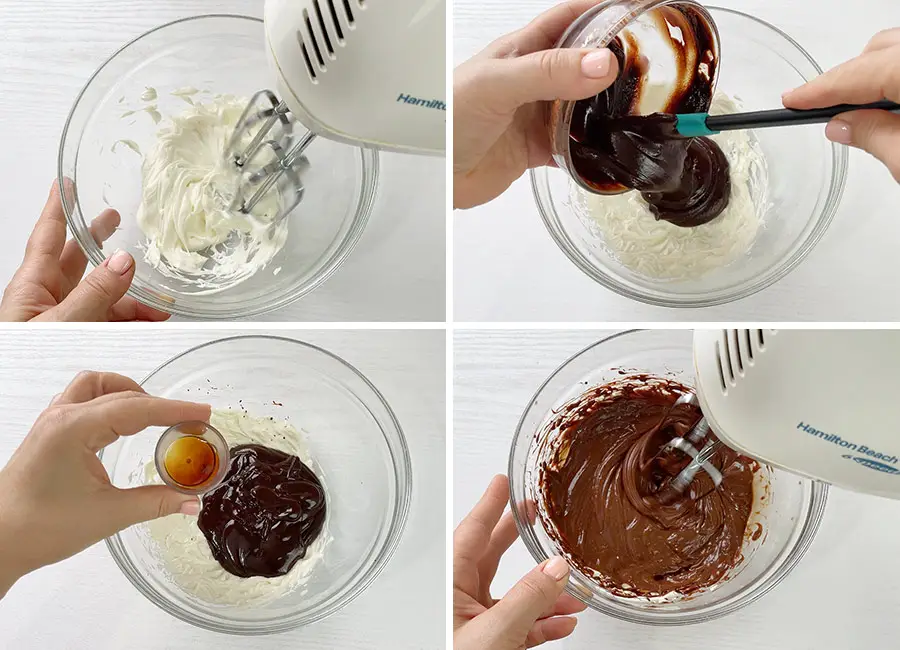
Place the cream cheese in a mixing bowl and using a hand mixer, whisk for one minute. Add the chocolate mixture, vanilla extract and whisk again.
Step 4
Next, we need to dissolve the gelatin by microwaving it for 10 seconds. Add the liquid gelatin to the chocolate mixture and whisk one more time.
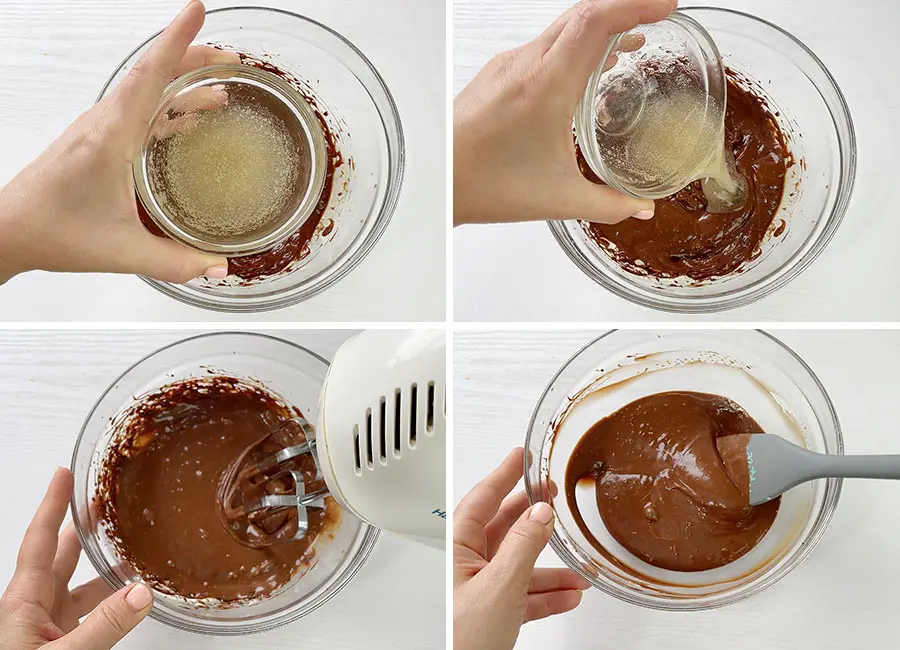
Step 5
Next, combine the cold heavy cream with the powdered sugar and using a hand mixer whisk until soft picks have formed or until it looks like melted ice cream.
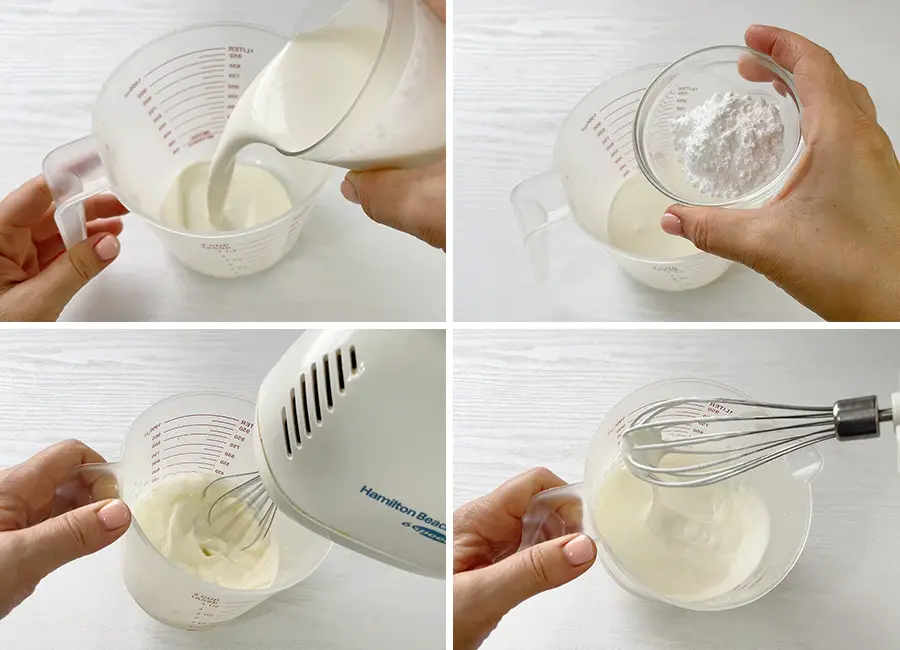
Step 6
Add the whipped cream to the chocolate mixture in 2-3 batches, mixing well after each addition. Transfer the chocolate mousse into a piping bag.
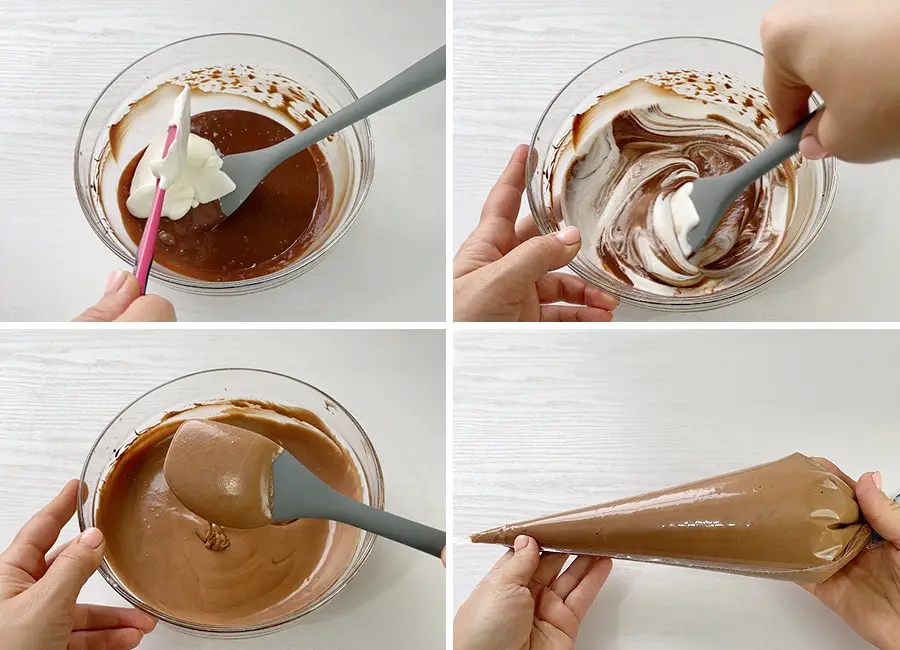
Step 7
Today I will use this popsicle silicone mold that I bought on Amazon. It comes with 2 packs of popsicle molds with silicone lids and 50 pieces of wooden sticks.
First, we need to insert the sticks into each slot. Then carefully fill up each cavity with the chocolate mousse. From the specified amount of the ingredients I got 7 chocolate popsicles. Be sure to tap the silicone mold on the counter a few times to release any large air pockets. Then, place the molds in the freezer for several hours.
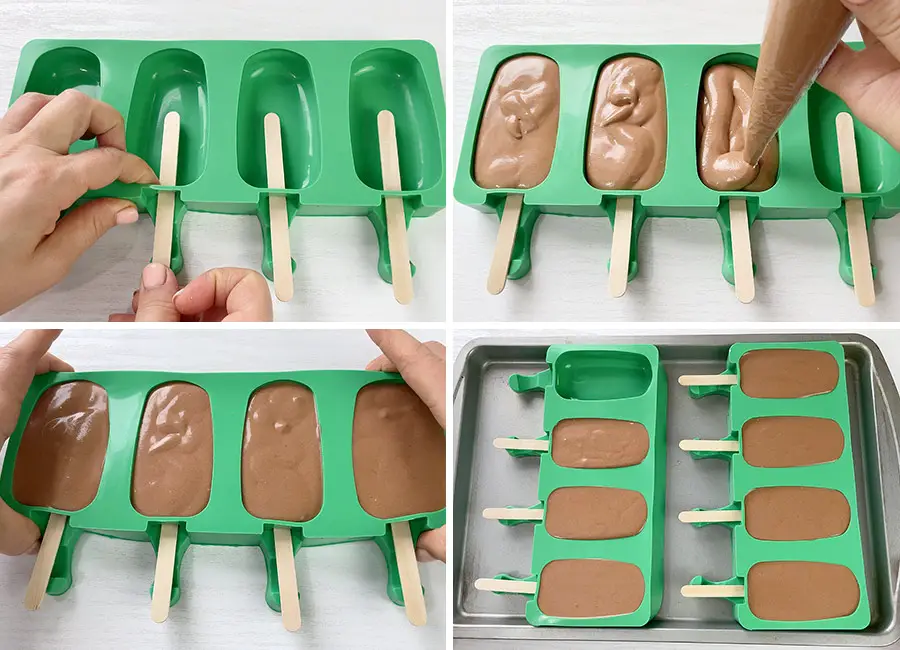
Step 8
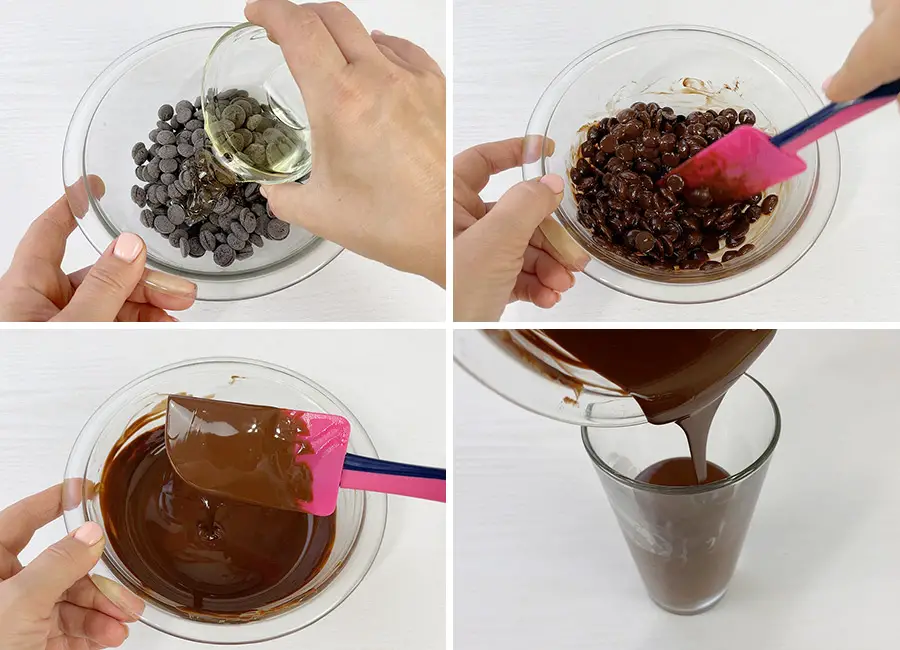
When the mousse popsicles are completely frozen, we can make the chocolate glaze. Pour the oil over the chocolate and microwave it for 20 seconds, then take the bowl out and give it a stir. Place the bowl back in the microwave and repeat the process of cooking for another 20 seconds, stopping, stirring and returning it to the microwave until the chocolate has melted. Pour the melted chocolate into a tall glass and let it cool to room temperature.
Step 9
Take the frozen mousse popsicle out of the silicon mold one at a time. If you work in a hot environment, it’s best to place the silicone mold back in the freezer. Also, don’t forget to use gloves for this step, to avoid any fingerprints on the popsicles and to prevent it from melting in your hands.
Dip the popsicle in the chocolate, allow the excess chocolate to drip off and place it on the prepared parchment paper or a teflon sheet. The coated chocolate will set within seconds due to a popsicle temperature. Repeat the process with the rest of the popsicles.
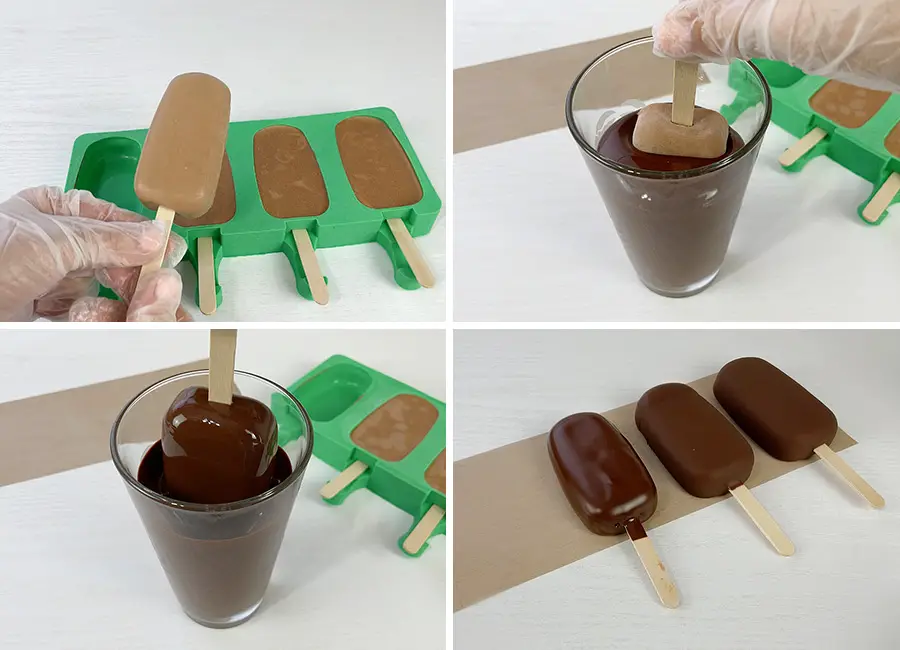
*When the amount of chocolate reduces, use a spoon to help cover the popsicle around the wooden stick. You can also warm up the chocolate for about 5-10 seconds, if it becomes too thick.
To decorate my chocolate mousse popsicles, I transferred the leftover chocolate glaze into a piping bag, cutted the tip of the bag and drizzled the chocolate on top of the popsicles. Then, sprinkled some edible sprinkles on top.
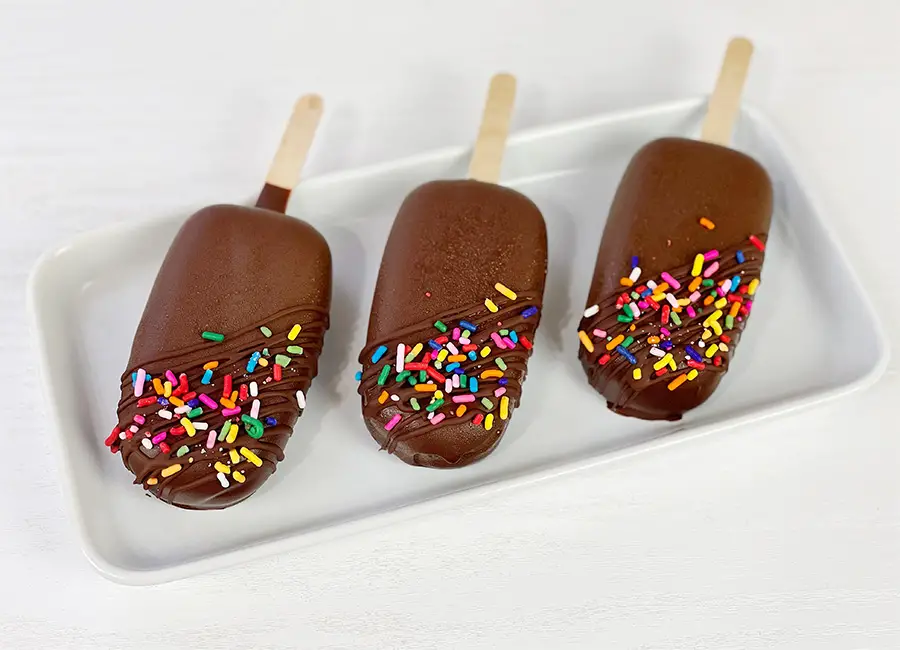
You can enjoy these chocolate mousse popsicles frozen or let them thaw in the refrigerator.
THIS POST CONTAINS AFFILIATE LINKS, WHICH MEANS I MAKE A SMALL COMMISSION AT NO EXTRA COST TO YOU. PLEASE SEE MY FULL DISCLOSURE POLICY FOR DETAILS.
Make sure to watch my YouTube video recipe for step-by-step instructions and see how I make this easy, Chocolate Mousse Popsicles! Want new recipe updates? Make sure to subscribe to my YouTube Channel!
Tips for making Chocolate Mousse Popsicles
- In this recipe I used Knox powdered gelatin 225 bloom. To get the same result, use the gelatin with the same strength.
- Make sure to use room temperature cream cheese and very cold heavy cream for whipping.
- Always whip the cream into soft peaks, but no more than that. If it’s too stiff, you can’t fold it in easily, creating a sandy texture.
- Use good quality chocolate. I use Callebaut dark chocolate. It’s a three-drop chocolate that has exactly the right cocoa butter content to produce the perfect end results.
How to store chocolate mousse popsicles
- Unglazed mousse popsicles can be stored in an airtight container in the freezer for up to 2 months.
- Chocolate covered mousse popsicles can be stored in the fridge for up to 3-4 days.
Recommended tools and ingredients
Callebaut Dark Chocolate
Knox Gelatin Powder
Popsicle Silicone Mold
Hand Mixer
Mixing Bowl
Piping Bag
Teflon Sheet
Pin for Later

How to Make Chocolate Mousse Popsicles
Ingredients
Method
- Combine the gelatin powder with water and mix well. Let it sit for about 15 minutes.
- Using a microwave, heat the smaller portion of heavy cream. Cover the chocolate with hot cream, let it sit for two minutes and mix, until the chocolate has melted. If you can still see little pieces of chocolate, warm the mixture up in the microwave for 5-10 seconds and stir again.
- Place the cream cheese in a mixing bowl and using a hand mixer, whisk for one minute. Add the chocolate mixture, vanilla extract and whisk again.
- Next, we need to dissolve the gelatin by microwaving it for 10 seconds. Add the liquid gelatin to the chocolate mixture and whisk one more time.
- Next, combine the cold heavy cream with the powdered sugar and using a hand mixer whisk until soft picks have formed or until it looks like melted ice cream.
- Add the whipped cream to the chocolate mixture in 2-3 batches, mixing well after each addition. Transfer the chocolate mousse into a piping bag.
- Today I will use this popsicle silicone mold that I bought on Amazon. First, we need to insert the sticks into each slot. Then carefully fill up each cavity with the chocolate mousse. From the specified amount of the ingredients I got 7 chocolate popsicles. Be sure to tap the silicone mold on the counter a few times to release any large air pockets. Then, place the molds in the freezer for several hours.
- When the mousse popsicles are completely frozen, we can make the chocolate glaze. Pour the oil over the chocolate and microwave it for 20 seconds, then take the bowl out and give it a stir. Place the bowl back in the microwave and repeat the process of cooking for another 20 seconds, stopping, stirring and returning it to the microwave until the chocolate has melted. Pour the melted chocolate into a tall glass and let it cool to room temperature.
- Take the frozen mousse popsicle out of the silicon mold one at a time. If you work in a hot environment, it’s best to place the silicone mold back in the freezer. Also, don't forget to use gloves for this step, to avoid any fingerprints on the popsicles and to prevent it from melting in your hands.Dip the popsicle in the chocolate, allow the excess chocolate to drip off and place it on the prepared parchment paper or a teflon sheet. The coated chocolate will set within seconds due to a popsicle temperature. Repeat the process with the rest of the popsicles.*When the amount of chocolate reduces, use a spoon to help cover the popsicle around the wooden stick. You can also warm up the chocolate for about 5-10 seconds, if it becomes too thick.
- To decorate my chocolate mousse popsicles, I transferred the leftover chocolate glaze into a piping bag, cutted the tip of the bag and drizzled the chocolate on top of the popsicles. Then, sprinkled some edible sprinkles on top.
Notes
- In this recipe I used Knox powdered gelatin 225 bloom. To get the same result, use the gelatin with the same strength.
- Make sure to use room temperature cream cheese and very cold heavy cream for whipping.
- Always whip the cream into soft peaks, but no more than that. If it’s too stiff, you can’t fold it in easily, creating a sandy texture.
- Use good quality chocolate. I use Callebaut dark chocolate. It’s a three-drop chocolate that has exactly the right cocoa butter content to produce the perfect end results.
- Unglazed mousse popsicles can be stored in an airtight container in the freezer for up to 2 months.
- Chocolate covered mousse popsicles can be stored in the fridge for up to 3-4 days.
You may also like:


Leave a Reply