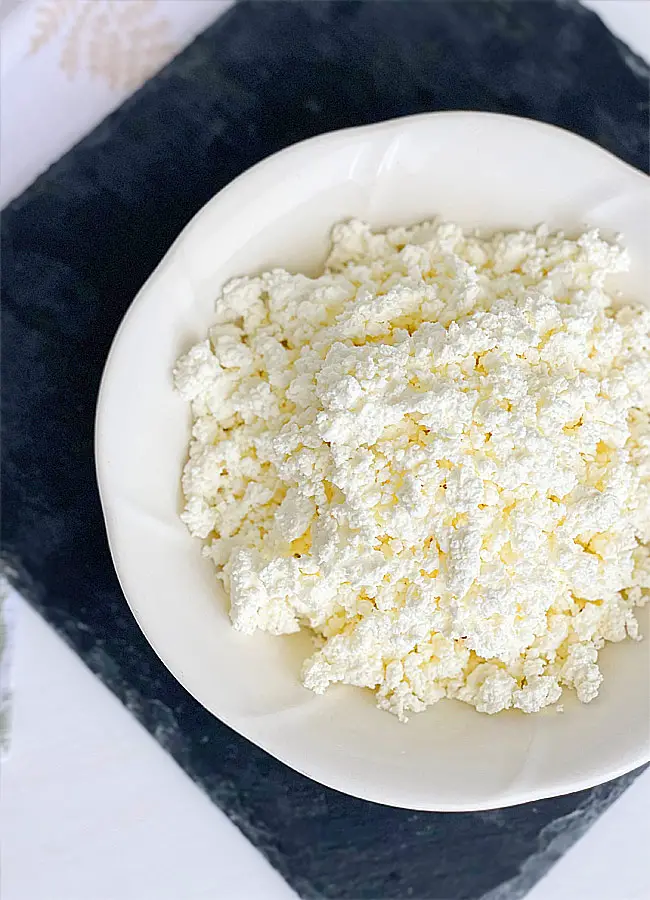
Today I want to share with you the process of making farmers cheese. Growing up in Russia, farmers cheese or Tvorog , that’s what it’s called in Russian, it was a big part of our family diet. My grandparents lived on a farm and my grandma always made yogurt, sour cream, fermented baked milk, hard cheese and, of cause, Tvorog or farmers cheese.
When I moved to the United states, one of the things I missed was farmers cheese. Store-bought ricotta cheese or cottage cheese have nothing to do with the real taste of farmers cheese. So, I started to make it myself like my gramma use to do it when I was a little.
Farmers cheese is a healthy milk product that is good to have in the refrigerator. It’s high in calcium, it contains protein and probiotic cultures.
The reason I decided to make this post is because Farmers cheese doesn’t only make a great snack on its own, but can also be used to make cheese fillings for buns, pies or crapes (blintzes), you can make sweet dough based on it, cheesecakes, make stuffed pasta or lasagna, crumble on top of salads and much more.
Cheesemaking also produces a lot of whey which I will tell you about later in this post.
Ingredients:
1-gallon (3.78 liters) whole pasteurized milk
200g whole milk plain yogurt
150g sour cream
Step 1
To make the farmers cheese we’ll need milk, I used store-bought whole milk. It’s better to buy whole pasteurized milk instead of ultra-pasteurized, as the cheese will have a lot of body and flavor. We’ll also need a big pot, sieve and a cheesecloth.
Pour the milk into a big pot. It doesn’t matter what temperature milk you are using because we’re going to warm it up. Turn on the stove to low heat, place the pot on top and cover with a lid. Warm it up for 15 to 20 minutes.

Step 2
To start the fermentation process, I like to use a blend of whole milk plain yogurt and sour cream. You can also use soured milk Kefir, which can also be bought in the grocery store, but in my opinion, using plain yogurt and sour cream together makes a more flavorful and delicate farmers cheese.
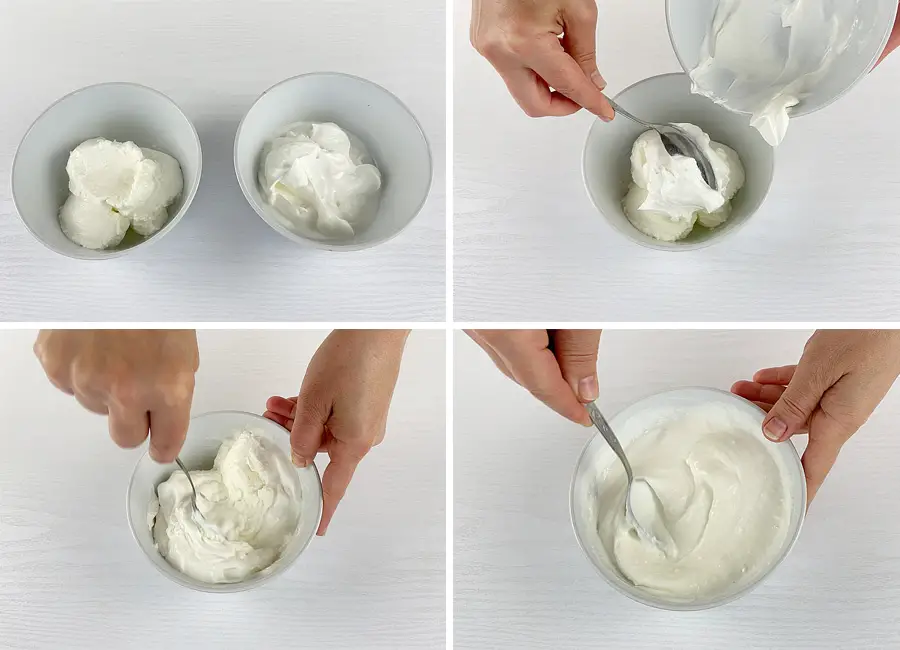
We need to combine the sour cream and plain yogurt. Another thing that I like to do is to warm them up in the microwave for 30 to 60 seconds. The mixture should be approximately the same temperature as the milk, and it will also be more liquid and easier to stir in the milk.
Step 3
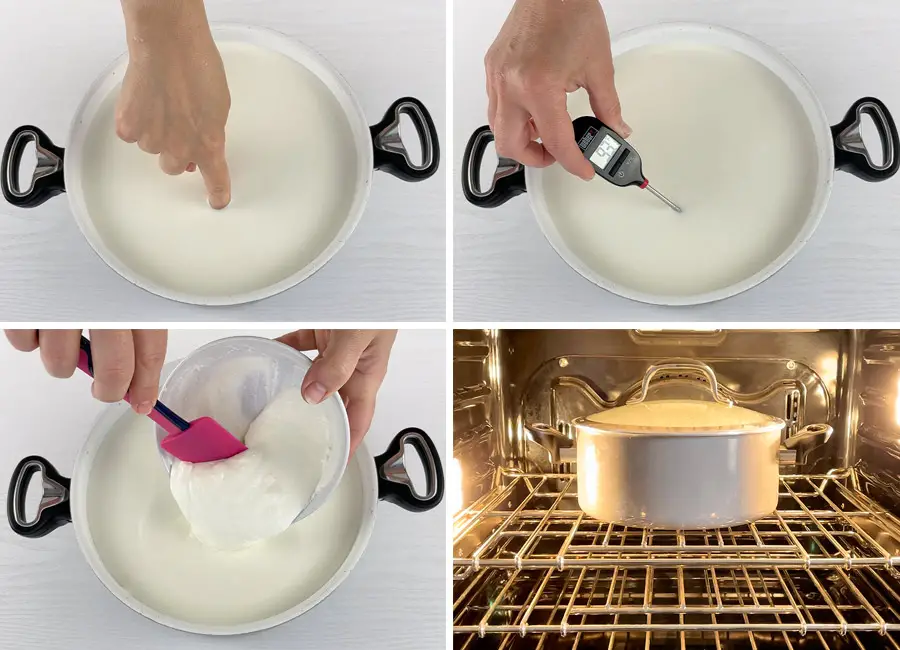
You can check the temperature of the milk with your finger, it should not burn the skin, or you can use a thermometer. The temperature of the milk should be somewhere in between 92- and 95-degrees Fahrenheit. Next, pour the yogurt mixture into the milk and mix everything very well. Cover the pot with a lid and place it in a warm place for up to 24 hours. I like to preheat my oven to 120 degrees Fahrenheit, turn it off and place the pot inside.
Step 4
This is how the milk should look after the fermentation process. It’s been about 20 hours and my milk has a thick consistency, almost like the consistency of store-bought yogurt, and it has a nice “sour” smell and taste.

Step 5
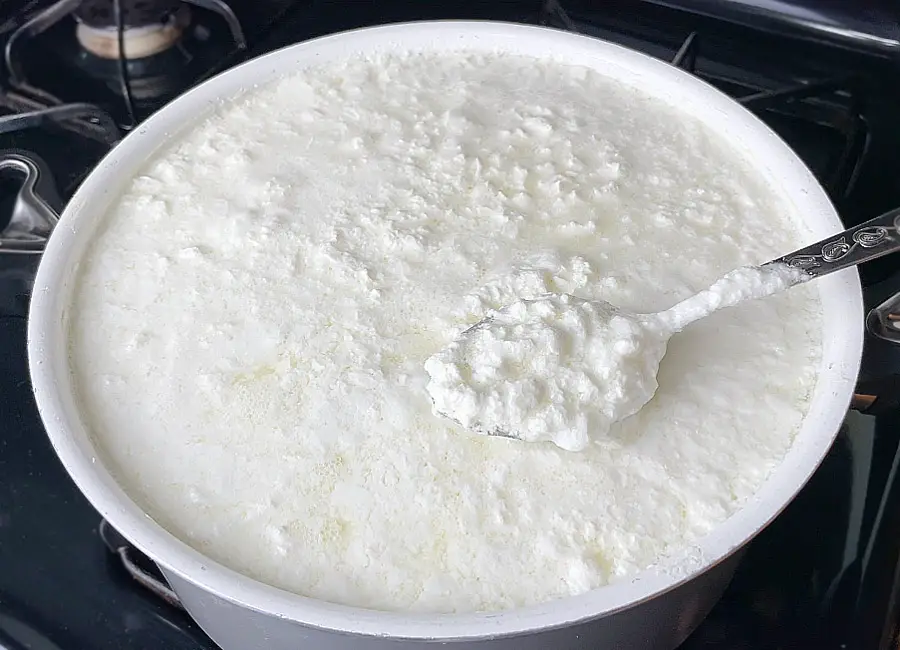
The next step is to warm up the milk over low heat to separate it into whey and soft curds. Cover the pot with a lid and heat it for 20 minutes.
*I want to bring to your attention that the milk should not be boiled. If you think that by increasing the heat you will make the process faster, you’re mistaken. If the milk boils, the cheese will have a rubbery structure.
This is how it looks 20 minutes later. As you can see, the whey started to separate from the curds. But most of the mixture still looks like yogurt. Cover it with a lid and let it sit for another 20 minutes.
Step 6
Now it’s been 40-minute total and as you can see, we have much more way and some curd formed on top. But on the bottom, it still looks like yogurt. So, I will let it sit for another 10 minutes.
Step 7
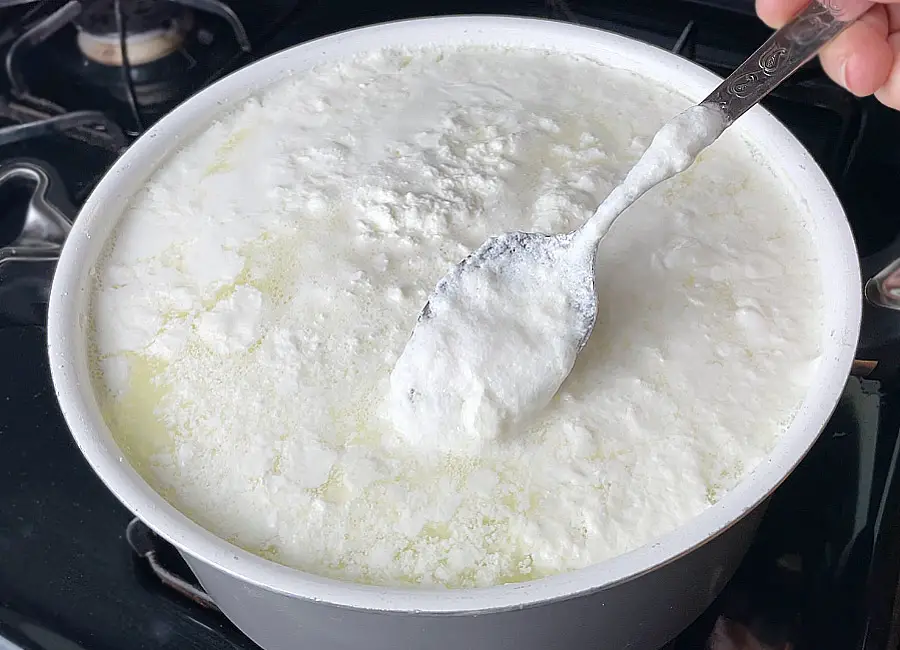
50 minutes passed in total and as you can see all the milk has separated into whey and curds. We can turn off the heat.
Step 8
Next, place a sieve on top of a large bowl and cover it with the cheesecloth folded into two layers. Pour the hot cheese mixture into a sieve. Let it sit until most of the whey drains into the bowl.

Step 9
Next, we need to tie the corners of the cheesecloth and hang it to drain the rest of the whey. Usually, I tie the cheesecloth to the spout of the kitchen faucet and let the leftover whey drip into the sink. You can also use a wooden stick. Tie the cheesecloth around the stick and hang it above a deep pot. Make sure that the cheesecloth doesn’t touch the bottom of the pot.
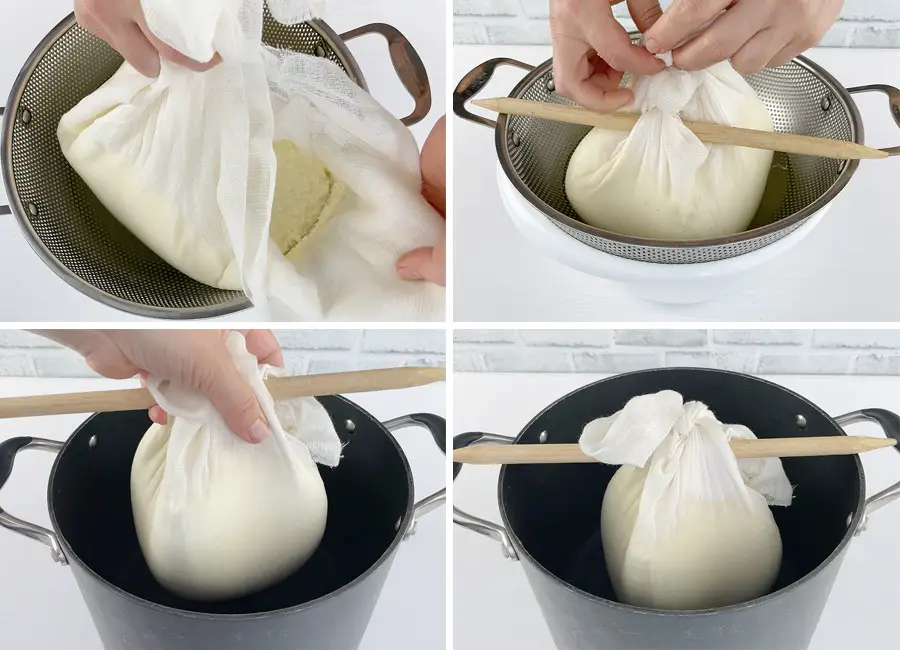
*The more whey will drain out, the drier the farmers cheese will be. I usually let it hang for 3 to 4 hours. I like my cheese on the dry side, that way I can use it in baking or eat it with a dash of sour cream.
Step 10
After 3 hours my farmers cheese is ready. Usually I’m transferring it to an airtight container and keeping it refrigerated for up to a week. From a gallon of whole milk, I got 965 grams of farmers cheese.
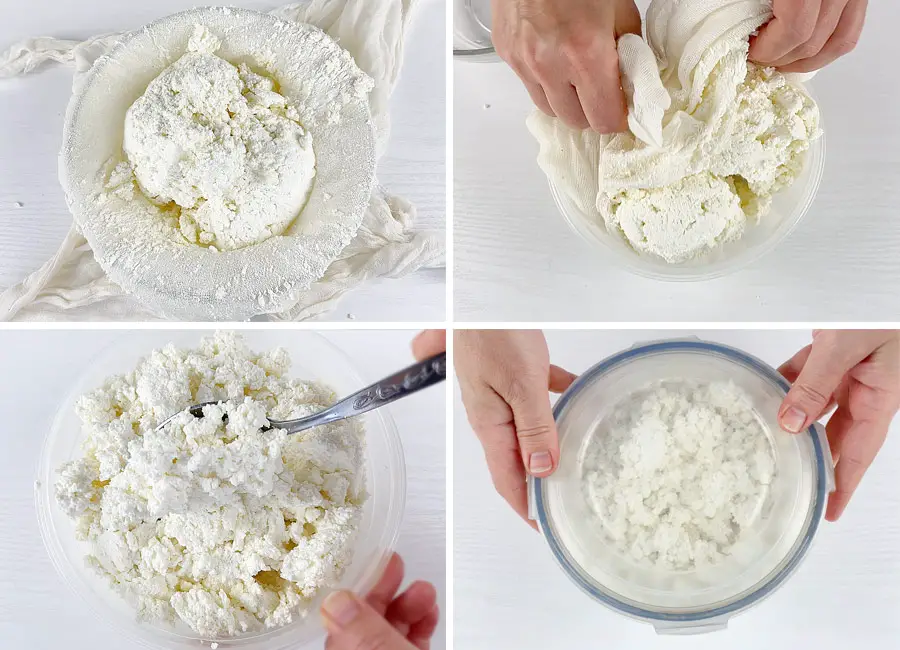
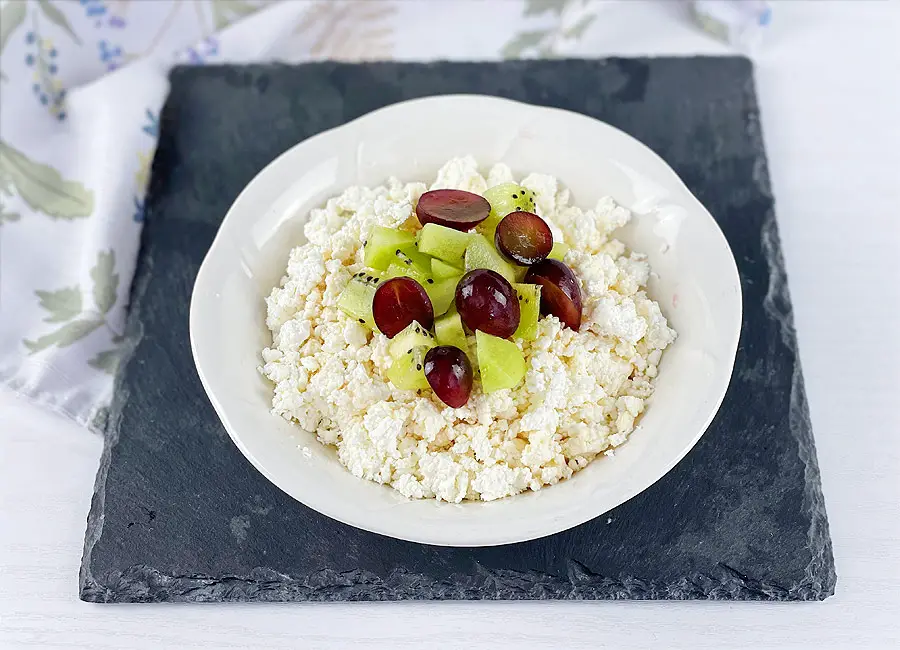
I just love this fresh mild cheese with a crumbly texture and subtle flavor, and I can’t wait to make my kids favorite farmers cheese pancakes or Syrniki, what how they called in Russia.
______________________________________________________________________________________
The Whey
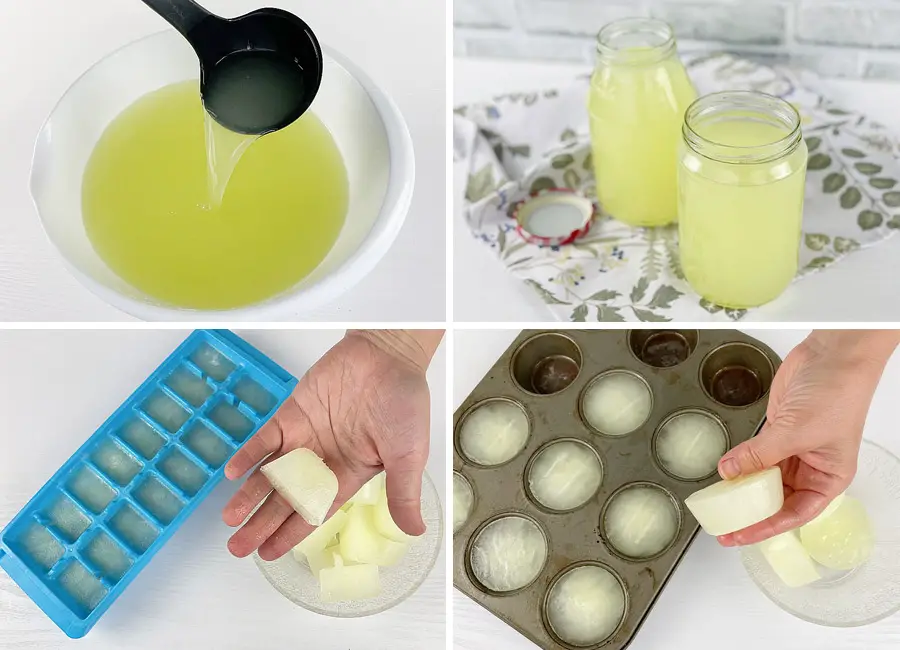
Now let’s talk about the whey. Some will call the whey “liquid gold”. It has multiple health benefits and contains different types of vitamin, minerals, and more. You can store it in a glass jars or a sealed container in the refrigerator for up to one week.
- You can use it for making Whey Bread, cook oatmeal, quinoa or lentils in it, soak beans, grains and nuts, make a sourdough starter, make a salad dressing or marinade meat in it.
- You can also freeze it in the ice cube mold and add it to your protein shakes and smoothies, make a face mask with it.
- You can freeze it in a muffin tin and use the whey as a starter in the next batch of farmers cheese. I use about two cups of the whey for a gallon of milk. And it’s only a small part of thing that you can use the whey for.
Notes:
It’s better to use whole pasteurized milk instead of ultra-pasteurized, as the cheese will have a lot of body and flavor.
2 percent milk will also yield good results, even though the cheese will be thinner and less rich in flavor.
Do not use expired milk, thinking of speeding up the process.
For more dry Farmers Cheese, hang the cheesecloth and let the whey drip for several hours.
Store the Farmers cheese in an airtight container in the refrigerator for up to a week.
Keep the fresh whey refrigerated in a tightly sealed glass jar or container for up to 1 week.
You can freeze farmer cheese wrapped in a plastic food wrap and placed in a ziplock freezer bag. Upon thawing it, however, the texture won’t be the same but a bit crumblier.
This post may contain affiliate sales links. Please see my Full Disclosure Policy for details.

Farmers Cheese Recipe
Ingredients
Method
- Pour the milk into a big pot.Turn on the stove to low heat, place the pot on top and cover with a lid. Warm it up for 15 to 20 minutes.
- Combine the sour cream and plain yogurt then warm them up in the microwave for 30 to 60 seconds. The mixture should be approximately the same temperature as the milk, and it will also be more liquid and easier to stir in the milk.
- You can check the temperature of the milk with your finger, it should not burn the skin, or you can use a thermometer. The temperature of the milk should be somewhere in between 92- and 95-degrees Fahrenheit.Next, pour the yogurt mixture into the milk and mix everything very well. Cover the pot with a lid and place it in a warm place for up to 24 hours. I like to preheat my oven to 120 degrees Fahrenheit, turn it off and place the pot inside.
- After about 20 hours and my milk has a thick consistency, almost like the consistency of store-bought yogurt, and it has a nice “sour” smell and taste.
- The next step is to warm up the milk over low heat to separate it into whey and soft curds. Cover the pot with a lid and heat it for about 50 minutes.*I want to bring to your attention that the milk should not be boiled. If you think that by increasing the heat you will make the process faster, you’re mistaken. If the milk boils, the cheese will have a rubbery structure.
- Next, place a sieve on top of a large bowl and cover it with the cheesecloth folded into two layers. Pour the hot cheese mixture into a sieve. Let it sit until most of the whey drains into the bowl.
- Next, we need to tie the corners of the cheesecloth and hang it to drain the rest of the whey. Usually, I tie the cheesecloth to the spout of the kitchen faucet and let the leftover whey drip into the sink.You can also use a wooden stick. Tie the cheesecloth around the stick and hang it above a deep pot. Make sure that the cheesecloth doesn’t touch the bottom of the pot.
- After 3 hours my farmers cheese is ready. Usually I’m transferring it to an airtight container and keeping it refrigerated for up to a week. From a gallon of whole milk, I got 965 grams of farmers cheese.




Leave a Reply