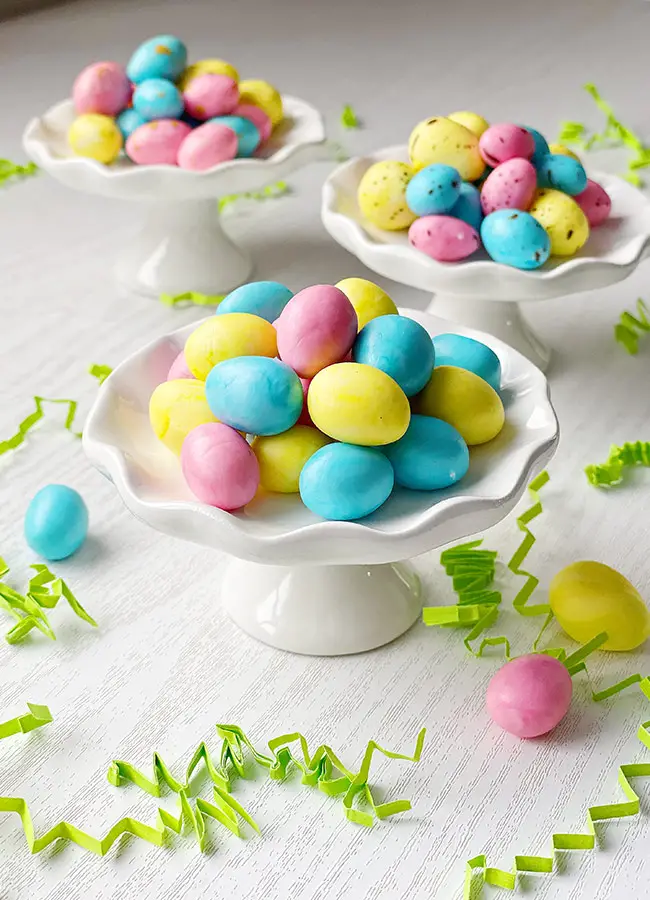
Today I’m making Marshmallow Candy Eggs. These mini candy eggs are very easy to make. They only have three ingredients and they’re perfect for decorating sweet Easter treats.
Ingredients:
100g marshmallows
140-160g sifted powdered sugar
20g butter
Gel food colors
THIS POST CONTAINS AFFILIATE LINKS, WHICH MEANS I MAKE A SMALL COMMISSION AT NO EXTRA COST TO YOU. PLEASE SEE MY FULL DISCLOSURE POLICY FOR DETAILS.
Step 1
In a large mixing bowl combine the marshmallows and butter. Place the bowl in the microwave and heat it for one minute. The marshmallows will melt and increase in volume. Give it a stir to combine them with the butter.
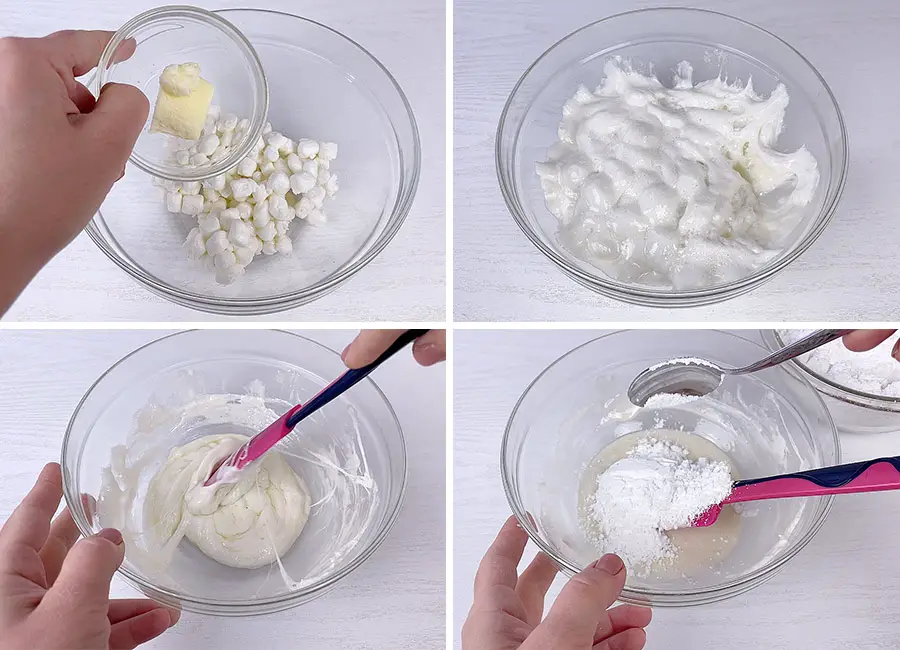
*If you’re making one color eggs, add some gel food color right now before adding the powdered sugar. I’ll do it a little bit later.
Step 2
Next, add a few tablespoons of powdered sugar and keep mixing the marshmallow mixture. I highly recommend using sifted powdered sugar to avoid any sugar lumps. Keep adding the powdered sugar and when it starts to be hard to mix with a spatula, start kneading the marshmallow dough with your hands.
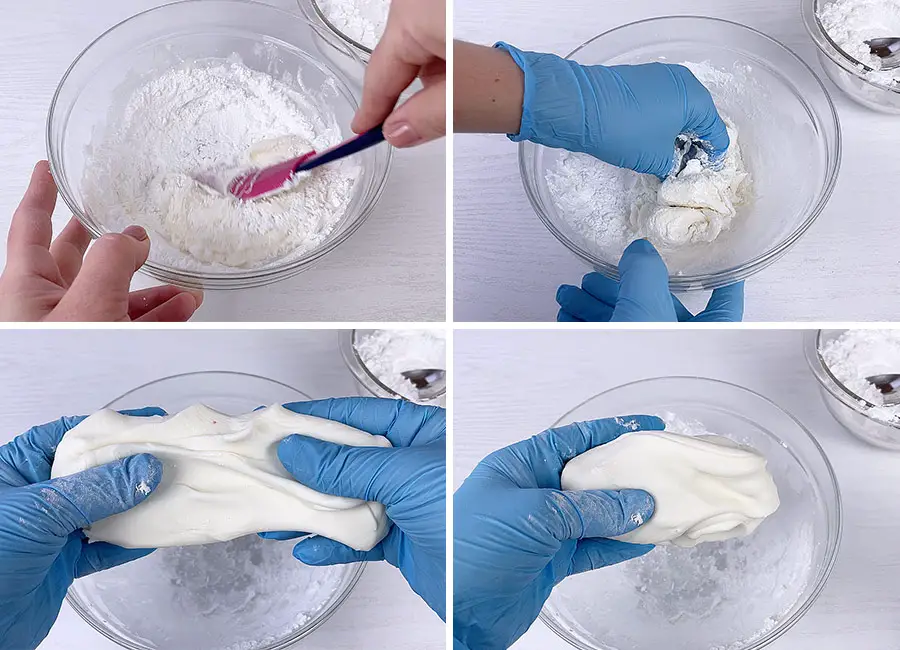
*It’s hard to give you an exact amount of powdered sugar in this recipe because everyone uses a different brand, so focus on the consistency of the marshmallow dough. It should look like a freshly opened playdough and be comfortable to work with. If you put too much powdered sugar, it will crack when forming the egg shape.
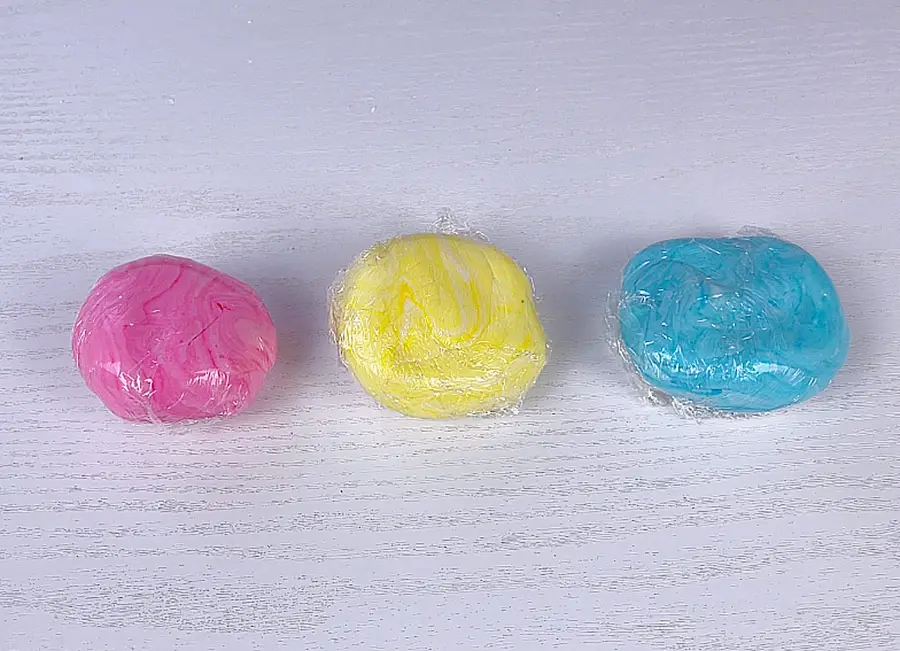
Step 3
I decided to make three different colors, so I’ll divide the dough into three pieces. Next, add one drop of desired food color and khead that piece of marshmallow dough until it’s evenly dyed in this color. If you like a marble effect, don’t mix it all the way through. If you feel like the dough is becoming too sticky, just add a little bit more powdered sugar. When you are satisfied with the color, cover the marshmallow dough with plastic wrap and start mixing the next one.
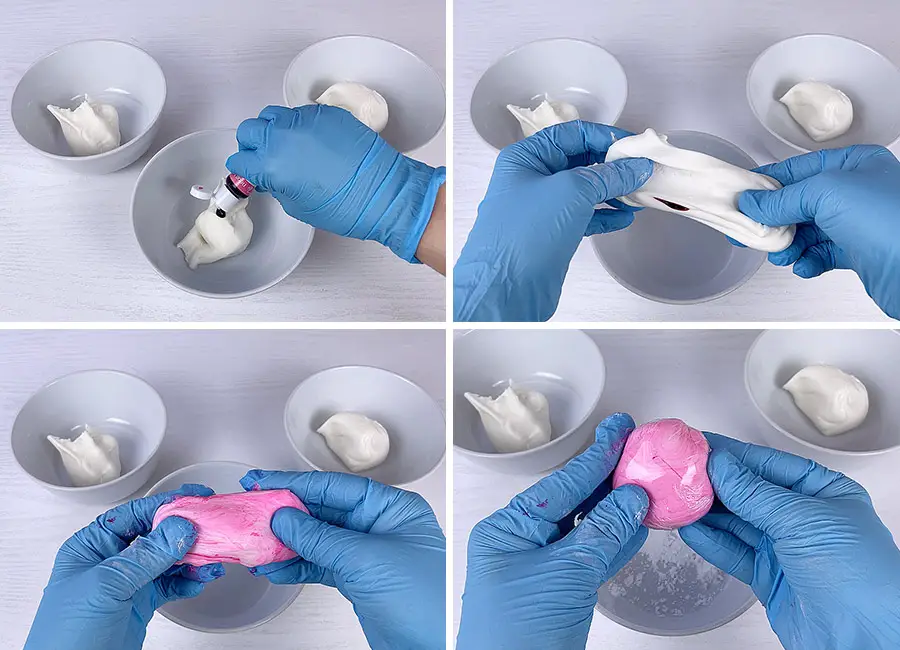
*I highly recommend working with gloves or you will have very colored hands.
*Another thing I want to highlight is work fast. It’s easier to mix in the color while the marshmallow dough is still warm.
Step 4
When all the coloring is done, start forming the eggs. Open one piece of marshmallow dough at a time, chip off a small piece and roll it between your palms to make an egg shape.
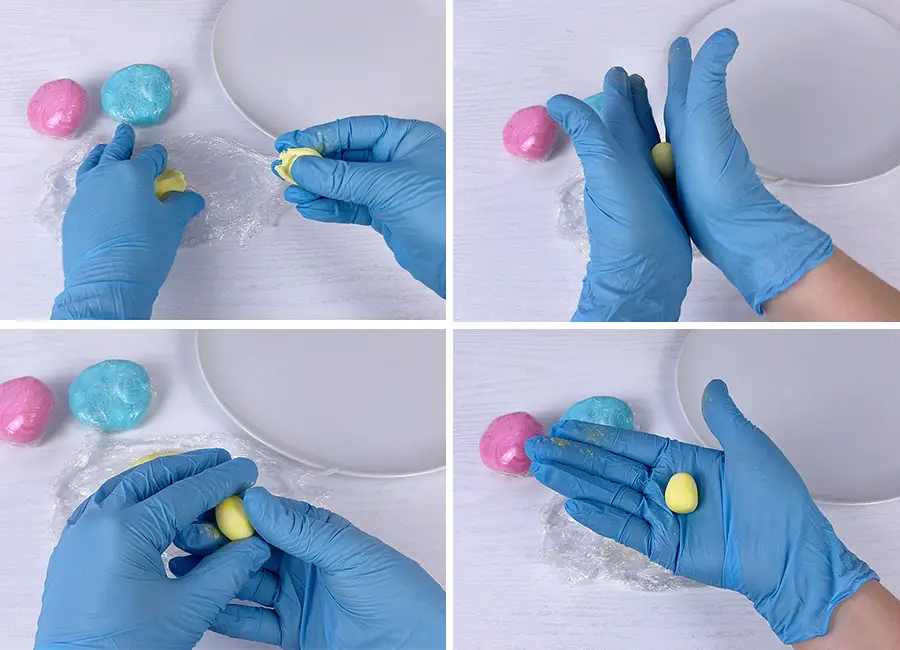
*Kids can also be involved in this process, as this is an excellent exercise for developing fine motor skills of the hands.
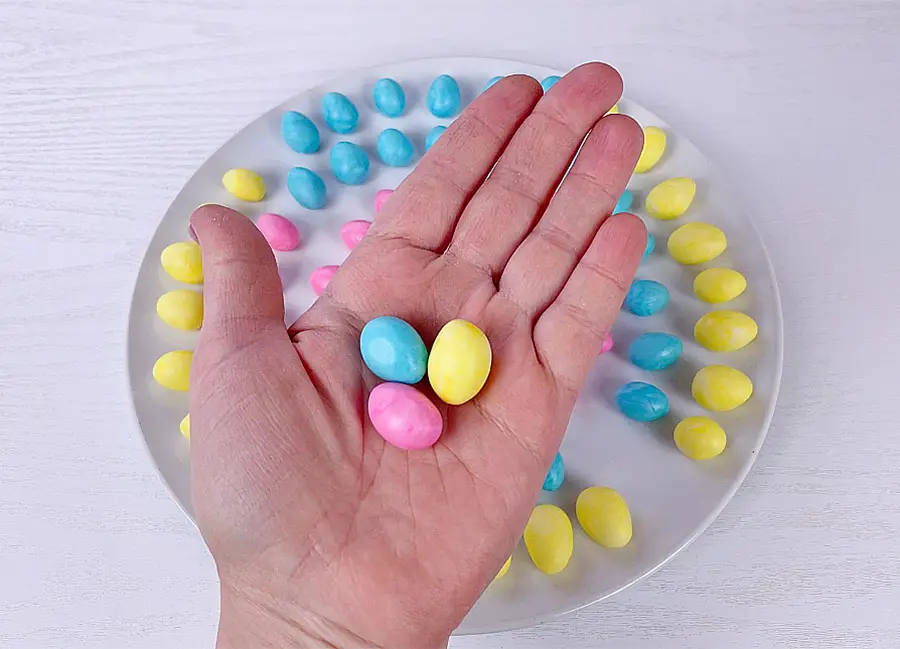
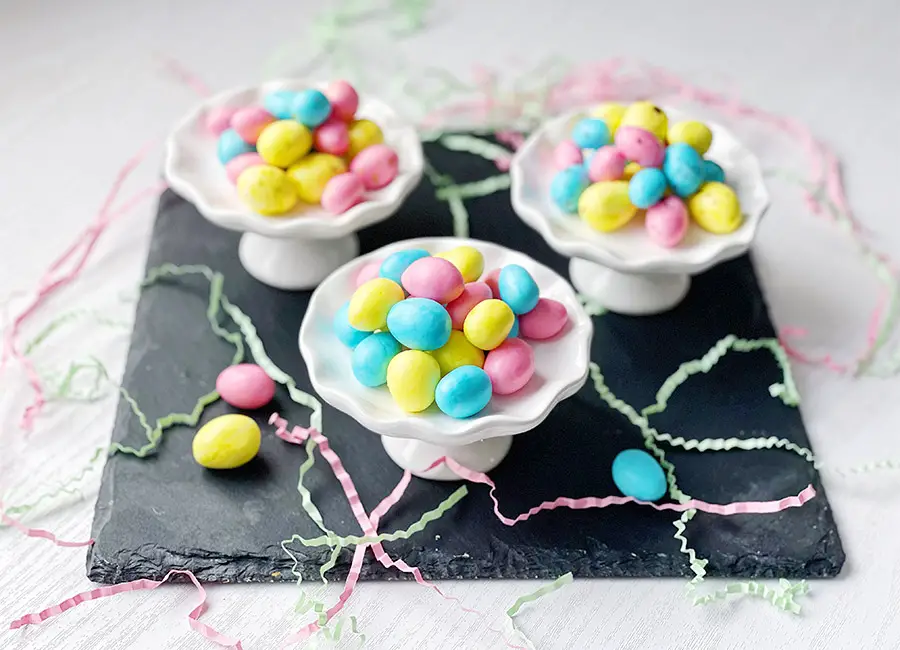
After a lot of hard work, this is what I’ve got. A plate full of beautiful sweet eggs. Place the plate in the refrigerator for one hour to make them a little bit harder.
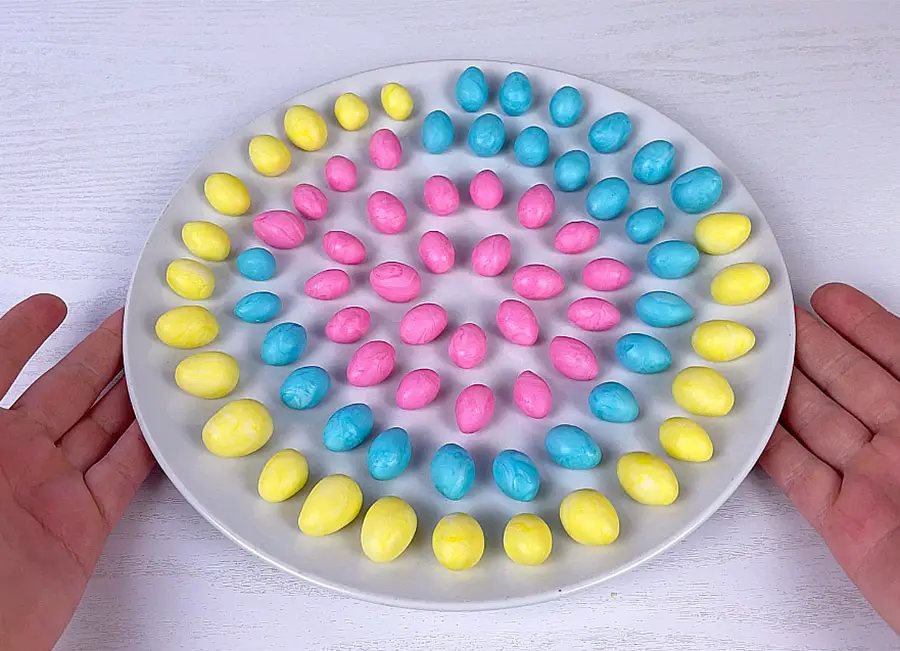
This is one hour later and as you can see, the eggs are holding their shape perfectly and already look festive. Even a few days later, they will be firm to the touch but soft enough to eat without breaking your teeth.
Step 5
I decided to go a little bit further and decorate a part of the eggs with gold splotches. I dissolved a little bit of gold luster powder in vodka and using a brush, I splattered the mixture. It’s better to use vodka instead of water because it evaporates very fast and saves time for the decorating process. After a couple of minutes, I turned the eggs and repeated the process.
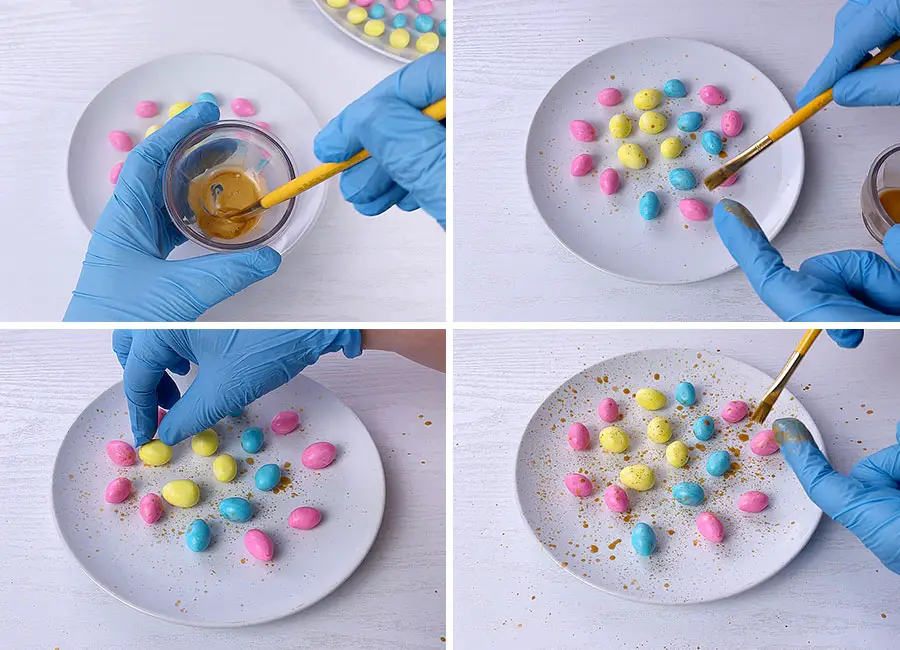
Step 6
If you don’t have a gold luster, don’t worry. You can use half a teaspoon of cocoa powder and a few drops of vodka. Make a thick paste and repeat the process of decorating the eggs with the splotches. In my opinion, the darker color looks even better on the eggs.

*Let me know in the comment area below what egg design is your favorite.
Let the eggs dry out overnight, then store them in a container or a box for up to a month.
Make sure to watch my YouTube video recipe for step-by-step instructions and see how I make these Marshmallow Candy Eggs! Want new recipe updates? Make sure to subscribe to my YouTube Channel!
Tips for Making Marshmallow Candy Eggs:
- If you’re only making one color eggs, add the food color before adding the powdered sugar.
- Use sifted powdered sugar to avoid any sugar lumps.
- When adding the powdered sugar, focus on the consistency of the marshmallow dough. It should look like a freshly opened playdough and be comfortable to work with.
- If you put too much powdered sugar, it will crack when forming the egg shape.
- Use gloves, when coloring the marshmallow dough.
- If desired, decorate the eggs with splotches of gold luster or cocoa powder and vodka mixture.
- Even a few days later, the eggs will be firm to the touch but soft enough to eat without breaking your teeth.
How to Store Marshmallow Candy Eggs:
Let the eggs dry out overnight, then store them in a container or a box for up to a month.
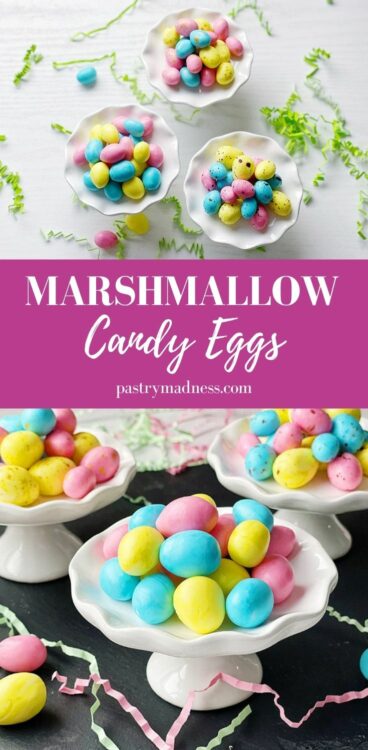
PIN IT FOR LATER
Marshmallow Candy Eggs (Mini Easter Eggs)
Ingredients
Method
- In a large mixing bowl combine the marshmallows and butter. Place the bowl in the microwave and heat it for one minute. The marshmallows will melt and increase in volume. Give it a stir to combine them with the butter. *If you’re making one color eggs, add some gel food color right now before adding the powdered sugar. I’ll do it a little bit later.
- Next, add a few tablespoons of powdered sugar and keep mixing the marshmallow mixture. I highly recommend using sifted powdered sugar to avoid any sugar lumps. Keep adding the powdered sugar and when it starts to be hard to mix with a spatula, start kneading the marshmallow dough with your hands. It’s hard to give you an exact amount of powdered sugar in this recipe because everyone uses a different brand, so focus on the consistency of the marshmallow dough. It should look like a freshly opened playdough and be comfortable to work with. If you put too much powdered sugar, it will crack when forming the egg shape.
- I decided to make three different colors, so I'll divide the dough into three pieces. Next, add one drop of desired food color and khead that piece of marshmallow dough until it’s evenly dyed in this color. If you like a marble effect, don’t mix it all the way through. And if you feel like the dough is becoming too sticky, just add a little bit more powdered sugar.When you are satisfied with the color, cover the marshmallow dough with plastic wrap and start mixing the next one.
- When all the coloring is done, start forming the eggs. Open one piece of marshmallow dough at a time, chip off a small piece and roll it between your palms to make an egg shape. Place the plate in the refrigerator for one hour to make them a little bit harder.
- I decided to go a little bit further and decorate a part of the eggs with gold splotches. I dissolved a little bit of gold luster powder in vodka and using a brush, I splattered the mixture. It’s better to use vodka instead of water because it evaporates very fast and saves time for the decorating process.After a couple of minutes, I turned the eggs and repeated the process.
- If you don’t have a gold luster, don’t worry. You can use half a teaspoon of cocoa powder and a few drops of vodka. Make a thick paste and repeat the process of decorating the eggs with the splotches.
Notes
- If you’re only making one color eggs, add the food color before adding the powdered sugar.
- Use sifted powdered sugar to avoid any sugar lumps.
- When adding the powdered sugar, focus on the consistency of the marshmallow dough. It should look like a freshly opened playdough and be comfortable to work with.
- If you put too much powdered sugar, it will crack when forming the egg shape.
- Use gloves, when coloring the marshmallow dough.
- If desired, decorate the eggs with splotches of gold luster or cocoa powder and vodka mixture.
- Even a few days later, the eggs will be firm to the touch but soft enough to eat without breaking your teeth.
- Let the eggs dry out overnight, then store them in a container or a box for up to a month.
You may also like:
Easter Carrot Cake

Easter Meringue Cookies

Easter Bread Wreath
Leave a Reply